Cutting vehicle patterns with HAUT software
From downloading the program to sending the job to the plotter.
Nothing matches
1.1What this program is
HAUT software lays out vehicle wrap and PPF patterns and cuts them on your plotter. It does three things and does not pretend to do more: it opens a pattern, it packs the parts onto the film you have loaded, and it sends the cut to the machine.
- Patterns come from the HAUT catalogue. You pick a vehicle and the kit opens. You can also import a drawing of your own.
- Nesting is automatic. The program packs the parts onto the roll width you tell it and reports how many inches of film the job takes.
- Cutting goes straight to the plotter through the print queue the operating system already makes for it.
- Quoting is built in. What the job costs the shop, and what it is sold for, on one screen and on one sheet of paper for the customer.
1.2Downloading and installing
There is one address, and it always gives the newest build:
Windows
- Open the Windows link. The browser saves a file whose name ends in
-setup.exe. - Run it. Windows may say the publisher is unknown — press More info, then Run anyway.
- The program installs and starts. There is nothing to choose during the install.
macOS
- Open the macOS link. The browser saves a
.dmgfile. - Open it, and drag HAUT software onto the Applications folder.
- Start it from Applications. The first launch takes a few seconds longer while macOS checks the signature.
Updates
The program checks for a newer build every four hours and at every start. When one is there it says so and installs it on the next restart. You never have to go back to the download page.
1.3Applying for a shop account
An account is granted, not taken. You cannot sign up: you send an application, a person at HAUT reads it, and the shop and its licence come into existence when it is approved. Nothing is created for an application that is turned down, which is why there is no password to choose yet.
- Start the program. On the sign-in screen press Apply for a shop account.
- Fill the form in. Every field is required except the ones an honest business may genuinely not have — a VAT number, a resale certificate, a suite in the address, a separate delivery address.
- Give one link for each of the three: your website, one social profile, and a map listing. If you have none of a kind, tick the box that says so — that is a real answer, not a blank.
- Answer the declaration about whether you work for a company that makes PPF pattern software or catalogues. Answering yes does not refuse the application; it opens a field where the connection is named, and a person decides.
- Send it. The screen gives you a reference. Keep it: it is how you check what happened without having an account.
Checking on it
On the sign-in screen, Check an application takes the reference and tells you where it stands: in review, approved, or not approved with the reviewer's own words. If it was not approved you can edit and apply again once whatever was wrong is sorted.
1.4The invitation code and your first sign-in
When the application is approved, HAUT sends an invitation code to the email address on it. That is the moment you choose a password.
- On the sign-in screen press I have an invitation code.
- Type the code, the email address the invitation was sent to, and a password of at least eight characters.
- Read the Terms of Service and the Privacy Policy and tick the box.
- Press Join the shop. You are signed in, the licence takes a seat on this computer, and the catalogue opens.
Seats
A licence carries two seats — two computers. The first two machines you sign in on take them. A third is refused by name rather than throwing somebody off, because the machine it would throw off might be cutting. To move a seat, sign out on the machine that no longer needs it, or ask HAUT.
If you forget the password
On the sign-in screen, Forgotten your password? sends a link to the address the licence was issued to. Open the link, choose a new password, then sign in here with the new one.
1.5Connecting the plotter
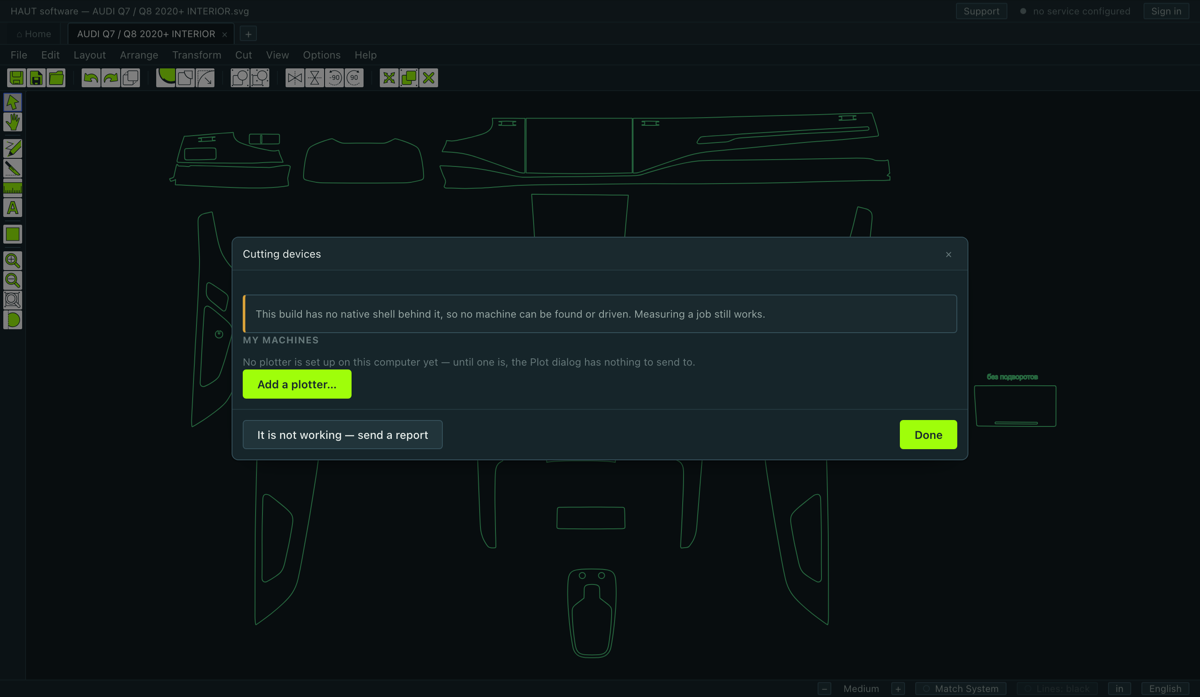
Do this now, before you ever open a pattern. It is set up once and never again, and it is the step that costs shops the most time when it is left until the film is already loaded.
The program talks to a plotter through the print queue the operating system makes for it, so the machine has to exist there before it can appear here.
Windows
- Plug the plotter in with the USB cable and switch it on.
- Open Settings → Bluetooth & devices → Printers & scanners (or the old Control Panel → Devices and Printers).
- If the plotter is already there, open it, choose Printer properties → Ports, and note the port — USB001, USB002 or similar. Then skip to the naming step.
- If it is not there, press Add device, then The printer that I want isn't listed.
- Choose Add a local printer or network printer with manual settings.
- For the port pick the USB00… entry the plotter is on. If the machine is on the network instead, choose Standard TCP/IP Port, type its address, and leave the type as RAW on port 9100.
- For the driver choose manufacturer Generic and printer Generic / Text Only. That is deliberate — this program sends the cutting file to the machine untouched, and a real printer driver would rewrite it into something a plotter cannot read.
- Name it HAUT, then your own make and model. Do not share it. Finish.
macOS
- Plug the plotter in with the USB cable and switch it on.
- Open System Settings → Printers & Scanners. A USB plotter usually appears by itself — if it is already in that list, it is done.
- If it is not there, press Add Printer, Scanner or Fax… and wait a few seconds on the Default tab for the machine to appear.
- If the plotter is on the network instead of the cable, use the IP tab: type its address, choose protocol HP Jetdirect – Socket, and leave the port at 9100.
- Whatever it offers under Use: is fine — this program sends the cutting file untouched and the driver never sees it. If it offers nothing, choose Select Software… and pick Generic PostScript Printer.
- Give it the name HAUT … and press Add.
Why the name matters
The program reads the queue's name back. A queue called HAUT … is taken as the plotter and offered on its own, because that name was typed by somebody who could see the cable — which beats any guess the program could make from a make or a port. A queue named anything else still works; it is just in the longer list behind the button that shows every port.
1.6The test square — what proves it cuts
Cut ▸ Cutting Devices… lists the machines this computer is set up for. Once one is chosen, press Cut a test square.
The machine cuts a small square. Then the program asks one question: did the blade move?
- Yes — the machine is marked as proved, with the date. That is what “connected” means here.
- Nothing moved — the answer names the three things to check, in the order to check them: the panel is not in HP-GL, it is the wrong queue, or the blade is not down.
Which driver is used
A queue whose name the program recognises is put on that machine's own driver, if that driver is one that is proved to cut. Otherwise it goes on the standard HP-GL driver, which cuts — and the line under the machine says so, and says that the machine's own width limit is not used and the blank is what bounds the work.
2.1The Home tab
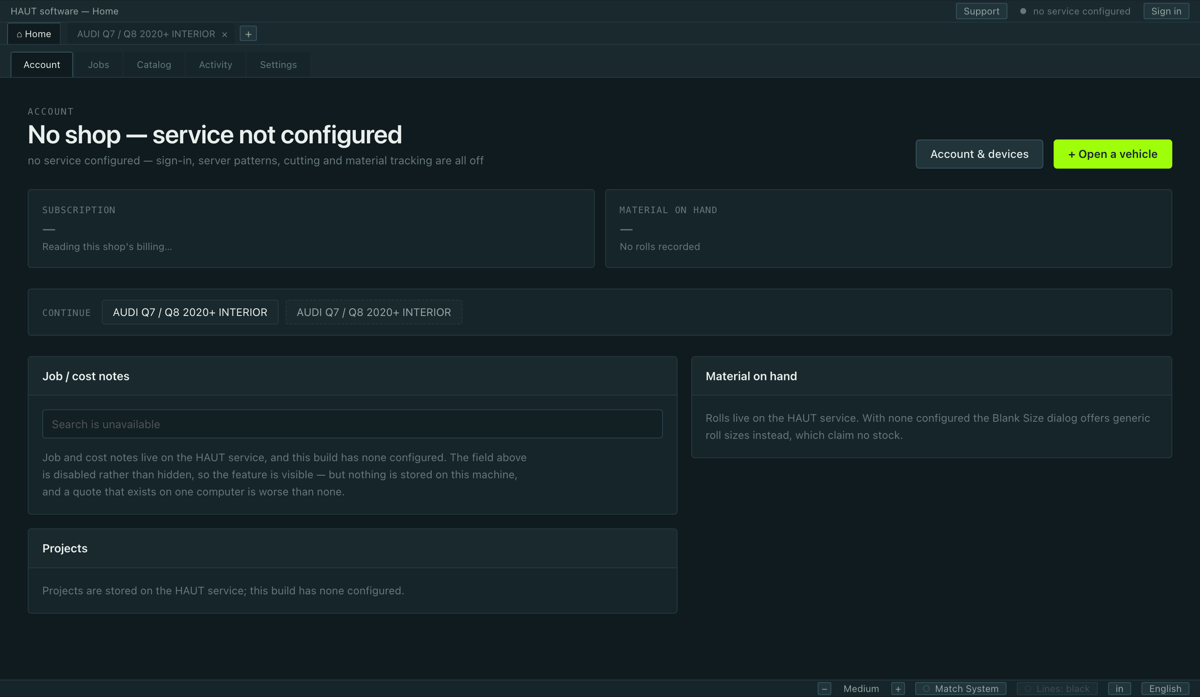
Home is the leftmost tab and it is always there. Everything that is about the shop rather than about a drawing lives on it, on faces you switch between:
- Catalogue
- The patterns your licence lets you see. This is where a job starts — see the next chapter.
- Jobs
- The quotes this shop has filed, searchable. A quote saved here is frozen: what the customer was told stands.
- Settings
- The shop's own figures — hourly rate, film prices, the material markup, masters, difficulty levels, tax, and the business name that goes on a printed proposal.
- Billing
- The subscription, and buying film and tools from HAUT where that applies to your shop.
2.2The shop's own figures, typed once
Home ▸ Settings holds what a quote reads live: change a rate there and every quote afterwards uses it, while a quote already filed keeps the figures it was costed at.
- What an hour is worth
- Two numbers: what you charge for an hour and what an hour costs you. The difference is the margin on labour.
- Material markup
- A multiplier over what the film cost you. ×2.5 sells a roll's worth of film at two and a half times what you paid. Nothing on a quote has a price until this is set — it is the one number the screen cannot work without, and it is typed once.
- Film on the shelf
- Each film you work with, and what you pay for it — not what you sell it for. The markup above does the selling.
- Difficulty levels
- A name and a multiplier. The level multiplies the work, not the total: the film costs the same whatever is being stuck to it.
- Masters
- Who does the work, and what their hour is worth if it differs from the shop's own. A master can be paid by the hour or by a percentage of the work — shops run both.
- Tax
- What the tax line is called on your proposals, and the rate. Leave the name empty and the market's own word is used.
- Card fee
- What the card costs you. Charged on the sum with the tax on it, and off unless a quote asks for it.
- The letterhead
- The business name that goes on a printed proposal. Without one, a proposal would carry no name at all.
2.3Licence, seats and devices
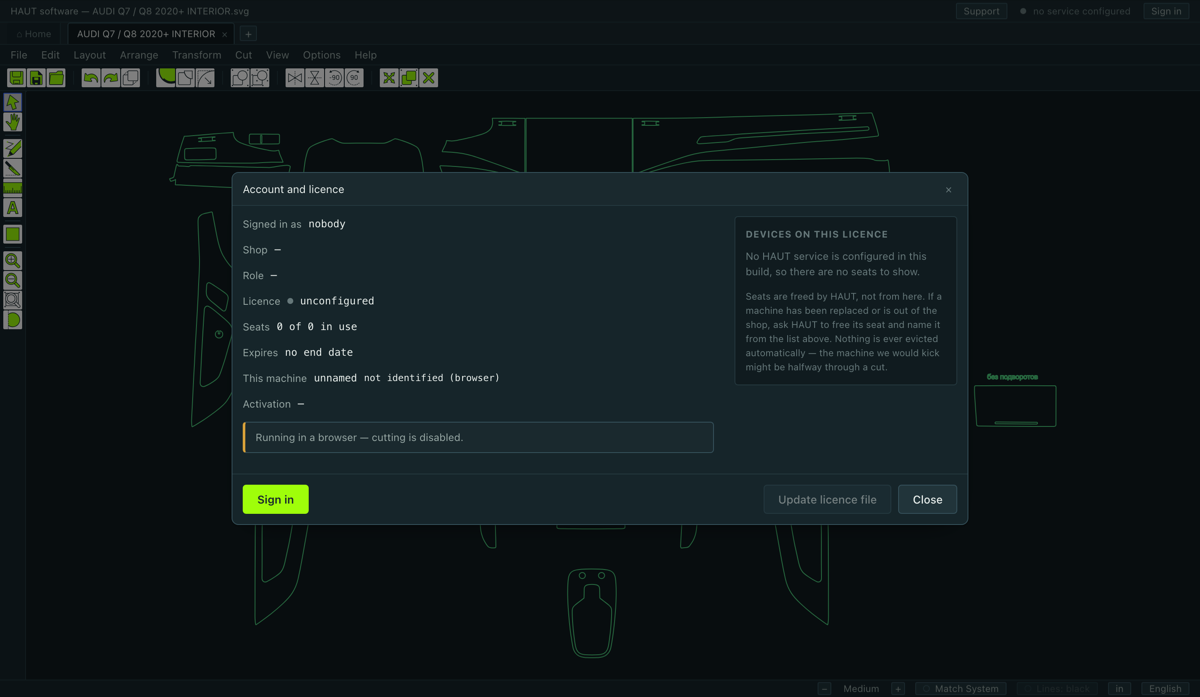
Help ▸ Account, Licence & Devices… shows what this computer is entitled to: the shop, the plan, when it runs to, which machines hold the two seats, and which of them is the one that cuts.
How the licence is checked
- At every start, at every sign-in, and once an hour while the program is open. It also asks when you come back to the window after being away.
- A licence that ends at lunchtime shuts at lunchtime, not the next morning. You do not have to restart anything.
- Offline, the last answer is good for seven days. A machine in a workshop with no network keeps cutting; one that has been offline longer than that has to see the service again.
When cutting stops
If the licence has lapsed or been suspended, the catalogue closes and the shop's own saved drawings close with it — not just the list, the rows. The editor and the bundled library still work. That is the licence doing its job, and the fix is a payment or a word with HAUT, not a setting.
3.1Opening a pattern from the catalogue
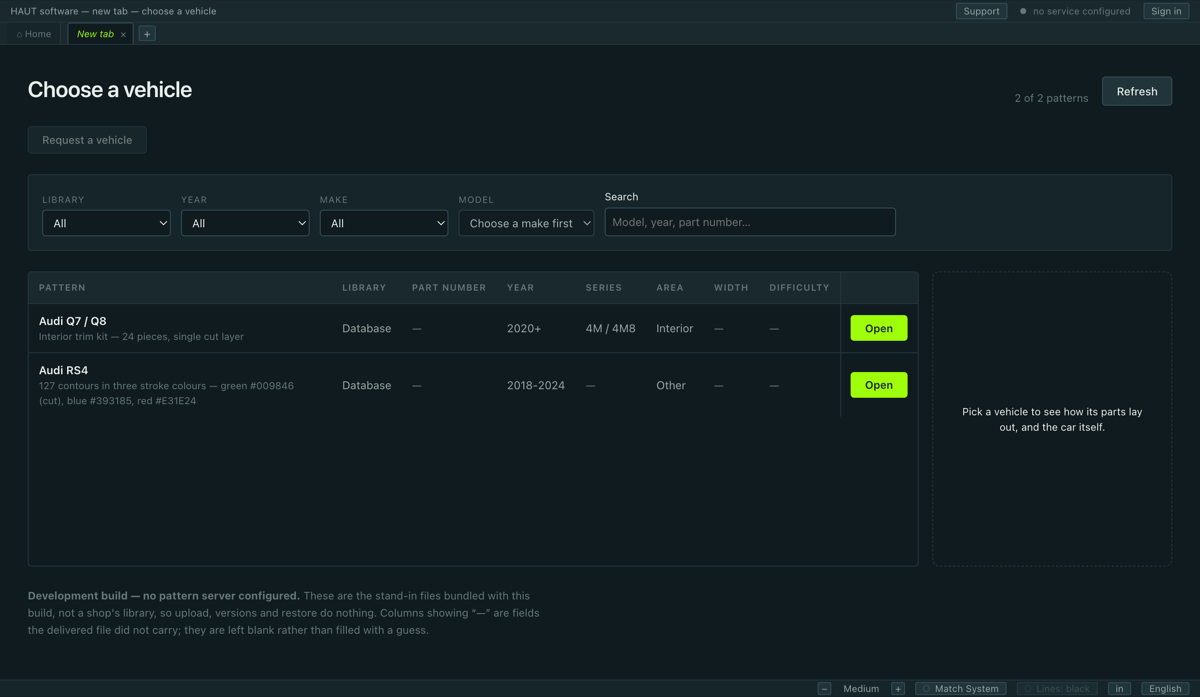
File ▸ Open from Library…, or Ctrl+O, or the + on the tab bar.
- Narrow it down with the filters across the top: library, year, make, model.
- Or type into the search box — a model name, part of one, a part number.
- Press Open on the row you want. The kit arrives in a new tab.
What the columns mean
- Library
- Which catalogue the pattern belongs to. Which libraries you can see is part of the licence.
- Part number
- HAUT's own number for that kit.
- Width
- The widest the kit needs across the roll. A kit wider than your film cannot be cut in one piece.
- Difficulty
- How hard the fit is. It is the designer's rating, not a price.
3.2When the pattern is not there
If the vehicle is not in the catalogue, ask for it. The request goes to HAUT's own drawing office and comes back as a pattern in the library — you do not have to draw it yourself and you do not have to find it elsewhere.
The request form is on the catalogue screen. Name the vehicle as precisely as you can: make, model, the years, the body, and the trim where it changes the panels. A request that says «BMW» takes a reply asking which one; a request that says «BMW M3 CS 2024, coupé» takes a pattern.
4.1What the window is made of
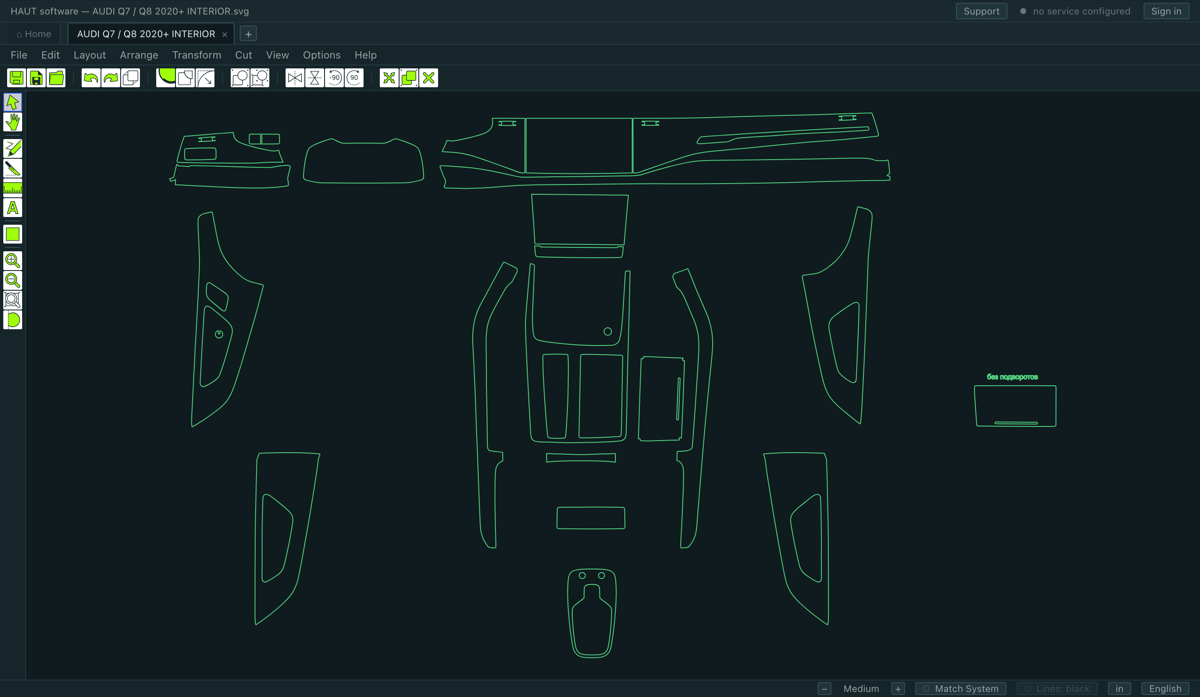
Top to bottom:
- Title bar
- The file that is open. When a modal tool is running its name appears here too —
HAUT software -[Edge Wrap] — …, which is how you can tell at a glance that a tool is still armed. - Tabs
- One per open file, plus Home on the left and + on the right. Several patterns can be open at once.
- Menu bar
- Eight menus, in the order the work happens: get the file, change it, put it on material, arrange it, work the geometry, send it — then the view and the settings.
- Toolbar
- Buttons for the actions you press most. Fully rearrangeable — see Customize Toolbar & Palette….
- Tool palette
- Down the left edge: the modal tools. The one that is armed carries a blue ring.
- Canvas
- The drawing. The material blank, when there is one, is drawn under it with its size on a label.
- Status line
- Along the bottom: the size of what is selected, the interface size, the theme, the line colour, the units and the language.
4.2Moving around the drawing
| Mouse wheel | Zoom, centred on the pointer. Nothing else is bound to the wheel. |
|---|---|
| Space + drag | Pan the canvas. |
| Middle button + drag | Pan the canvas. |
| F8 | Zoom to everything |
| F7 | Zoom to the selection |
| F9 | Zoom to the blank |
| F6 / Shift+F6 | One step out / one step in |
| + / − | One step in / one step out |
Grid, rulers and guides
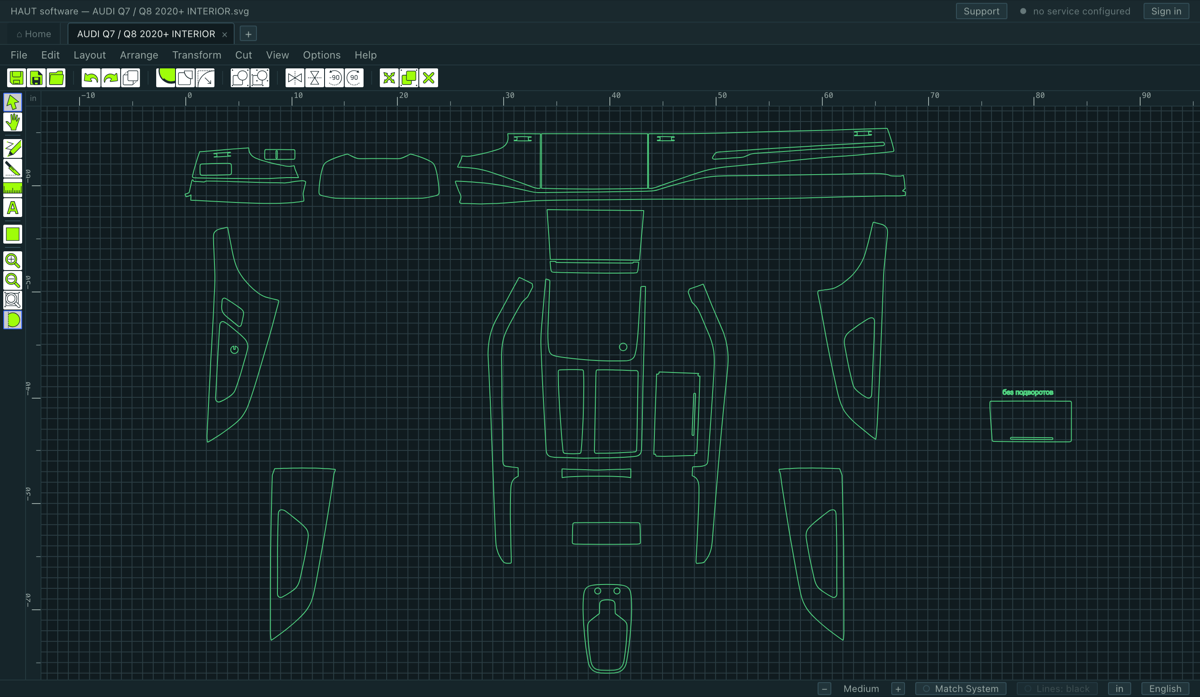
- Show Grid in the View menu draws the grid, and Grid Size beside it sets its step — 0.25, 0.5, 1, 2 or 5 in.
- Show Rulers puts a ruler along the top and left edges.
- A guide is a line you place yourself: V drops a vertical one, H a horizontal one, both at the pointer. Parts snap to them.
- To remove one guide, right-click it and take Delete Guide. Clear Guides removes them all.
4.3Theme, size, units and language
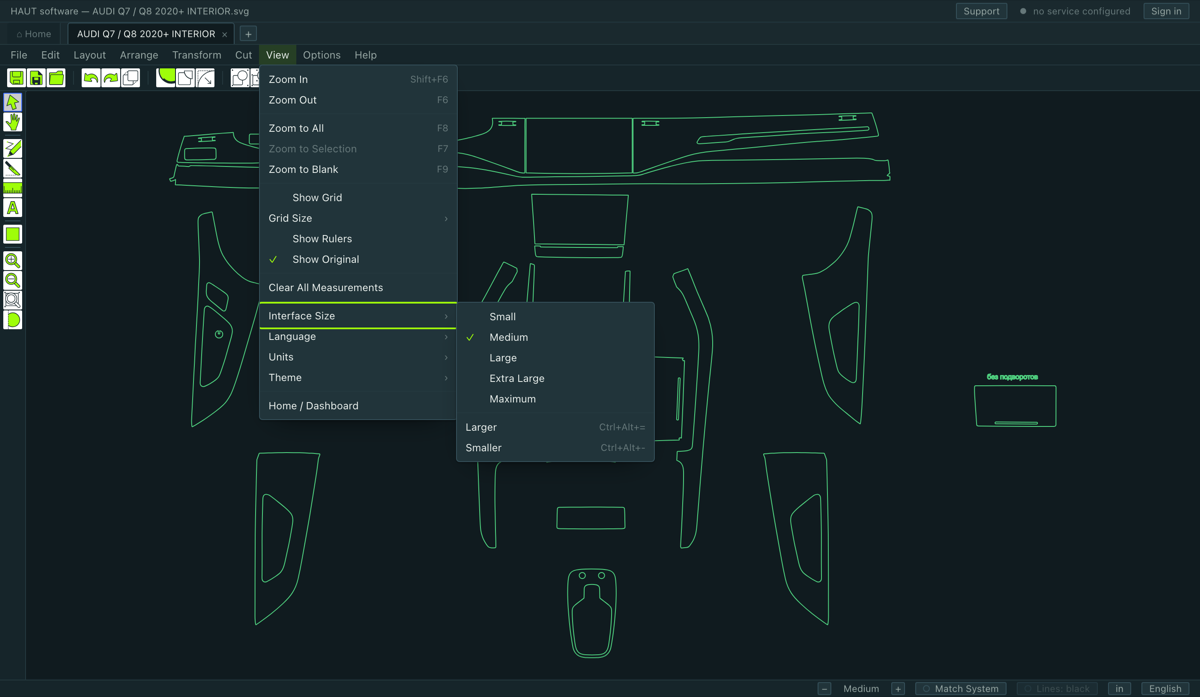
All four are in the View menu, and all four are also on the status line at the bottom of the window, where they are one press away.
- Interface Size
- Five steps from Small to Maximum. Everything scales together — menus, buttons, dialogs and the fields inside them. Ctrl+Alt+= and Ctrl+Alt+− step up and down.
- Language
- English, Русский, Español, Português. It changes at once and is remembered.
- Units
- Inches or millimetres. This changes every field and every readout in the program, including the ones inside tool strips.
- Theme
- Dark, Light, or Match System — which follows the computer's own setting and switches with it at dusk. Match System is what a fresh install uses.
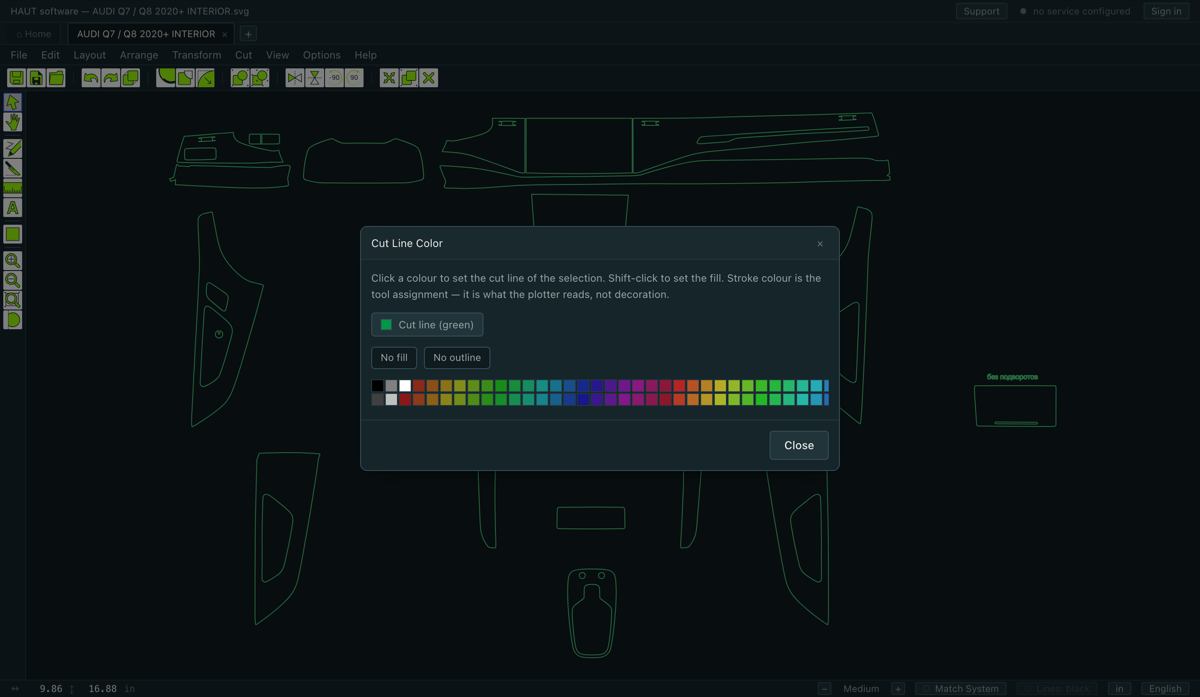
The colour of the lines
The status line carries a Lines: black switch. On, every contour is drawn black whatever colour it came in as. That matters because the colours in a pattern file mean nothing — they are the designer's own, and the program never cuts by colour.
4.4Rearranging the toolbar and the palette
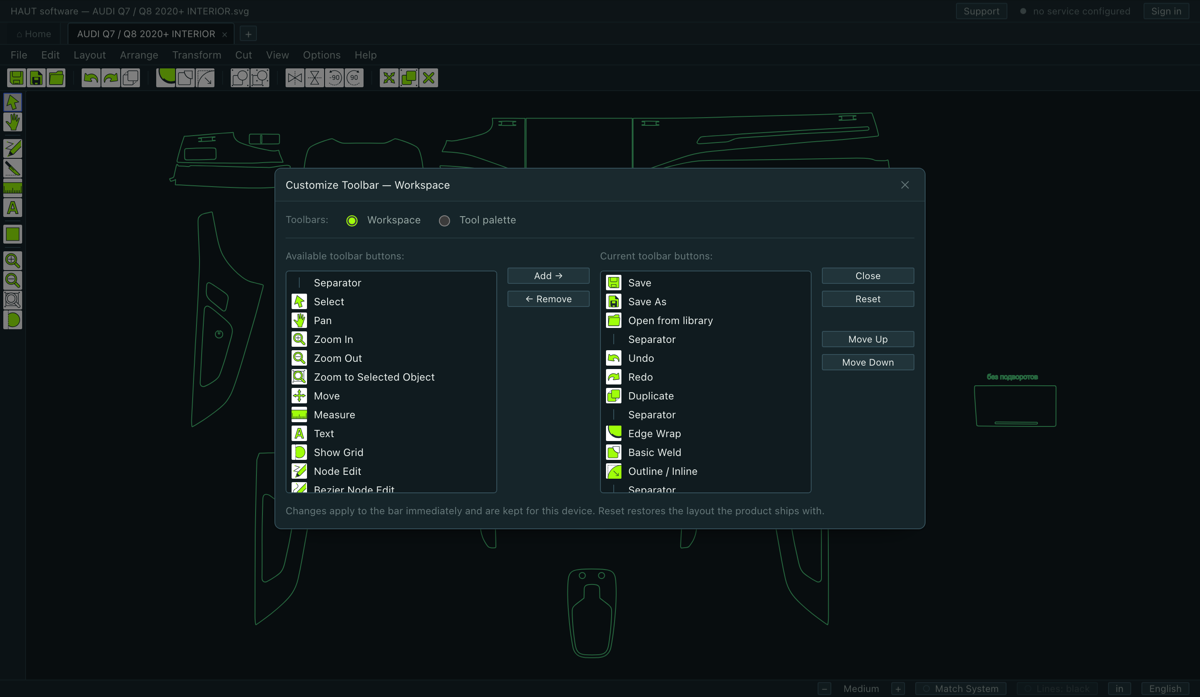
Options ▸ Customize Toolbar & Palette… holds two lists: everything the program can put on a bar, and what is on it now. Add, remove, move up, move down, and a separator to group things.
Whatever you build is remembered on this computer. A shop that never uses the text tool can take it off; a shop that mirrors every job can put the mirror pair at the left end.
Keyboard shortcuts
Options ▸ Keyboard Shortcuts… lists every command that can carry a key and lets you bind your own. The built-in keys in the next chapters cannot be taken away, but anything without one can be given one.
4.5Importing, saving, and what leaves the program
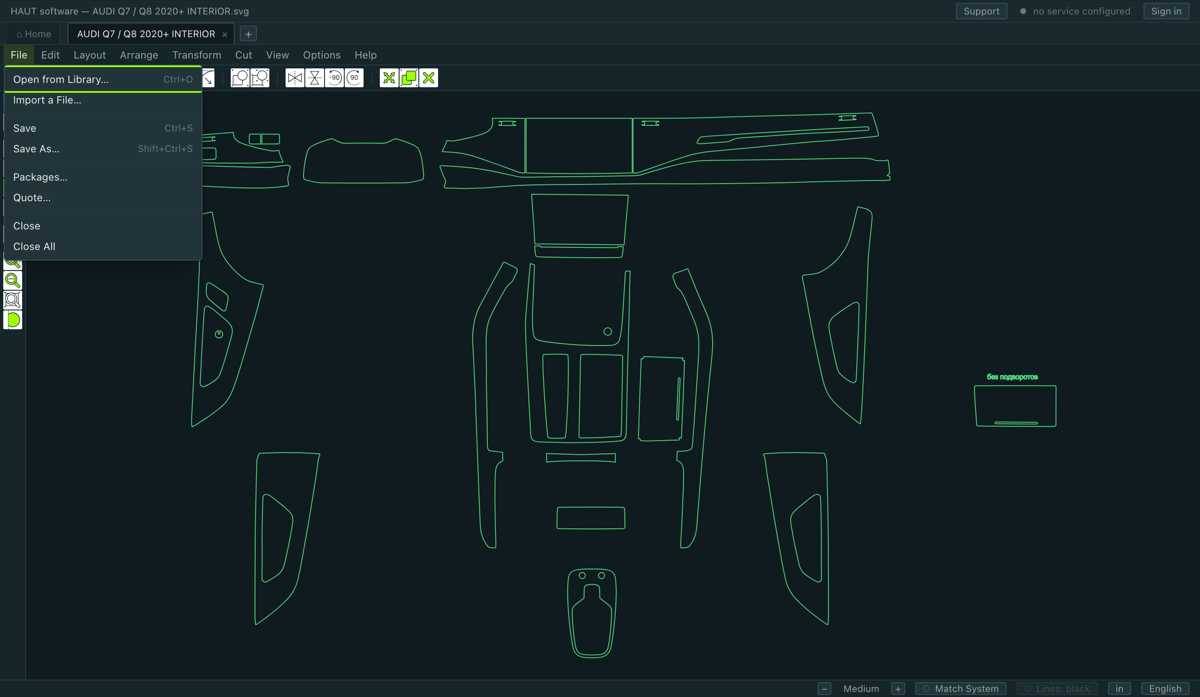
Importing
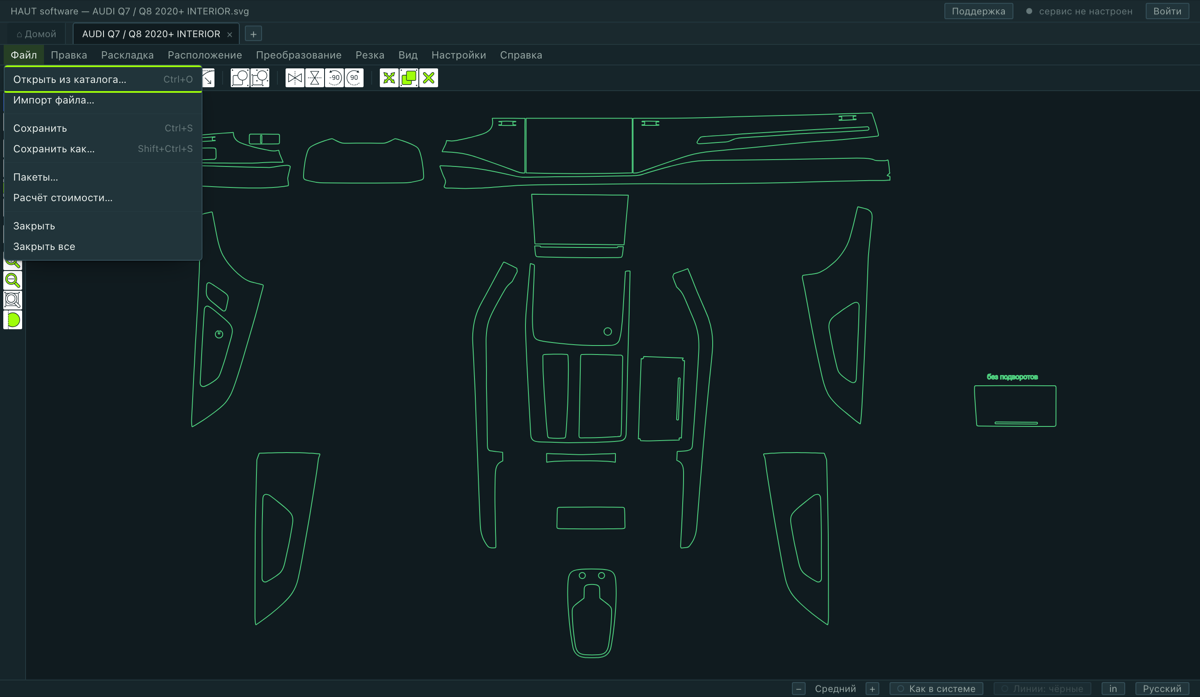
File ▸ Import a File… reads a drawing of your own: SVG, EPS, AI and PLT. It arrives in a new tab and behaves like any other pattern.
Saving
- Ctrl+S — Save, over the file you have open.
- Shift+Ctrl+S — Save As…, under a new name. A pattern that came out of the catalogue or out of an import has to be saved somewhere of its own the first time, so this is the save you need more often than the plain one.
- A tab with unsaved work carries a dot beside its name, and closing it asks.
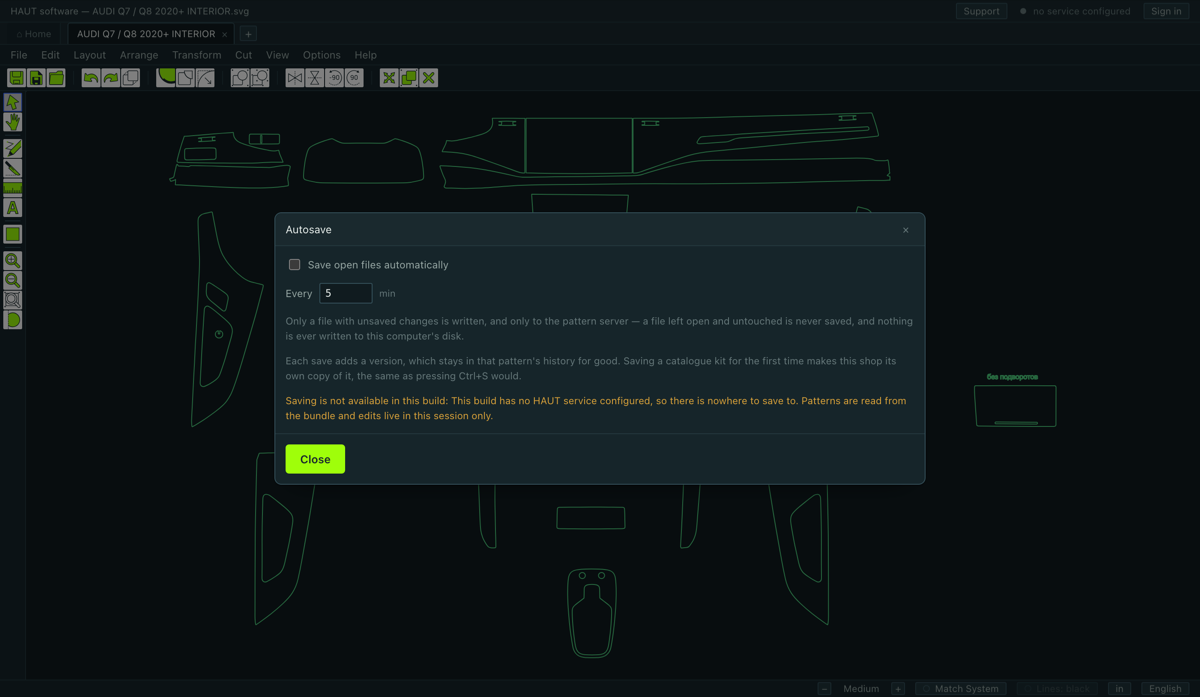
Autosave
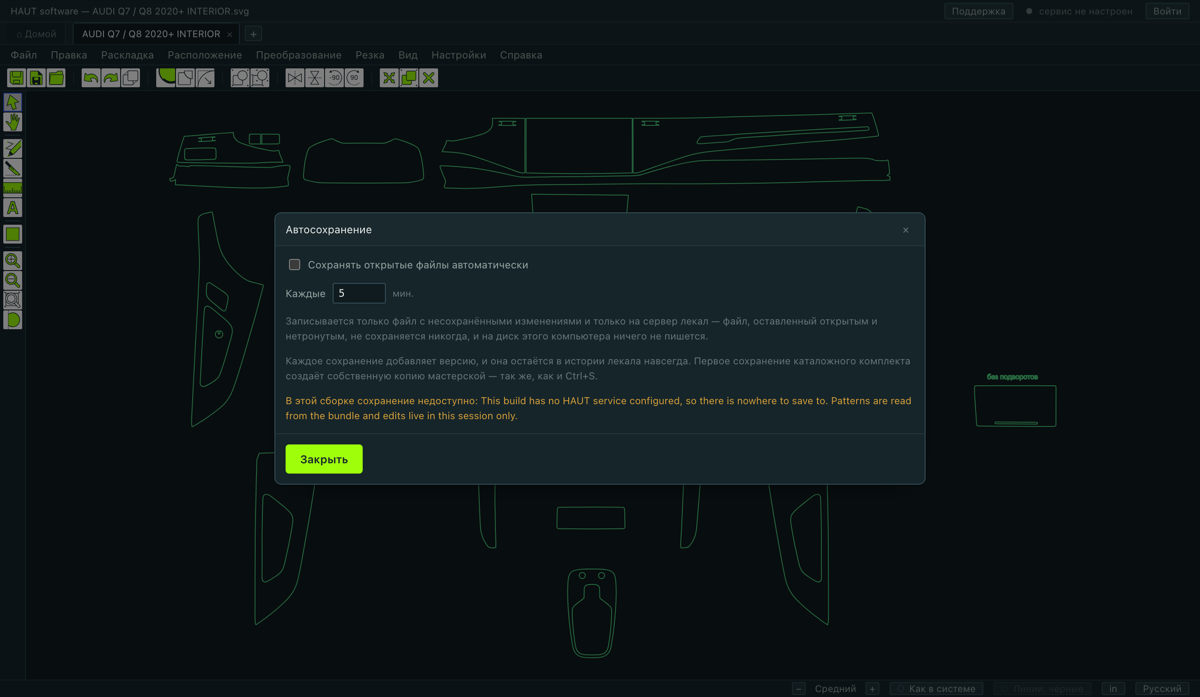
Options ▸ Autosave… saves every open file that has unsaved changes, every few minutes. It is off until you turn it on.
What cannot leave
There is no export — no vector file, no image, no PDF — and there is no copy of vector data onto the system clipboard. Ctrl+C and Ctrl+V move parts inside this program and put nothing where another program could read it.
What can leave is paper: Cut ▸ Print Layout… prints a numbered map of the parts on the blank, and the quote prints a proposal for the customer.
4.6Selecting and moving parts
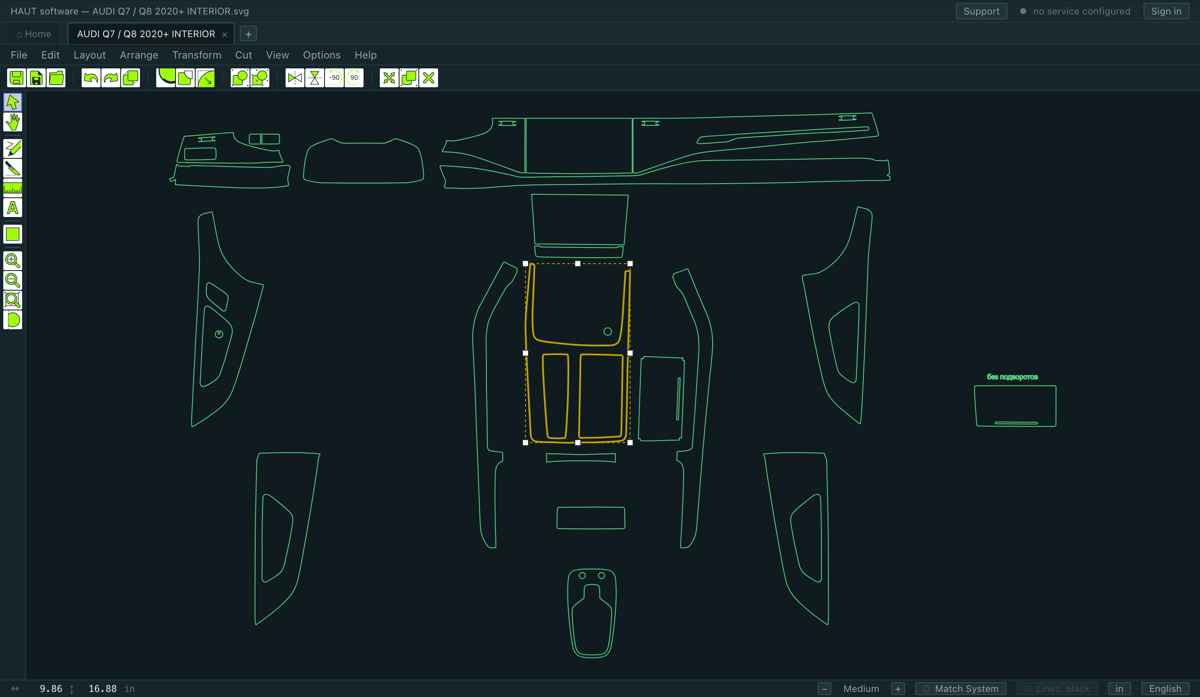
| Click | Select one part. It is outlined in a thicker line so you can see which. |
|---|---|
| Shift + click | Add a part to the selection, or take one back off. |
| Drag on bare film | A marquee — everything it touches is selected. |
| Ctrl+A | Select everything |
| Esc | Select nothing |
| Drag a selected part | Move it. Everything selected moves with it. |
| Arrow keys | Nudge. Shift makes the step bigger. |
| Ctrl+D | Duplicate |
| Delete | Delete — but see the note below |
Snapping
While you drag, a part snaps to the guides, to the edges of the blank, to the grid, and to the edges and centres of the other parts. The line it has caught is drawn dashed for as long as the drag lasts.
- Hold Alt to turn snapping off for that drag.
- Guides and the grid only catch while they are shown.
Delete over nested parts
A part's size cannot be changed
5.1Telling the program what film is loaded
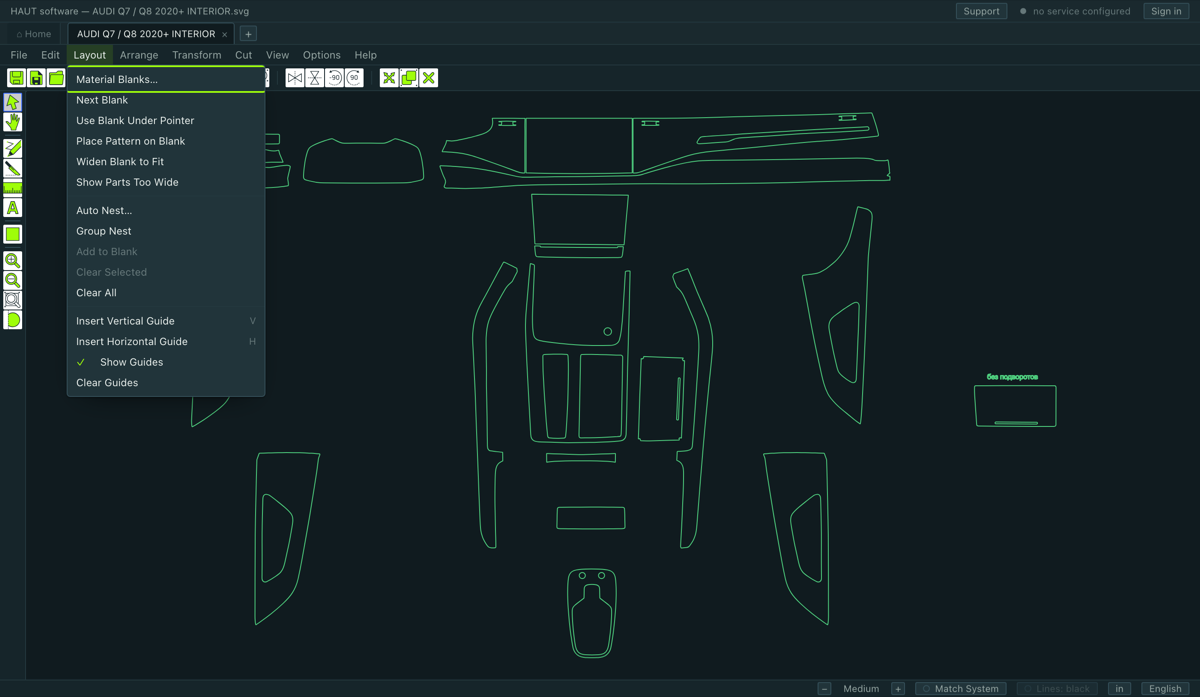
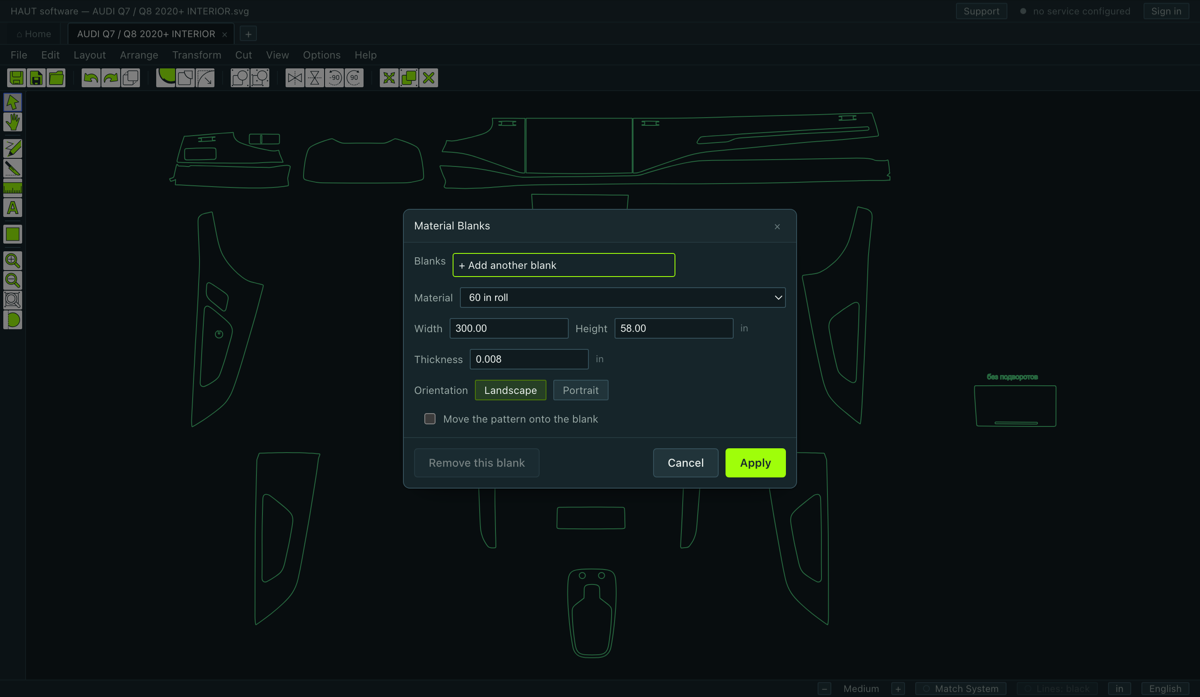
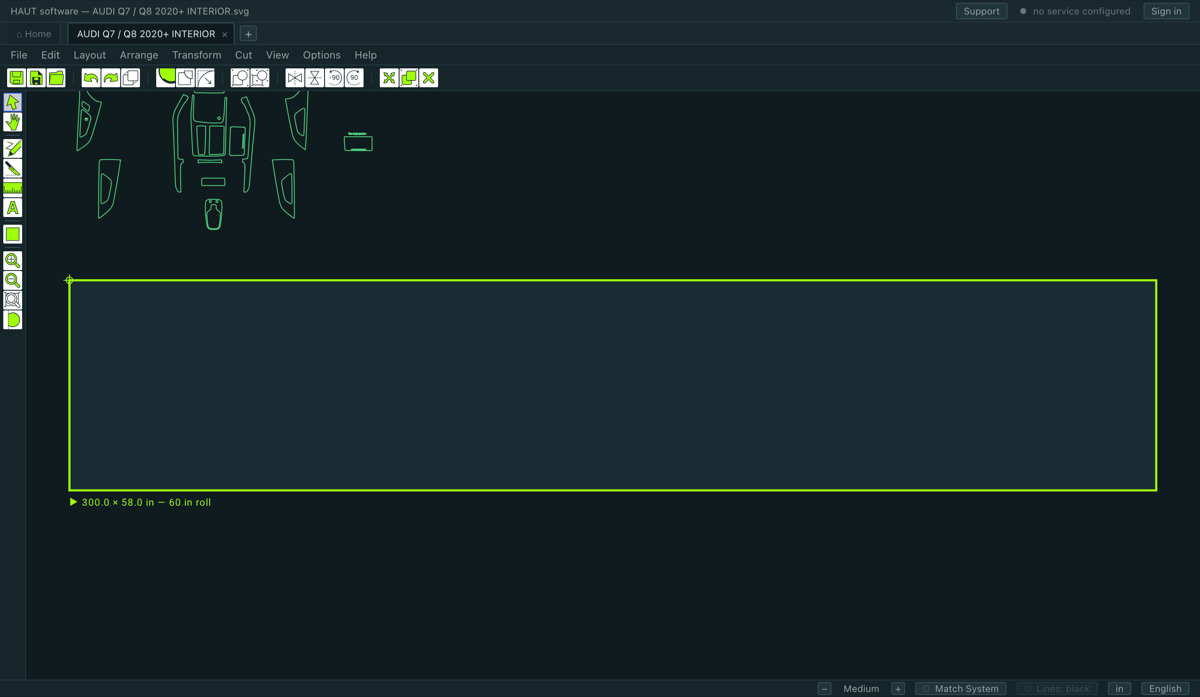
A blank is the film you have on the machine, drawn on the canvas as a rectangle under the parts. Everything about nesting and about what gets cut is decided against it, so it is the first thing to set once a pattern is open.
Layout ▸ Material Blanks….
- Pick the roll from Material — 60, 48, 36, 30, 24 or 12 in. The width across the roll fills itself in.
- Set the length if you want it different from the default.
- Press Apply. The sheet appears under the drawing with its size on a label.
5.2Several sheets, and two commands worth knowing
You can have more than one blank on the canvas — a 60 in roll and a 30 in roll, say. One of them is the active one, and every command acts on that one. To switch:
- double-click the sheet, or
- right-click it and take Use This Blank, or
- Layout ▸ Next Blank.
- Widen Blank to Fit
- Sets the blank as wide across the roll as the widest part needs — up to half an inch from the roll's own edge. A 60 in roll can genuinely be cut at 59.5 with a steady hand, and this is that edit made from where the problem is noticed.
- Show Parts Too Wide
- Selects and frames the parts that will not lie across the active blank, so you can see which ones they are before you find out at the machine.
6.1The tool palette
Down the left edge, top to bottom. Only one is armed at a time, and the armed one carries a blue ring.
- Select
- Pick, move and group parts. S arms it from anywhere. This is where you start and where you come back to.
- Pan
- Drag the canvas. You rarely need it — space and the middle button do the same thing without leaving the tool you are in.
- Node Edit
- Work the nodes of one part. Double-clicking a part arms it too.
- Slice
- Cut a part in two along a line you draw.
- Measure
- Draw a dimension between two points. It stays on the drawing until you remove it.
- Text
- Put a word on the drawing — a label on a part, a note for the fitter.
- Shape
- Square, circle, triangle, star, polygon. The button opens sideways into the five.
- Zoom In / Zoom Out / Zoom to Selected Object
- The view. The wheel does the first two faster.
- Show Grid
- The grid on and off.
6.2Edge Wrap — the PPF allowance
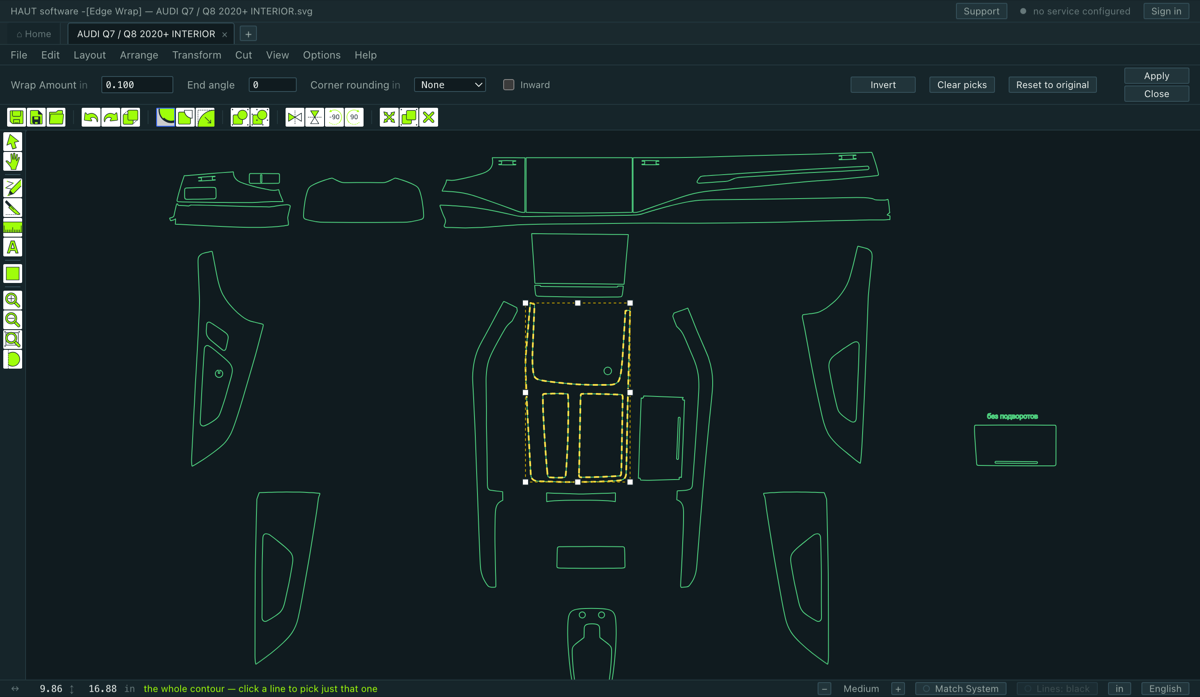
This is the tool the trade actually buys this program for. It grows the film past the edge of the panel so it can be tucked round it — and it does it on the stretches you pick, not on the whole part, because a bonnet is wrapped at its leading edge and cut flush at the shut lines.
Transform ▸ Edge Wrap…, or the button on the toolbar.
- Select the part.
- Click a line on it to pick that stretch. Shift-click adds another, or takes one back off. The readout in the status line says how much you have picked; with nothing picked, the allowance covers every contour of the part.
- Type the Wrap Amount — how far the film runs past the edge.
- Press Apply.
The fields
- Wrap Amount
- How far past the edge the film goes. This is the number the fitter's own habit decides.
- End angle
- Degrees. 0 stops the allowance square across the edge. A positive angle runs it out to nothing over its last stretch, so it does not leave a step where it ends.
- Corner rounding
- Rounds the corners the allowance makes — where it starts and stops on the contour, and the corners of the step it raises. None leaves them sharp, which is what the tool has always done. The choices are 0.05, 0.1, 0.2 and 0.3 in.
- Inward
- Takes the allowance into the part instead of outward. On a hole, inward opens the hole up.
The three buttons
- Invert
- Select everything on this contour except what you picked — and the long way round between two points.
- Clear picks
- Drop every picked stretch. Apply then covers every contour of the part again. This is the way out when you picked one stretch too many.
- Reset to original
- Take every allowance off and put the contours back the way the part was drawn.
6.3Outline / Inline — growing and shrinking a contour
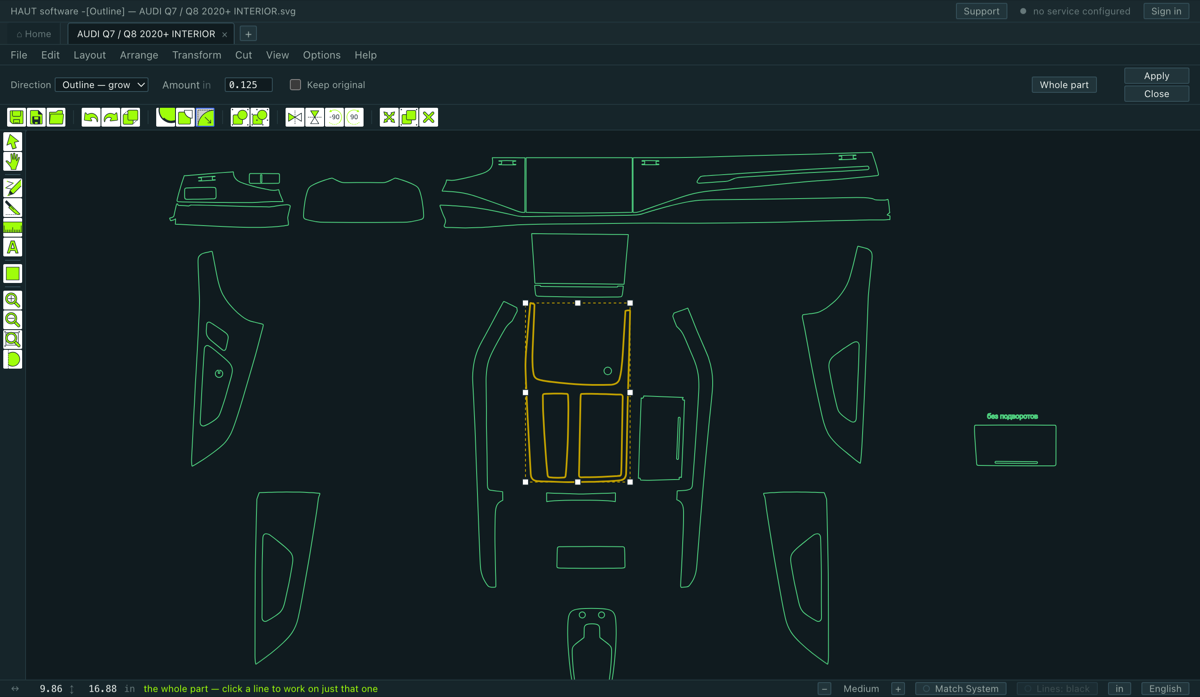
Transform ▸ Outline / Inline…. It moves a contour outward or inward by an exact amount, keeping the shape: corners stay corners, they do not get rounded off.
- Direction
- Outline — grow adds the amount all round; Inline — shrink takes the same amount off.
- Amount
- How far. The default is 0.125 in.
- Keep original
- Leave the contour that was there beside the new one. Off by default, and that is deliberate — both of them would be cut.
- Whole part
- Drop the picked lines, so Apply covers every contour of the part again.
Like Edge Wrap, it can work on picked lines: click a line to pick it, Shift-click to add or remove. A sensor hole picked and grown opens up while the rest of the panel stays as drawn.
6.4The knife — cutting a part in two
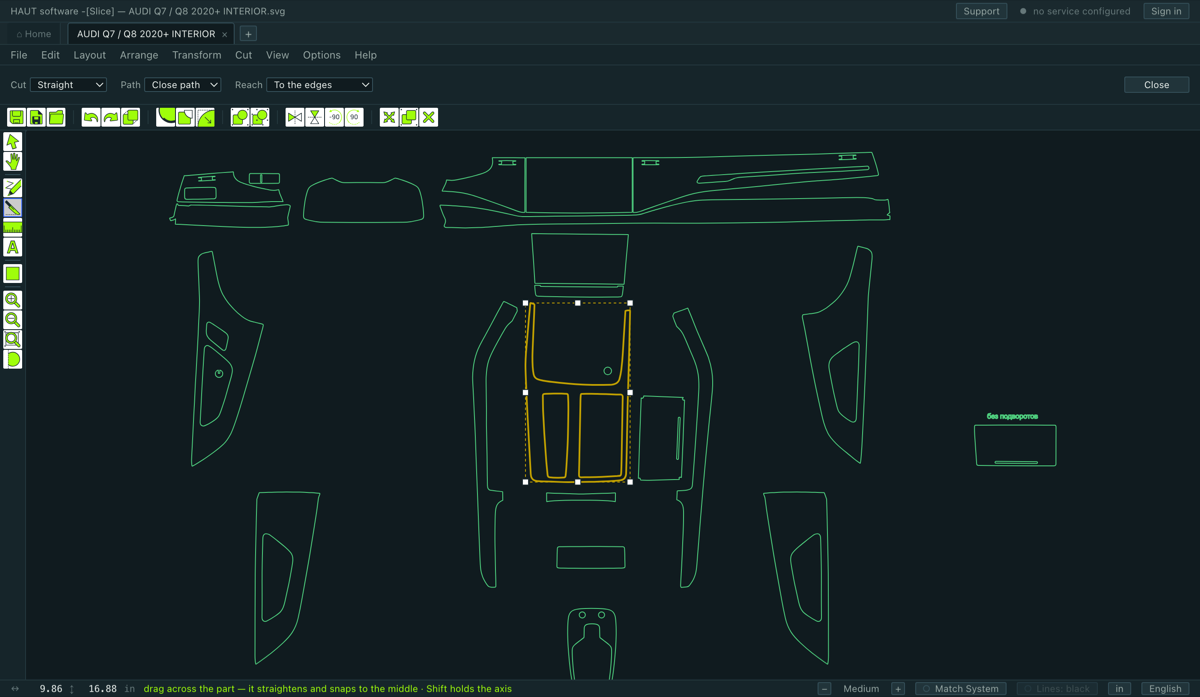
Arm Slice in the palette, select the parts to cut, and drag a line across. Its strip has three fields, and they are independent of each other.
- Cut — Straight or Arc
- The shape of the cut. Straight: drag across the parts. Arc: drag the chord, then move to bend the cut and click. Both straighten onto horizontal or vertical near those angles; Shift holds the axis whatever the angle.
- Path — Close path or Open path
- What the cut leaves. Close path breaks the part into whole closed pieces you can move away — this is the ordinary cut. Open path makes the same division in the same place but leaves the contours open along it.
- Reach — To the edges or Only where drawn
- How far the cut runs. To the edges: a short stroke divides the whole part at that place. Only where drawn: the cut is exactly the line you made and stops where your hand stopped.
What the knife refuses, and why
- A stroke that does not cross the part is refused by name. A line drawn inside a window opening touches no film, so there is nothing to cut.
- A cut is the stroke and nothing more. It never appears where you did not draw. A stroke over one island of a part leaves the other islands whole, holes and all.
- Only where drawn may leave one piece, and that is an outcome rather than a refusal. A nick across a narrow bridge leaves the part in one piece and the cut is still in the drawing — the film will part along it under the blade.
6.5Node Edit — working the line itself
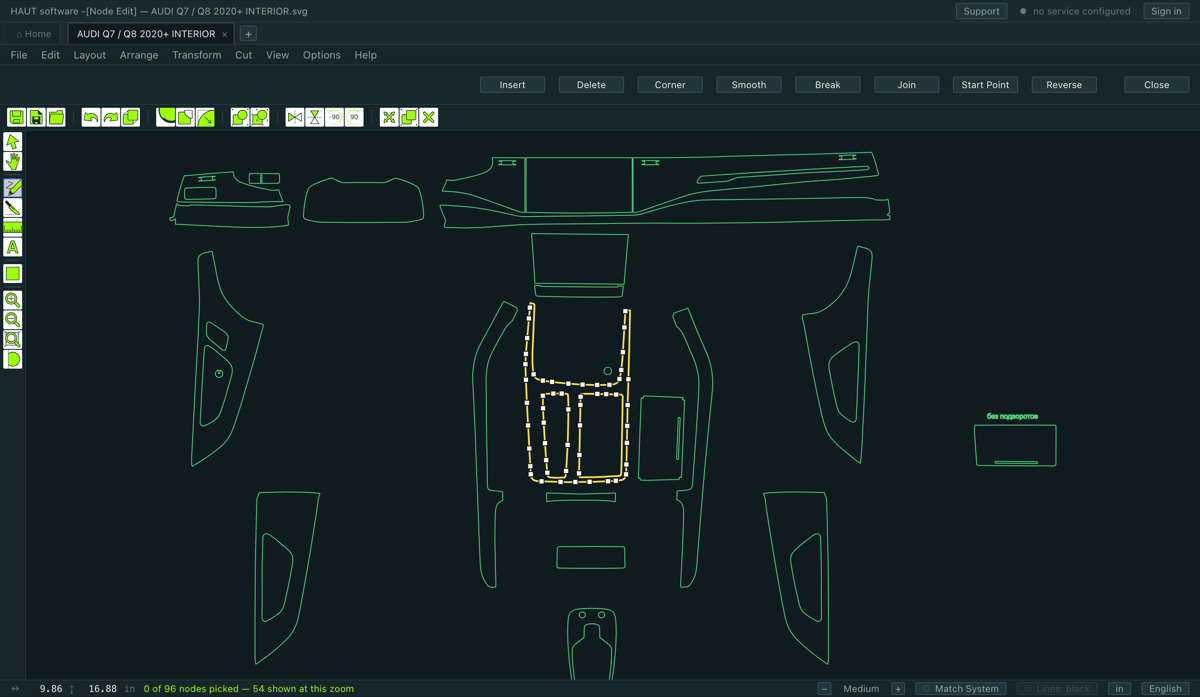
Double-click a part, or arm Node Edit in the palette. The part's nodes appear as small squares; a picked one is filled, an unpicked one is a ring. Drag a node to move it; drag its handles to bend the curve.
On the strip and on the right-click
- Insert
- Add a node — or double-click the line where you want it.
- Delete
- Remove the picked nodes. Delete does the same.
- Corner
- Make the picked nodes hard corners.
- Smooth
- Lay the picked nodes' handles along the curve, so the line runs through smoothly.
- Break
- Open the contour at the picked node.
- Join
- Join the two picked loose ends — or close the contour, if they are its own two ends.
- Start Point
- Begin the cut of this contour at the picked node.
- Reverse
- Cut this contour the other way round. It changes how the film releases, which is why it is here rather than filed under cosmetics.
On a dense part not every node is drawn
A delivered panel can carry four hundred nodes, and at the zoom where you can see the whole part the squares would touch each other and read as a solid band. So the program draws only the ones that have room, and the status line says how many of the total are shown. Nothing is hidden from the pointer — a node that is not drawn is still picked by clicking where it is, and appears the moment you do.
6.6Reduce Nodes
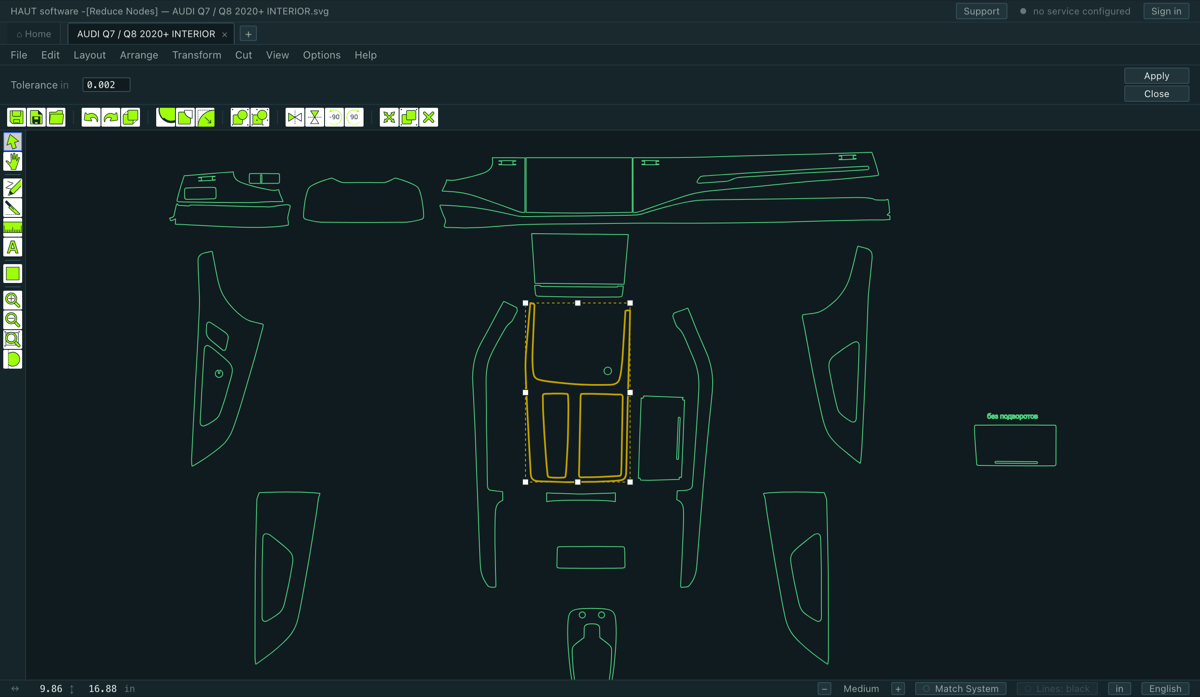
Arrange ▸ Reduce Nodes… takes out the nodes that can go without moving the cut line further than the tolerance you set. Nodes that carry real shape stay.
- Tolerance
- How far the cut line may move. A plotter step is 0.001 in (0.025 mm), so anything at or under that is invisible to the machine. The default is 0.002 in.
It is worth running after an offset or a boolean, which both return straight-segment lines with more points than the shape needs.
6.7Weed — the border that lets the waste come away
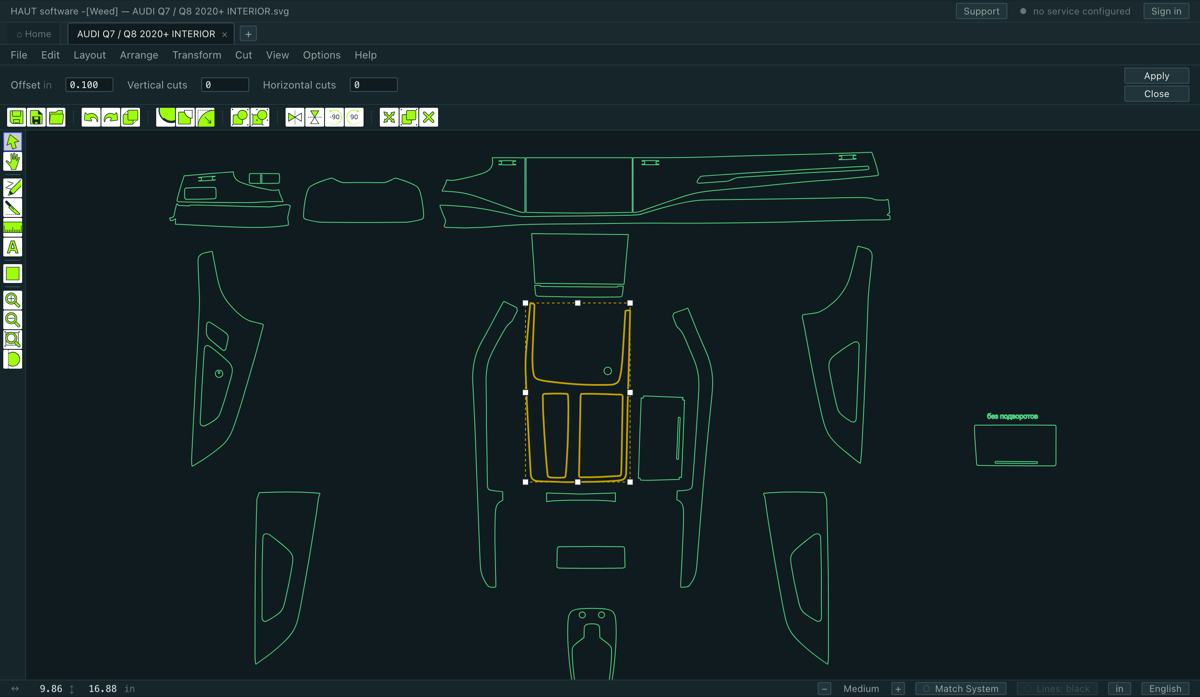
Transform ▸ Weed… draws a cut line around the selected parts so the waste film lifts away in one piece instead of being picked at.
- Offset
- How far outside the part the border runs. 0.10 in is the trade's usual.
- Vertical cuts / Horizontal cuts
- Extra cuts that divide the waste into strips, so a long job comes away in manageable pieces rather than one unwieldy sheet.
6.8Text, shapes and measurements
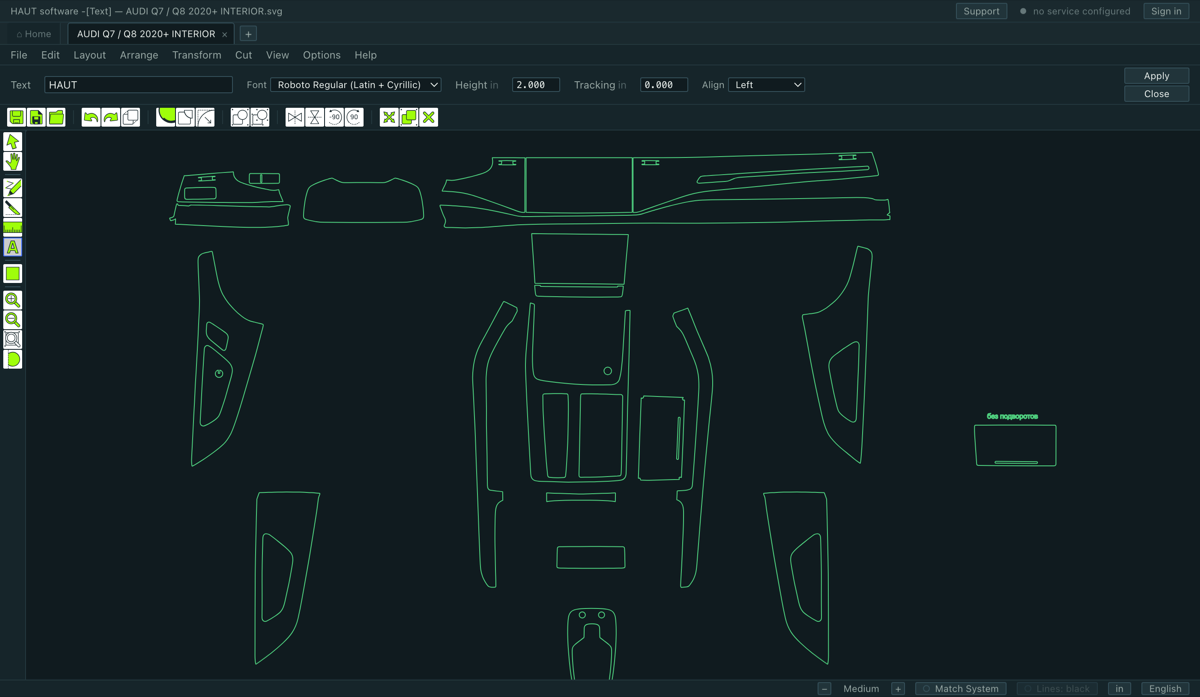
Text
Transform ▸ Text… or the A button in the palette. Type the words, pick a font, set the Height (that is the cap height), and place it. Tracking spaces the letters out; a negative value tightens them.
Transform ▸ Text to Graphics turns a piece of text into ordinary contours. Do that when you want to node-edit the letters, or before handing the drawing to somebody whose computer may not have the font.
Shapes
The shape button in the palette opens sideways into five: square, circle, triangle, star and polygon. Drag on the canvas to draw one. A shape you drew is the one thing in this program whose size you can set by hand — everything that came out of a pattern is protected.
Measure
Arm Measure and drag between two points. The dimension stays on the drawing; it is not cut and it is not part of the geometry. To remove one, right-click the part it was measured on and take Delete Measurement; View ▸ Clear All Measurements removes them all.
6.9Contours: combining, breaking, closing, curves
- Combine Paths
- Makes several contours one part with holes. This is how a panel with a sensor cutout is put together: the inner ring becomes a hole rather than a second part.
- Break Apart
- The reverse — every contour becomes a part of its own. Use it when a hole needs to be moved or deleted on its own.
- Close Open Contours
- An open contour is a cut that does not come back to its start. This closes them.
- Convert to Curves
- Turns straight-segment lines back into curves. It reduces the node count a lot, but it can move the line further than an offset does — up to a sixth of an inch on a contour that came out of an offset. Look at the result before you cut it.
- Group / Ungroup
- Ctrl+G and Shift+Ctrl+G. A group moves, turns and cuts as one.
- Lock Object / Unlock Object
- A locked part cannot be picked or moved by accident.
6.10Mirroring, rotating and aligning
All in Transform and Arrange, and the four most used are on the toolbar.
- Horizontal Mirror / Vertical Mirror
- Flips the selection. A left-hand panel becomes the right-hand one.
- Rotate 90° / Rotate −90°
- A quarter turn. For anything else, drag the rotate handle at the corner of the selection.
- Align
- Left, centre, right, top, middle, bottom — and equal spacing, horizontally or vertically.
- Cut in Half Horizontally / Cut in Half Vertically
- Divides the selection along a line through its own middle. A long part that will not fit across your roll is split in two presses rather than by drawing a line.
7.1Auto Nest
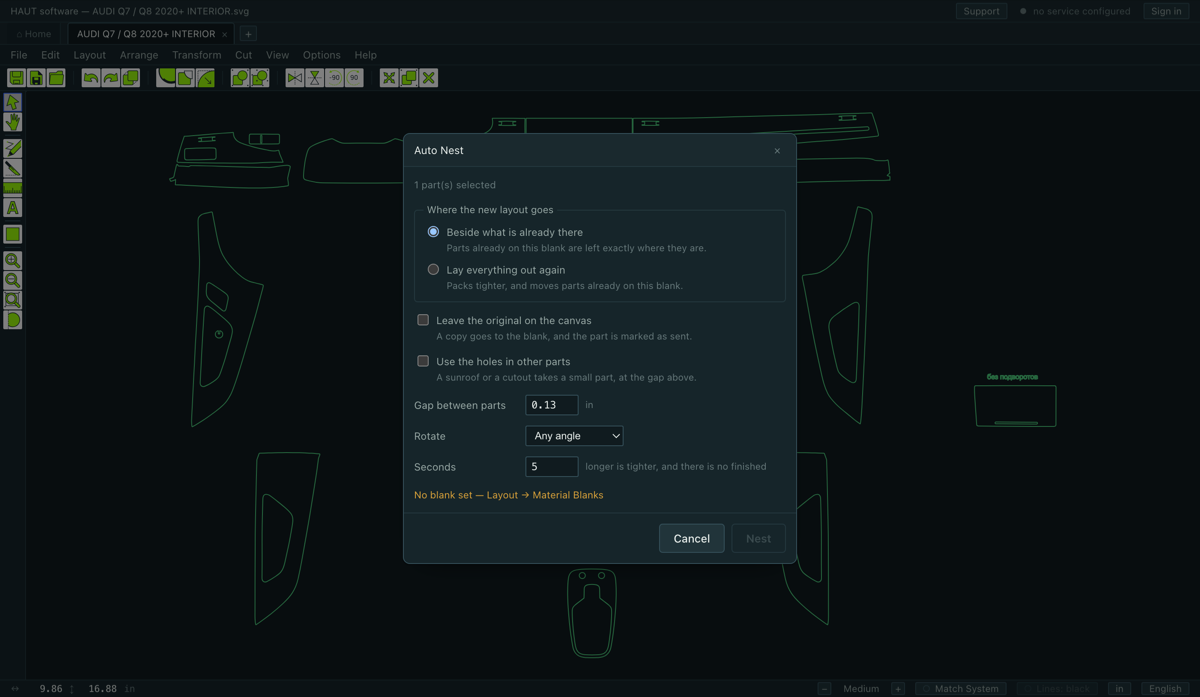
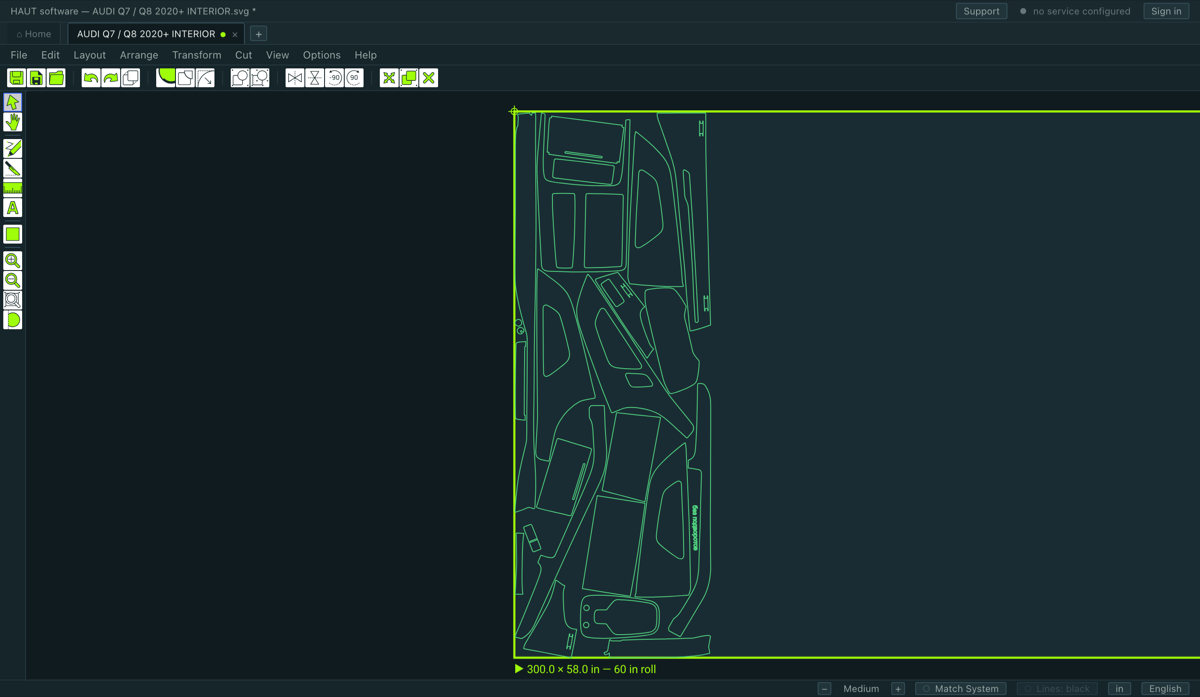
This is what saves the film. Select the parts, open Layout ▸ Auto Nest…, and the program packs them onto the active blank as tightly as it can in the seconds you give it.
The window
- Clearance
- The gap left between parts. Typed once and remembered — a shop nests with its own gap every time.
- Seconds
- How long the solver may think. Longer is tighter, with diminishing returns.
- Where to put it
- Beside what is already there leaves what is on the sheet exactly where it is and lays the new layout past it. Repack takes what is lying there together with what you picked and lays it all out again. Beside is the default because it is the one that cannot spoil work somebody arranged by hand.
- Leave the original on the canvas
- A copy goes onto the film and the original stays where it was, marked in a colour — so the fitter can see what has already gone into the blank and what has not.
- Use the holes in other parts
- Lays small parts inside the empty middles of bigger ones — a roof with a sunroof cutout, a door with a window. Off by default, because a sheet where one part sits inside another reads as an overlap to somebody who did not ask for it. It costs about twice the wait, because the sheet is solved twice.
What it tells you afterwards
The note names the inches of roll used and the density, and — when parts went into holes — how many did. A layout that suddenly came out a third shorter with a part apparently missing is work somebody would otherwise go and check by hand.
The two ways of putting one part on
- Add to Blank
- Finds the selected parts a place without moving what is already there. This is the one-at-a-time half: the fitter changed their mind and one more piece has to go in.
- Group Nest
- Makes everything on the active blank one object, so the layout drags, turns and cuts as one.
Taking parts back off
- Clear Selected
- Takes the selected parts off the film and puts them back where they came from. A copy is removed and the mark comes off its original; a part that travelled is turned back and set on its old centre. Delete over nested parts does this too, and re-packs what is left.
- Clear All
- Takes everything on the active blank off it.
7.2Checking the layout before you cut it
- Cut ▸ Check Overlaps
- Do any of the parts lie on top of each other? Two parts sharing film is two parts ruined, and this is the question to ask before the blade moves.
- Cut ▸ Object Total Area
- The true enclosed area of the selection, or of the whole drawing if nothing is selected.
- Layout ▸ Show Parts Too Wide
- Which parts will not lie across the active blank.
8.1Sending the job
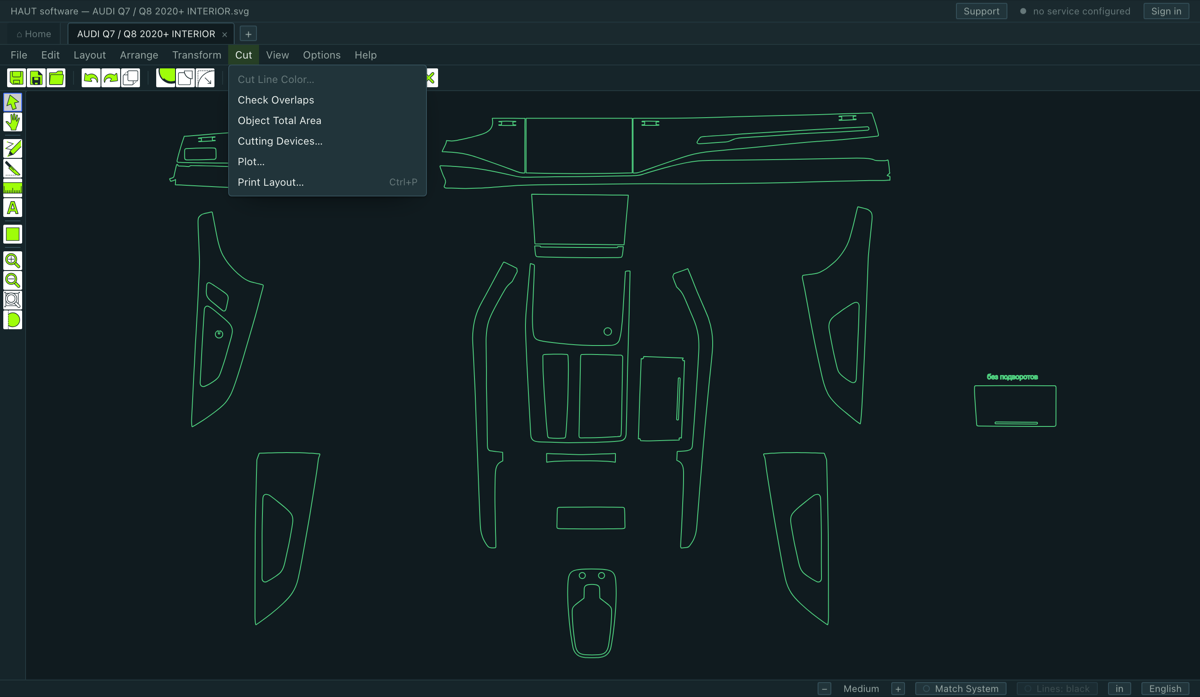
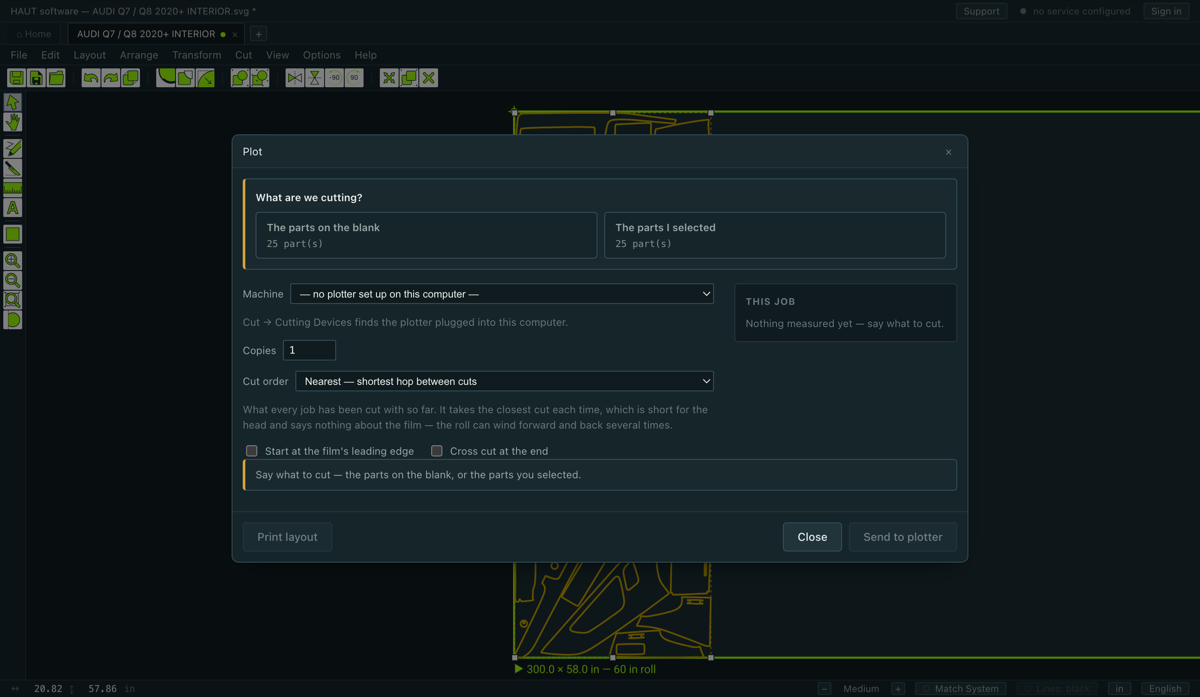
Cut ▸ Plot…. The window asks one thing first, in its own box at the top: what are we cutting? — the parts on the blank, or the parts you selected. Nothing else is live until that is answered.
- Machine
- Which plotter. If it says no plotter is set up, go to Cutting Devices… first.
- Copies
- How many times to cut the same job.
- Cut order
- The order the blade takes. Nearest — shortest hop between cuts takes the closest cut each time — short for the head, and what every job has been cut with so far. Serpentine works in bands along the roll, one band across the film and the next one back, which winds noticeably less film. Nearest is the default and no shop's order changes unless they ask.
- Start at the film's leading edge
- Shifts the job so the first cut is at zero, instead of the machine winding out to wherever the parts happen to sit on the canvas. Off by default: a part put further along the roll on purpose — to dodge a flaw in the film — must not be moved without being asked.
- Cross cut at the end
- Finish with the film presented under the cross-cut knife.
The two numbers to read before you press
- Along the roll — how much film the job itself takes.
- To the first cut — how much the machine will wind out before the blade touches anything. Over a foot, the program warns: on an offcut that is film that comes off the pinch rollers and cannot be got back.
The map
The window draws the parts in the order the blade will take them, with the travel between cuts dashed and the part number on it, and plays it back. That order comes from the same place the cut does, so the picture cannot disagree with the machine.
What the machine keeps for itself
Force, speed and blade offset are never sent. They are set on the plotter's own panel, where a fitter can see the film and feel the cut. At the end of the job the carriage returns to the origin.
8.2Printing the layout on paper
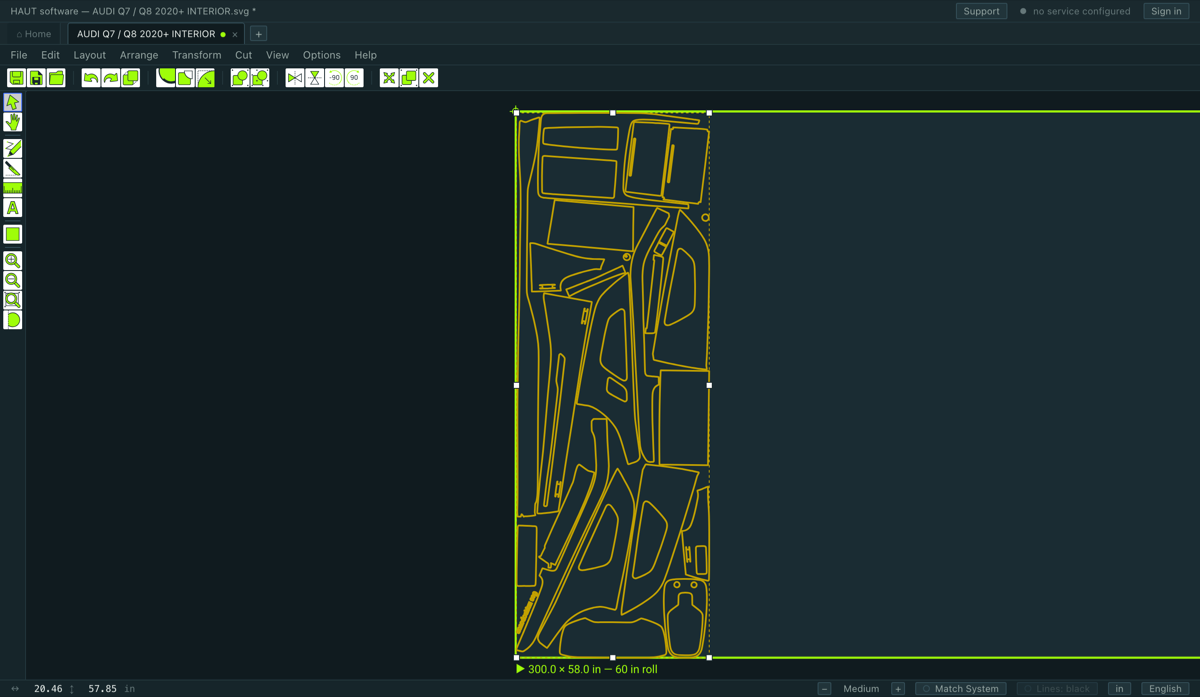
Cut ▸ Print Layout…, or Ctrl+P. It prints a numbered map of the parts on the blank, on A4, so a weeded piece can be told from its neighbour on the bench.
This and the customer's proposal from the quote are the only two things this program puts on paper. There is no print-and-cut and no RIP, and there never will be.
9.1Packages — grouping the parts the way you sell them
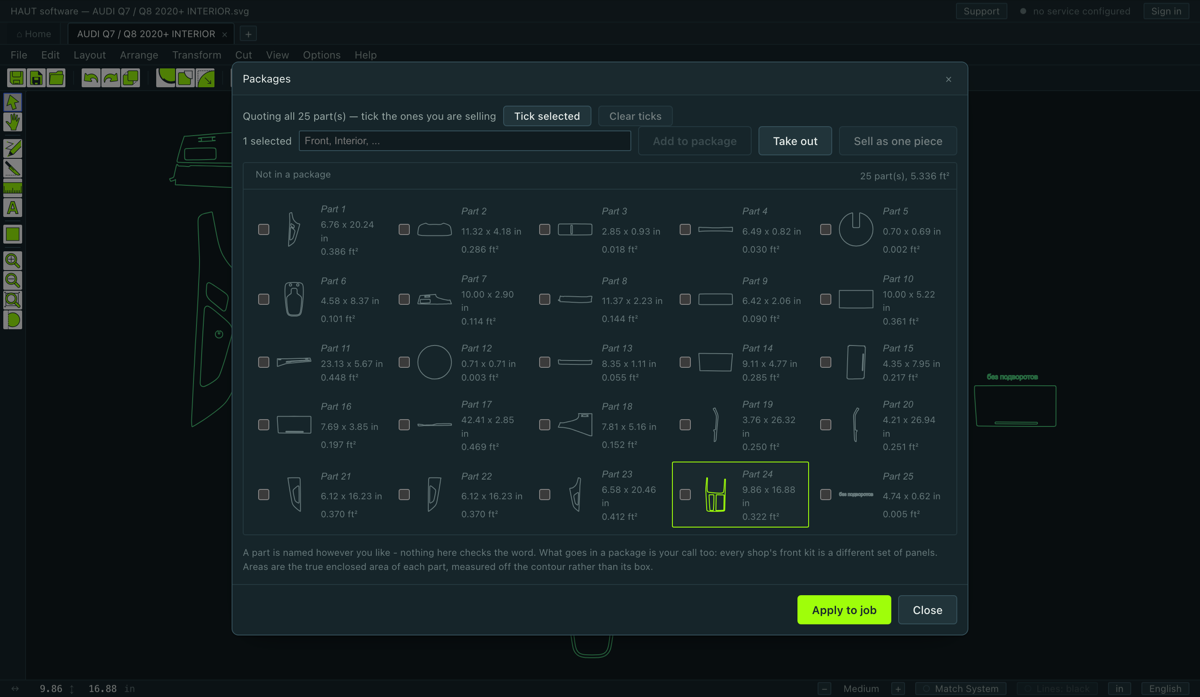
File ▸ Packages…. A customer does not buy twenty-five contours, they buy a front end and a door kit. A package is that: a named group of parts that the quote prices and the proposal prints as one line.
- Select the parts, open the window, and put them in a package.
- Name the package the way the customer will read it.
- A part can be named on its own too — what the customer reads on the proposal, rather than the drawing's own name.
- Anything not in a package is priced on its own.
9.2The quote
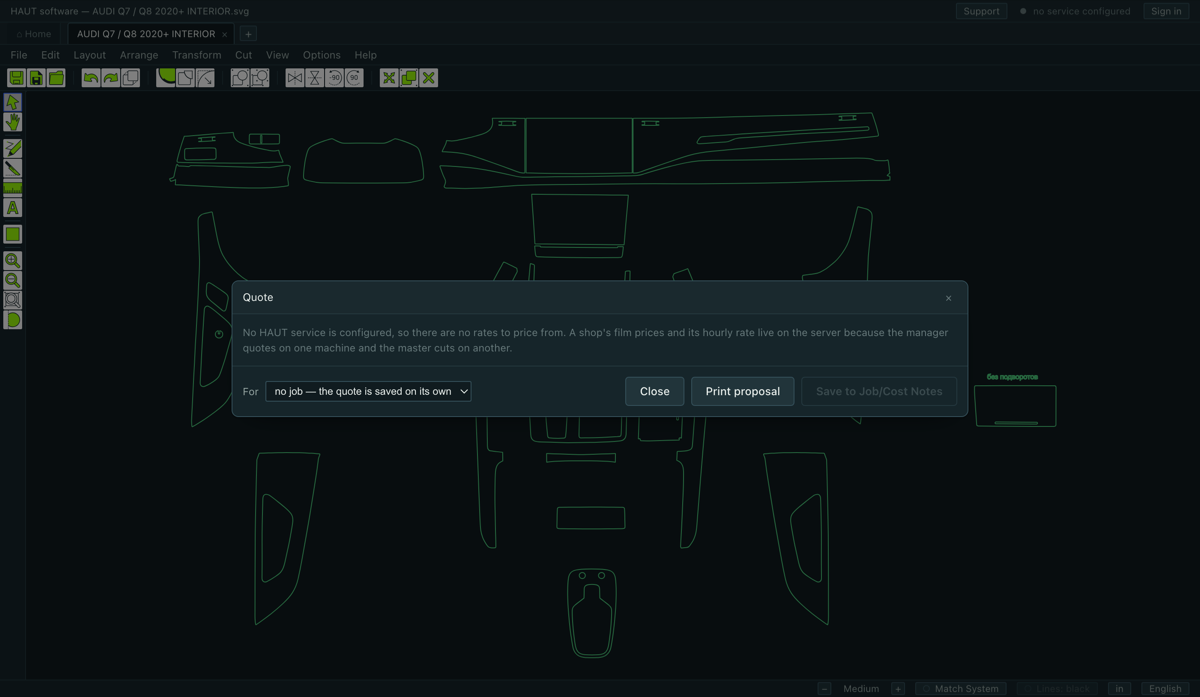
File ▸ Quote…. One screen: what the job costs the shop, and what it is sold for.
Two modes
- With labour
- Film and hours. This is a job you are fitting.
- Just pre-cuts
- Film only. The hours stay on the drawing and are not charged — so the difficulty level and the master are hidden, because with no hours they have nothing to multiply and nobody to pay. Switch back and what was typed is still there.
How the film is counted
Only what is selected
The quote is about the parts you selected and nothing else. A line beside the tick says how many parts of the drawing the quote does not count, so a part cannot fall out of the order quietly. Open the screen with nothing selected and it counts the whole drawing.
Discount, tax and the card
The order is fixed, and it is not the common one — getting it wrong is not a rounding error:
net    = sum − discount
tax    = net × rate
fee    = (net + tax) × rate
total  = net + tax + fee
- The discount can be a percentage or a fixed sum, and it applies to the whole quote, before the tax.
- Tax is not always applied — a private customer is invoiced without it, and the same shop bills a company with it. That is a fact about this quote, so it is stored on the drawing.
- The card fee is taken on the sum with the tax on it, and is set by hand — not always.
- A line that was not asked for is absent, not zero. “Discount 0” on a customer's proposal is a line somebody asks about.
A sentence to the customer
There is a box for one comment on the whole quote. It reaches the printed proposal — under the total, above the shop's standing terms — the filed copy, and the searchable archive.
Filing it
Saving to Job/Cost Notes freezes the quote: what the customer was told stands, whatever the rates do afterwards. A shop reopening the drawing months later may well see a different figure on screen from the one on the paper, and that is correct.
10.1If something is wrong
It says there is no licence on this computer, but the licence is paid and valid
The plotter is not in the list
I pressed cut and nothing happened at the machine
The catalogue is empty, or my saved drawings will not open
Nothing on the quote has a price
The knife cut more of the part than I drew across
The knife did nothing and said the line does not cross the part
Auto Nest refuses to run
Part of the window is blank when I maximise it
I sent an application and heard nothing
I was signed out on the other computer
A part is too wide for my film
10.2Getting help
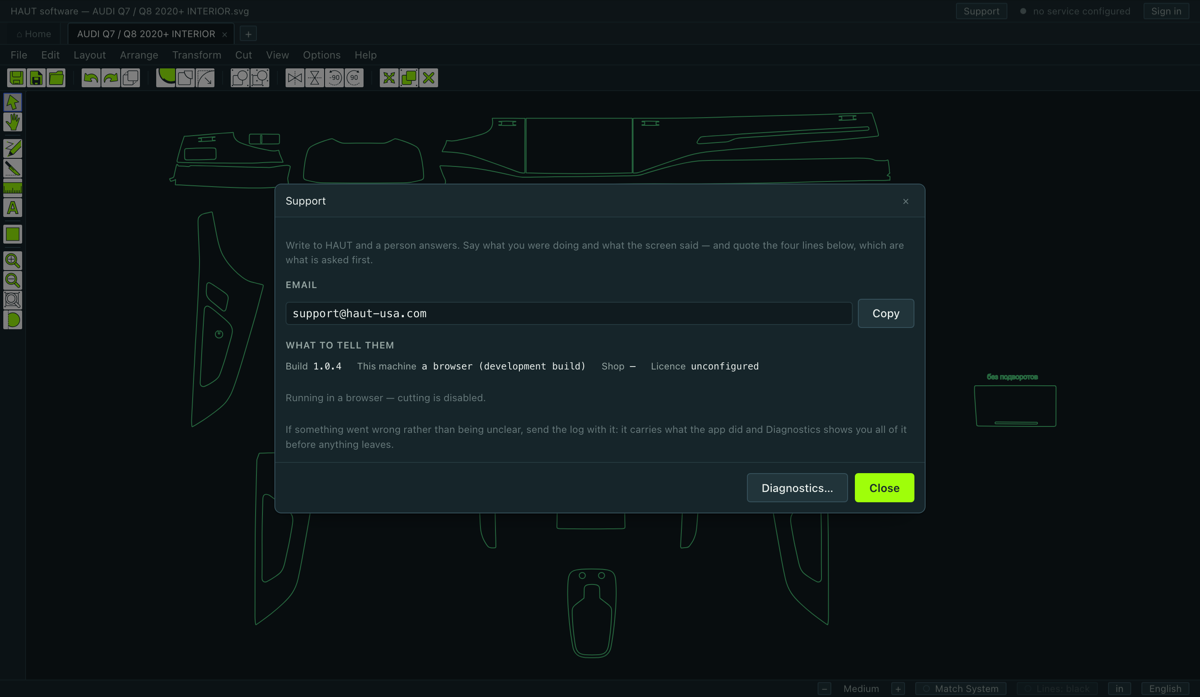
Help ▸ Support… has a box for the message. Write what happened and send it — the four facts that begin every support call go with it automatically: which shop, which account, which build, which machine. You do not have to find them.
The address is under the box as a fallback, for the case where the service itself is what is not working.
Diagnostics
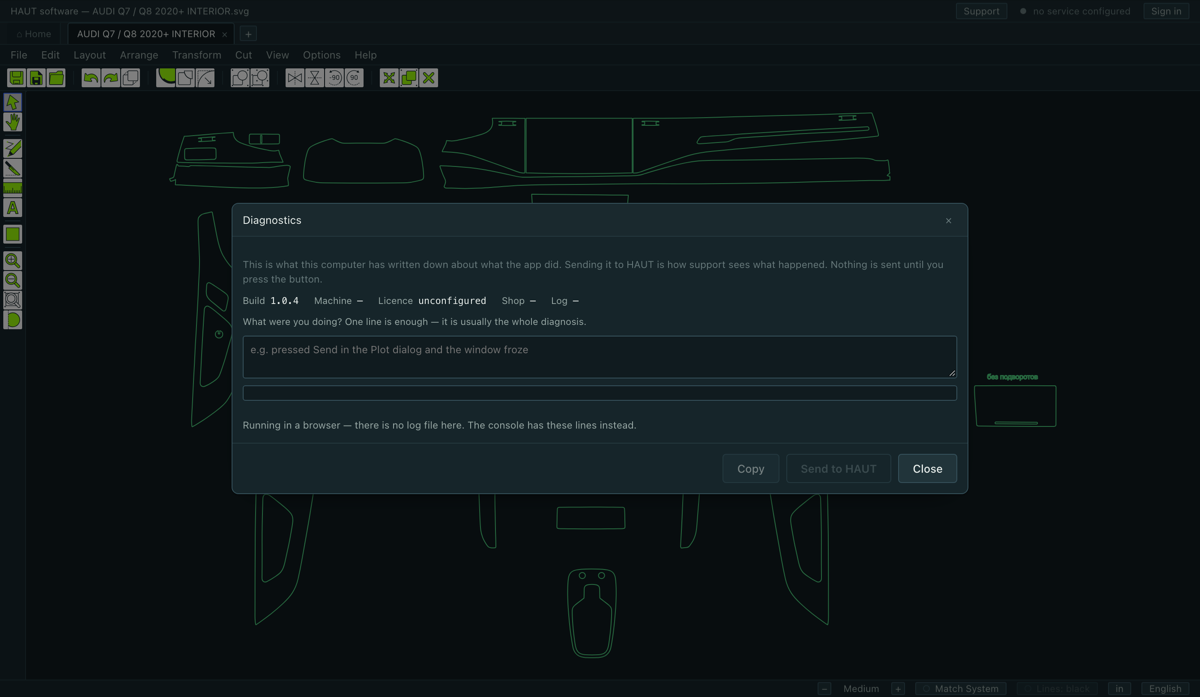
Help ▸ Diagnostics… is the report to attach when something is wrong and nobody can see why. It carries the build, the licence state, the plotter the computer is set up for, and the log of what the program has been doing. Send it with the first message rather than the third — it usually contains the answer.
10.4Keyboard and mouse
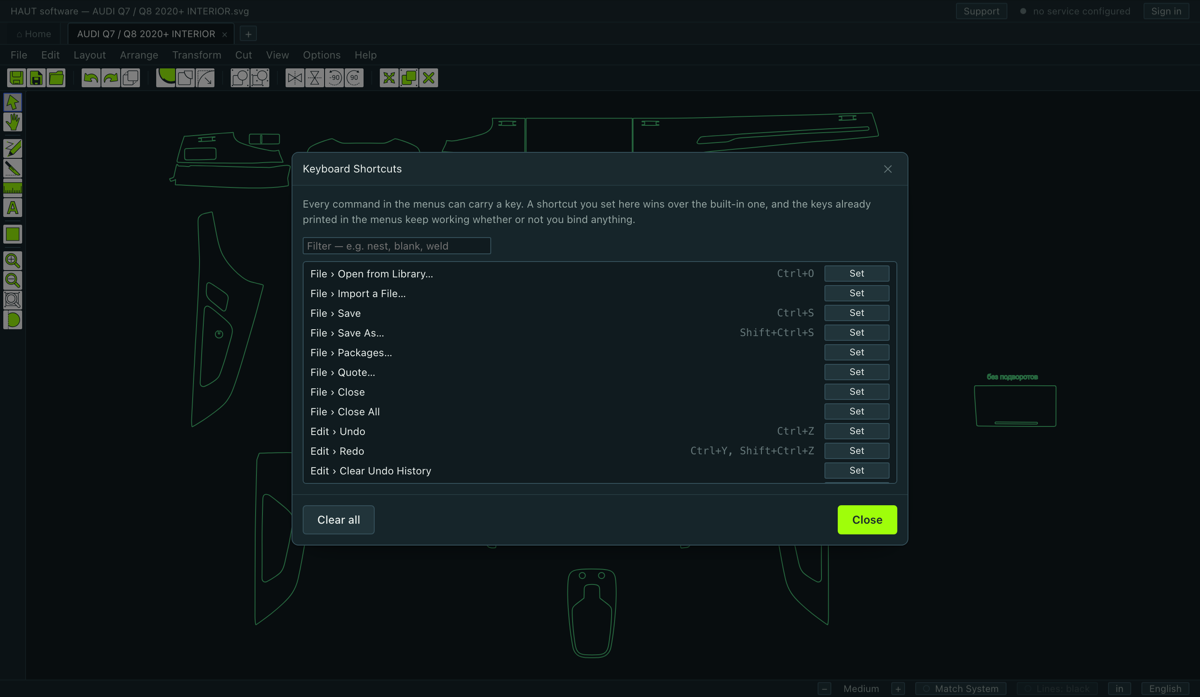
Anything without a key of its own can be given one in Options ▸ Keyboard Shortcuts….
Files
| Ctrl+O | Open from the library |
|---|---|
| Ctrl+S | Save |
| Shift+Ctrl+S | Save As |
| Ctrl+P | Print the layout |
Editing
| Ctrl+Z | Undo |
|---|---|
| Ctrl+Y / Shift+Ctrl+Z | Redo |
| Ctrl+X | Cut (inside the program) |
| Ctrl+C | Copy |
| Ctrl+V | Paste |
| Ctrl+D | Duplicate |
| Delete / Backspace | Delete — or take off the blank |
| Ctrl+A | Select all |
| Esc | Select nothing |
| Ctrl+G | Group |
| Shift+Ctrl+G | Ungroup |
| Arrows | Nudge — Shift for a bigger step |
View
| F8 | Zoom to everything |
|---|---|
| F7 | Zoom to the selection |
| F9 | Zoom to the blank |
| F6 | One step out |
| Shift+F6 | One step in |
| + / − | In / out |
| Ctrl+Alt+= / Ctrl+Alt+− | Interface size up / down |
Tools and guides
| S | Select tool |
|---|---|
| V | Vertical guide |
| H | Horizontal guide |
Mouse
| Wheel | Zoom, centred on the pointer |
|---|---|
| Space + drag | Pan |
| Middle button + drag | Pan |
| Double-click a part | Node Edit |
| Double-click a blank | Make it the active one |
| Right-click | What can be done here |
| Alt while dragging | Snapping off |
| Shift while drawing a cut | Hold the axis |
1.1Что это за программа
HAUT software раскладывает выкройки оклейки и PPF и режет их на вашем плоттере. Она делает три вещи и не притворяется, что умеет больше: открывает выкройку, раскладывает детали на заряженной плёнке и отправляет рез на машину.
- Выкройки берутся из каталога HAUT. Вы выбираете машину — кит открывается. Можно и импортировать свой чертёж.
- Раскладка автоматическая. Программа укладывает детали в ширину рулона, которую вы назвали, и говорит, сколько дюймов плёнки уходит на работу.
- Рез идёт прямо на плоттер — через очередь печати, которую операционная система для него и так заводит.
- Расчёт стоимости внутри. Во что работа обходится мастерской и за сколько продаётся — на одном экране и на одном листе для клиента.
1.2Скачать и установить
Адрес один, и он всегда отдаёт самую свежую сборку:
Windows
- Откройте ссылку для Windows. Браузер сохранит файл, имя которого кончается на
-setup.exe. - Запустите его. Windows может сказать, что издатель неизвестен — нажмите Подробнее, затем Выполнить в любом случае.
- Программа установится и запустится. Во время установки выбирать нечего.
macOS
- Откройте ссылку для macOS. Браузер сохранит файл
.dmg. - Откройте его и перетащите HAUT software в папку «Программы».
- Запустите из «Программ». Первый запуск идёт на несколько секунд дольше — macOS проверяет подпись.
Обновления
Программа проверяет наличие новой сборки каждые четыре часа и при каждом запуске. Когда она есть — говорит об этом и ставит её при следующем перезапуске. Возвращаться на страницу загрузки не надо никогда.
1.3Заявка на аккаунт мастерской
Аккаунт дают, а не берут. Зарегистрироваться нельзя: вы подаёте заявку, её читает человек в HAUT, и мастерская вместе с лицензией появляется в момент одобрения. Для отклонённой заявки не создаётся ничего — поэтому пароль на этом шаге ещё не выбирают.
- Запустите программу. На экране входа нажмите Подать заявку на аккаунт мастерской.
- Заполните анкету. Обязательны все поля, кроме тех, которых у честного бизнеса может и не быть, — НДС, сертификат перепродажи, офис в адресе, отдельный адрес доставки.
- Дайте по одной ссылке на каждое из трёх: сайт, соцсеть и карты. Если чего-то нет — поставьте галочку «нет»: это настоящий ответ, а не пустое поле.
- Ответьте на вопрос о связи с разработчиками ПО и каталогов выкроек для PPF. Ответ да заявку не запрещает — он открывает поле, где связь надо назвать, и решает рецензент.
- Отправьте. Экран выдаст номер заявки. Сохраните его: по нему можно узнать, что произошло, не имея аккаунта.
Как узнать, что с ней
На экране входа Проверить заявку принимает номер и говорит, на чём дело: на рассмотрении, одобрено или отказано — со словами самого рецензента. После отказа можно исправить и подать заново, когда причина устранена.
1.4Код приглашения и первый вход
Когда заявку одобряют, HAUT присылает код приглашения на указанную в ней почту. Вот на этом шаге и выбирается пароль.
- На экране входа нажмите У меня есть код приглашения.
- Наберите код, адрес почты, на который пришло приглашение, и пароль не короче восьми символов.
- Прочитайте условия использования и политику конфиденциальности и поставьте галочку.
- Нажмите Присоединиться к мастерской. Вы вошли, лицензия заняла место на этом компьютере, каталог открылся.
Места
Лицензия несёт два места — два компьютера. Их занимают первые две машины, на которых вы вошли. Третья получает отказ по имени, а не выселяет кого-то: та машина, которую пришлось бы выселить, может в этот момент резать. Чтобы перенести место, выйдите на машине, которой оно больше не нужно, или напишите в HAUT.
Если забыли пароль
На экране входа Забыли пароль? отправляет ссылку на адрес, на который выписана лицензия. Откройте ссылку, выберите новый пароль и войдите здесь уже с ним.
1.5Подключить плоттер
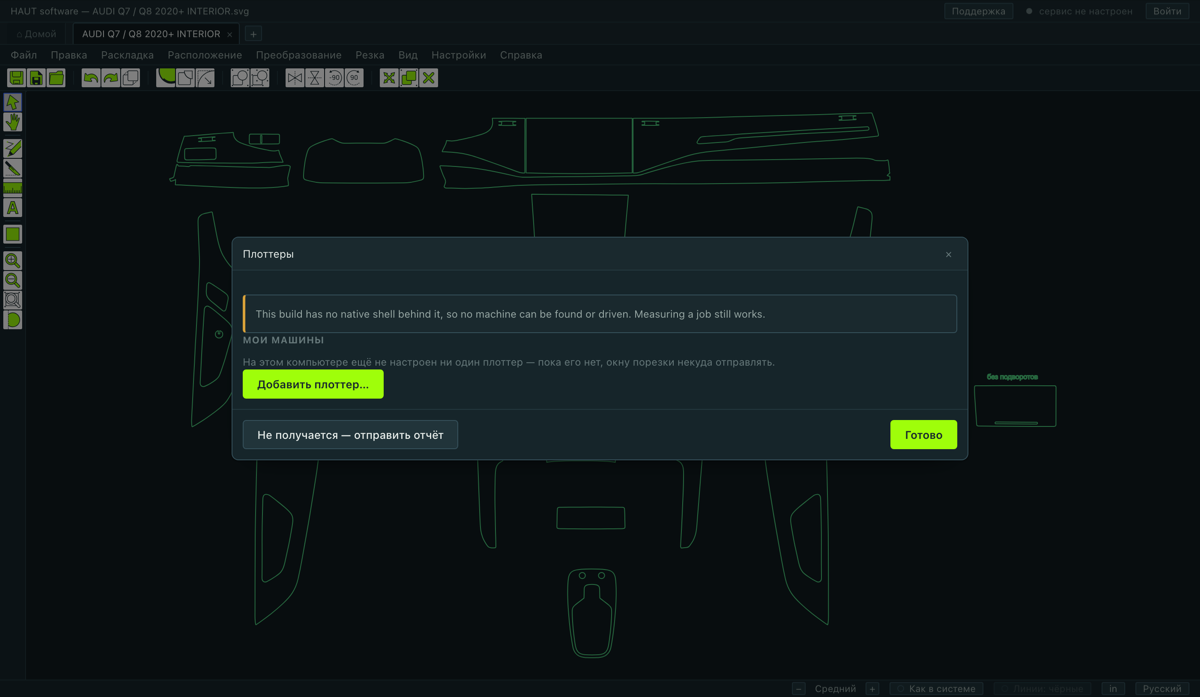
Сделайте это сейчас, до того как откроете первую выкройку. Настраивается один раз и больше никогда, и это тот шаг, который дороже всего обходится, когда его оставляют на момент, когда плёнка уже заряжена.
Программа говорит с плоттером через очередь печати, которую заводит для него операционная система, — значит, машина должна существовать там раньше, чем появится здесь.
Windows
- Воткните плоттер кабелем USB и включите его.
- Откройте Параметры → Bluetooth и устройства → Принтеры и сканеры (или старую Панель управления → Устройства и принтеры).
- Если плоттер уже там — откройте его, зайдите в Свойства принтера → Порты и запишите порт: USB001, USB002 или похожий. Дальше переходите к шагу с именем.
- Если его там нет — нажмите Добавить устройство, затем Необходимый принтер отсутствует в списке.
- Выберите Добавить локальный или сетевой принтер с параметрами, заданными вручную.
- Портом возьмите тот USB00…, на котором сидит плоттер. Если машина в сети — выберите Стандартный порт TCP/IP, наберите её адрес и оставьте тип RAW на порту 9100.
- Драйвером выберите изготовителя Generic и принтер Generic / Text Only. Это нарочно: программа шлёт файл реза машине нетронутым, а настоящий драйвер принтера переписал бы его в то, чего плоттер не прочтёт.
- Назовите HAUT, дальше свою марку и модель. Общий доступ не давайте. Завершите.
macOS
- Воткните плоттер кабелем USB и включите его.
- Откройте Системные настройки → Принтеры и сканеры. Плоттер по USB обычно появляется сам — если он уже в списке, готово.
- Если его там нет — нажмите Добавить принтер, сканер или факс… и подождите несколько секунд на вкладке По умолчанию, пока машина появится.
- Если плоттер в сети, а не на кабеле, возьмите вкладку IP: наберите адрес, выберите протокол HP Jetdirect – Socket и оставьте порт 9100.
- Что бы ни предложили в «Использовать:» — годится: программа шлёт файл реза нетронутым, и драйвер его не видит. Если не предлагают ничего — выберите «Выбрать ПО…» и возьмите Generic PostScript Printer.
- Дайте имя HAUT … и нажмите Добавить.
Зачем имя
Программа читает имя очереди обратно. Очередь по имени HAUT … считается плоттером и предлагается отдельно, потому что это имя набрал человек, который видел кабель, — а это сильнее любой догадки по марке или порту. Очередь с другим именем тоже работает, просто лежит в длинном списке за кнопкой, которая показывает все порты.
1.6Пробный квадрат — чем доказано, что режет
Резка ▸ Плоттеры… перечисляет машины, под которые настроен этот компьютер. Когда одна выбрана, нажмите Порезать пробный квадрат.
Машина режет маленький квадрат. Потом программа задаёт один вопрос: нож двигался?
- Да — машина помечается как проверенная, с датой. Вот это здесь и значит «подключено».
- Ничего не двинулось — ответ называет три вещи, которые надо проверить, в порядке проверки: панель не в HP-GL, не та очередь, нож не опущен.
Какой драйвер используется
Очередь, имя которой программа узнала, ставится на драйвер своей машины, если этот драйвер из тех, про которые доказано, что они режут. Иначе она идёт на стандартный HP-GL, который режет, — и строка под машиной так и говорит, и говорит, что собственный предел ширины машины не используется, а работу ограничивает бланк.
2.1Вкладка «Дом»
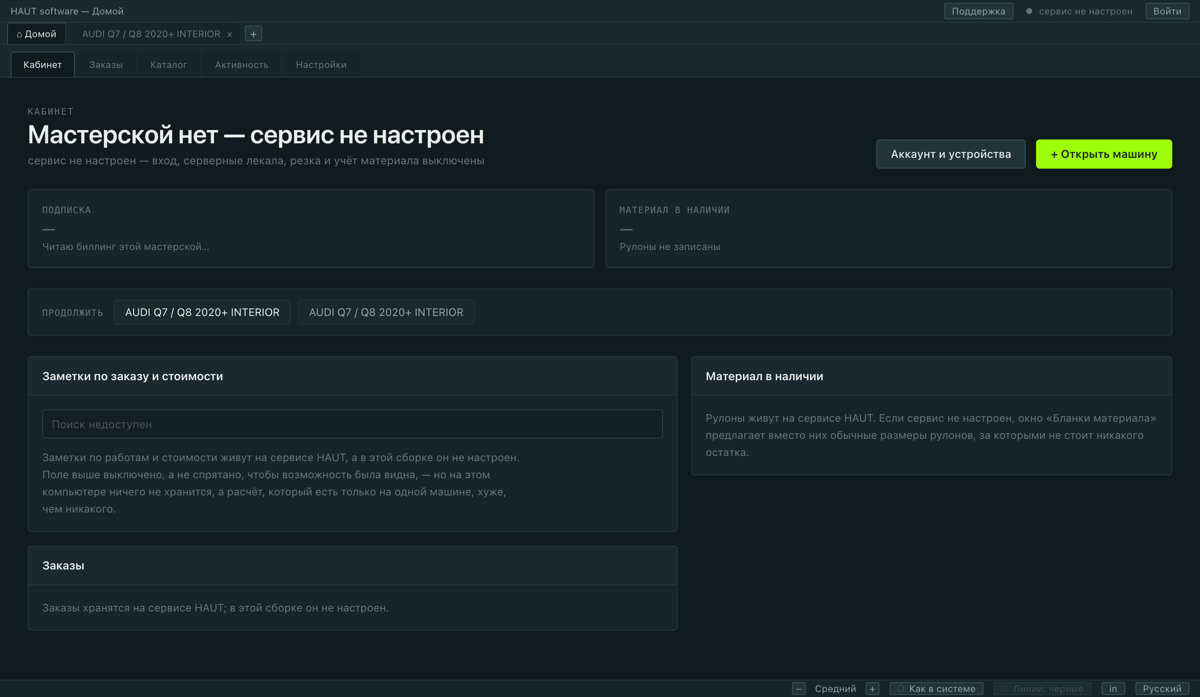
Домой — самая левая вкладка, и она есть всегда. Всё, что относится к мастерской, а не к чертежу, живёт на ней, на страницах, между которыми переключаются:
- Каталог
- Выкройки, которые вам открывает лицензия. С этого работа и начинается — см. следующую главу.
- Заказы
- Расчёты, сохранённые этой мастерской, с поиском. Сохранённый сюда расчёт заморожен: то, что клиенту сказали, стоит.
- Настройки
- Собственные цифры мастерской — нормочас, цены плёнки, наценка на материал, мастера, уровни сложности, налог и название компании, которое уходит в напечатанное предложение.
- Оплата
- Подписка, а также покупка плёнки и инструментов у HAUT там, где это к вашей мастерской относится.
2.2Ставки мастерской, набираемые один раз
Домой ▸ Настройки держит то, что расчёт читает живьём: смените ставку там — и каждый следующий расчёт пойдёт по ней, а уже сохранённый останется с теми цифрами, по которым его посчитали.
- Сколько стоит час
- Два числа: сколько вы берёте за час и во сколько час обходится вам. Разница — маржа на работе.
- Наценка на материал
- Множитель к тому, во сколько плёнка обошлась вам. ×2.5 продаёт плёнку в два с половиной раза дороже закупки. Пока это не задано, ни одна строка расчёта не имеет цены: это то единственное число, без которого экран не считает, и набирают его один раз.
- Плёнка на складе
- Каждая плёнка, с которой вы работаете, и сколько вы за неё платите — не за сколько продаёте. Продаёт наценка выше.
- Уровни сложности
- Название и множитель. Уровень умножает работу, а не итог: плёнка стоит одинаково, что бы к ней ни клеили.
- Мастера
- Кто делает работу и сколько стоит его час, если он отличается от общего. Мастеру можно платить почасово или процентом от работы — в мастерских есть и то и другое.
- Налог
- Как строка налога называется в ваших предложениях, и ставка. Оставьте название пустым — возьмётся слово, принятое на рынке.
- Комиссия карты
- Во сколько вам обходится карта. Берётся от суммы с налогом, и выключена, пока расчёт её не попросит.
- Шапка документа
- Название компании, которое уходит в напечатанное предложение. Без неё предложение не понесёт вообще никакого имени.
2.3Лицензия, места и устройства
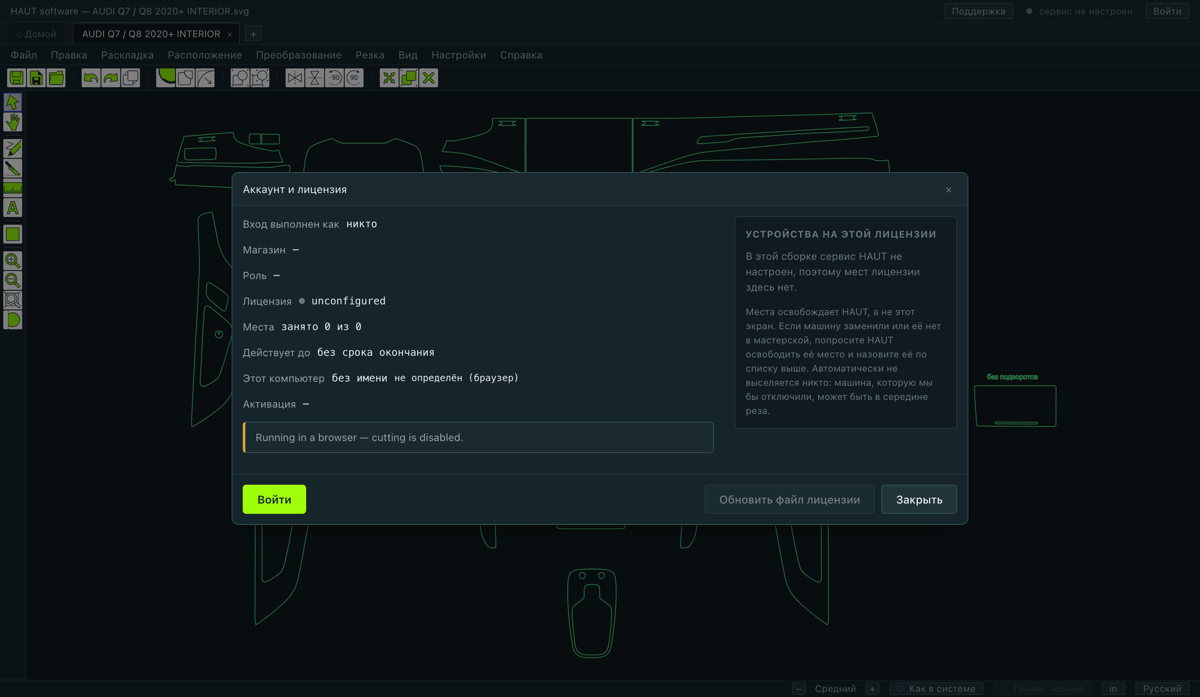
Справка ▸ Аккаунт, лицензия и устройства… показывает, на что этот компьютер имеет право: мастерская, тариф, до какого числа, какие машины держат два места и какая из них режет.
Как проверяется лицензия
- При каждом запуске, при каждом входе и раз в час, пока программа открыта. Спрашивает и когда вы возвращаетесь к окну после отлучки.
- Лицензия, которая кончается в обед, закрывается в обед, а не на следующее утро. Перезапускать ничего не надо.
- Офлайн последний ответ годен семь дней. Машина в цехе без сети продолжает резать; та, что офлайн дольше, обязана снова увидеть сервис.
Когда резка прекращается
Если лицензия истекла или заморожена, каталог закрывается, и собственные сохранённые чертежи мастерской закрываются вместе с ним — не просто список, а строки. Редактор и встроенная библиотека продолжают работать. Это лицензия делает свою работу, и лечится она оплатой или разговором с HAUT, а не настройкой.
3.1Открыть выкройку из каталога
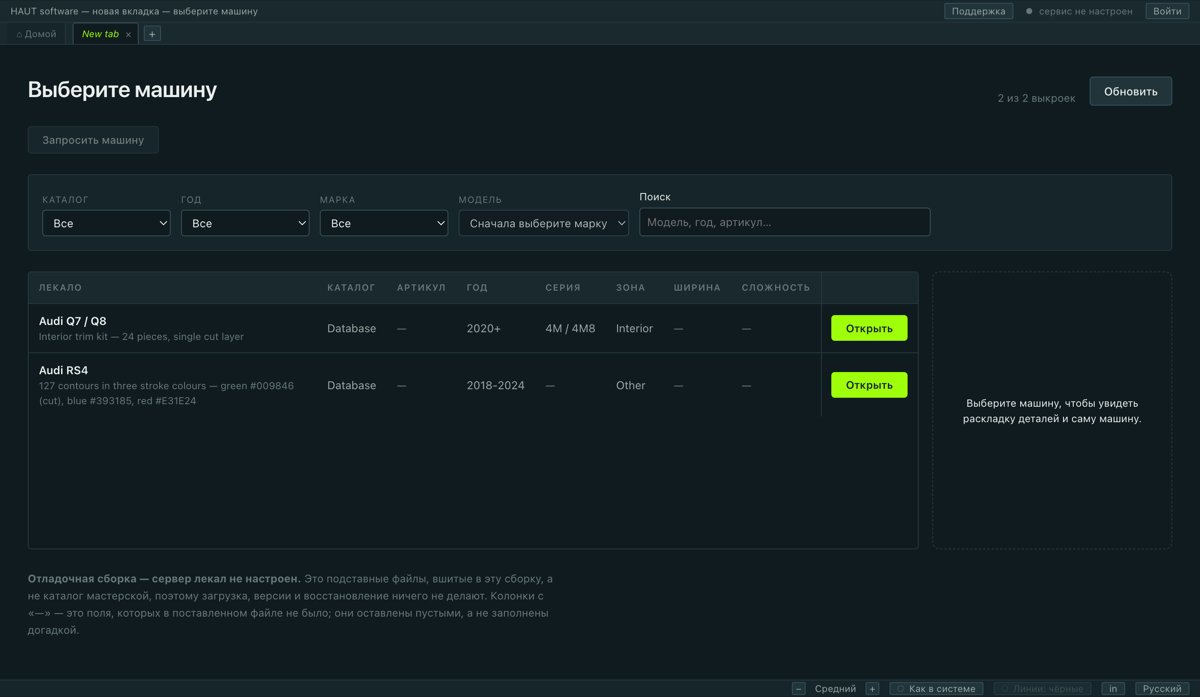
Файл ▸ Открыть из каталога…, или Ctrl+O, или + на полосе вкладок.
- Сузьте выбор фильтрами наверху: каталог, год, марка, модель.
- Или наберите в поиске — название модели, часть названия, номер детали.
- Нажмите Открыть в нужной строке. Кит приедет в новую вкладку.
Что значат колонки
- Каталог
- К какому каталогу относится выкройка. Какие каталоги вам видны — это часть лицензии.
- Номер детали
- Собственный номер HAUT для этого кита.
- Ширина
- Самое широкое, что киту нужно поперёк рулона. Кит шире вашей плёнки одним куском не режется.
- Сложность
- Насколько тяжела поклейка. Это оценка дизайнера, а не цена.
3.2Если выкройки нет
Если машины нет в каталоге — попросите её. Запрос уходит в собственную чертёжную HAUT и возвращается выкройкой в каталоге: рисовать самому не надо, и искать на стороне тоже.
Форма запроса — на экране каталога. Назовите машину как можно точнее: марка, модель, годы, кузов и комплектация там, где она меняет панели. Запрос «BMW» получает в ответ вопрос, какая именно; запрос «BMW M3 CS 2024, купе» получает выкройку.
4.1Из чего состоит окно
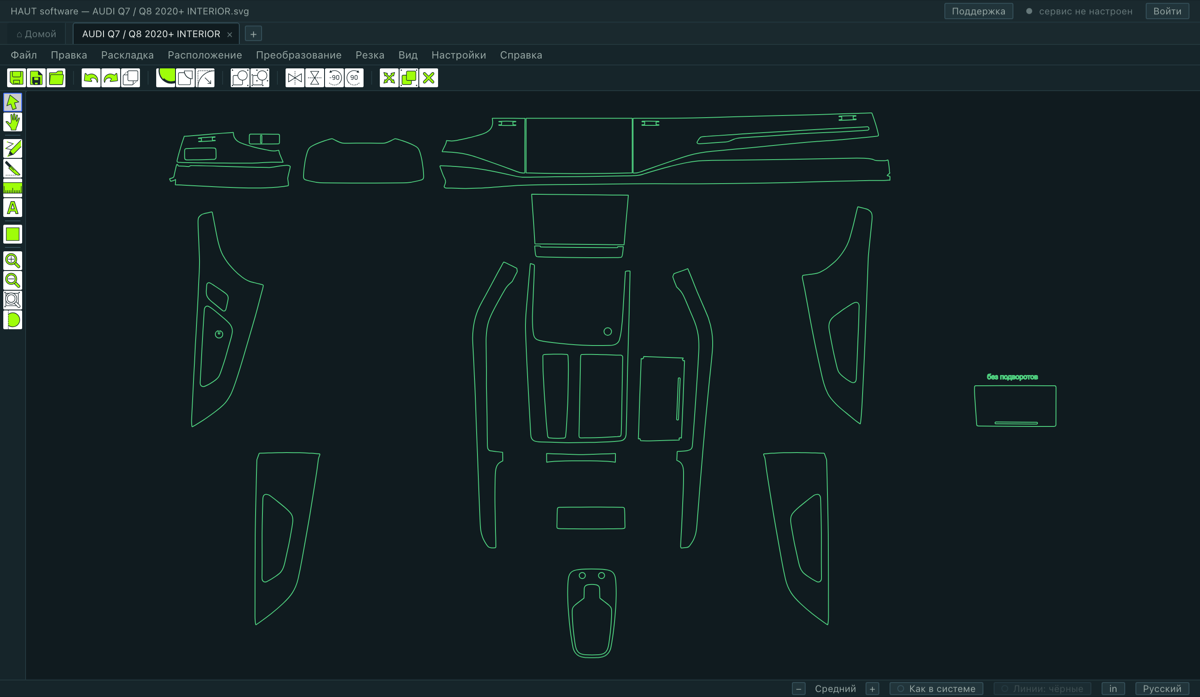
Сверху вниз:
- Заголовок
- Открытый файл. Когда работает модальный инструмент, его имя появляется здесь же —
HAUT software -[Подворот] — …, и по этому сразу видно, что инструмент ещё взведён. - Вкладки
- По одной на открытый файл, плюс Домой слева и + справа. Несколько выкроек могут быть открыты разом.
- Строка меню
- Восемь меню, в порядке, в котором идёт работа: взять файл, изменить его, положить на материал, расставить, поработать с геометрией, отправить — потом вид и настройки.
- Панель инструментов
- Кнопки того, что нажимают чаще всего. Полностью перестраивается — см. Настроить панели….
- Палитра инструментов
- Вдоль левого края: модальные инструменты. Взведённый обведён синим кольцом.
- Холст
- Чертёж. Бланк материала, если он есть, рисуется под ним, с размером на подписи.
- Нижняя строка
- Внизу: размер выделенного, размер интерфейса, тема, цвет линий, единицы и язык.
4.2Как двигаться по чертежу
| Колесо мыши | Зум, с центром под курсором. Больше на колесо не назначено ничего. |
|---|---|
| Пробел + тяга | Двигать холст. |
| Средняя кнопка + тяга | Двигать холст. |
| F8 | Показать всё |
| F7 | Показать выделенное |
| F9 | Показать бланк |
| F6 / Shift+F6 | На шаг от себя / на шаг к себе |
| + / − | На шаг к себе / на шаг от себя |
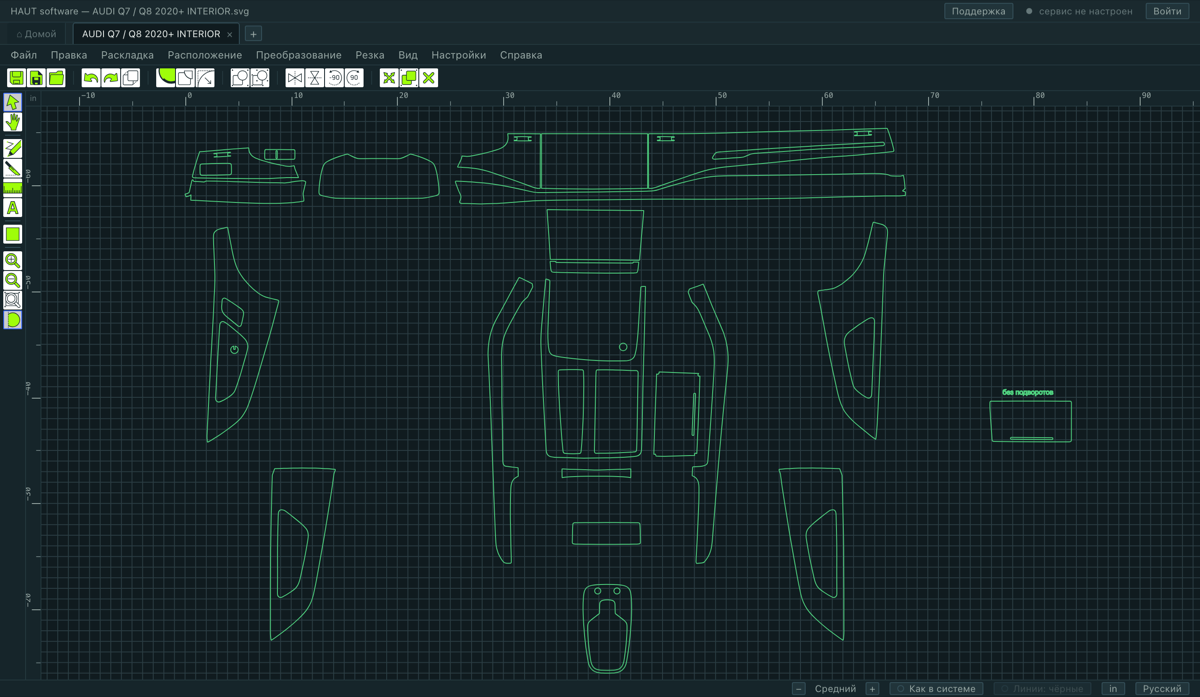
Сетка, линейки и направляющие
- Показать сетку в меню Вид рисует сетку, а Шаг сетки рядом задаёт её шаг — 0.25, 0.5, 1, 2 или 5 in.
- Показать линейки ставит линейку по верхнему и левому краю.
- Направляющая — линия, которую вы ставите сами: V роняет вертикальную, H горизонтальную, обе под курсором. Детали к ним липнут.
- Убрать одну направляющую — правой кнопкой по ней и Delete Guide. Убрать направляющие убирает все.
4.3Тема, размер, единицы и язык
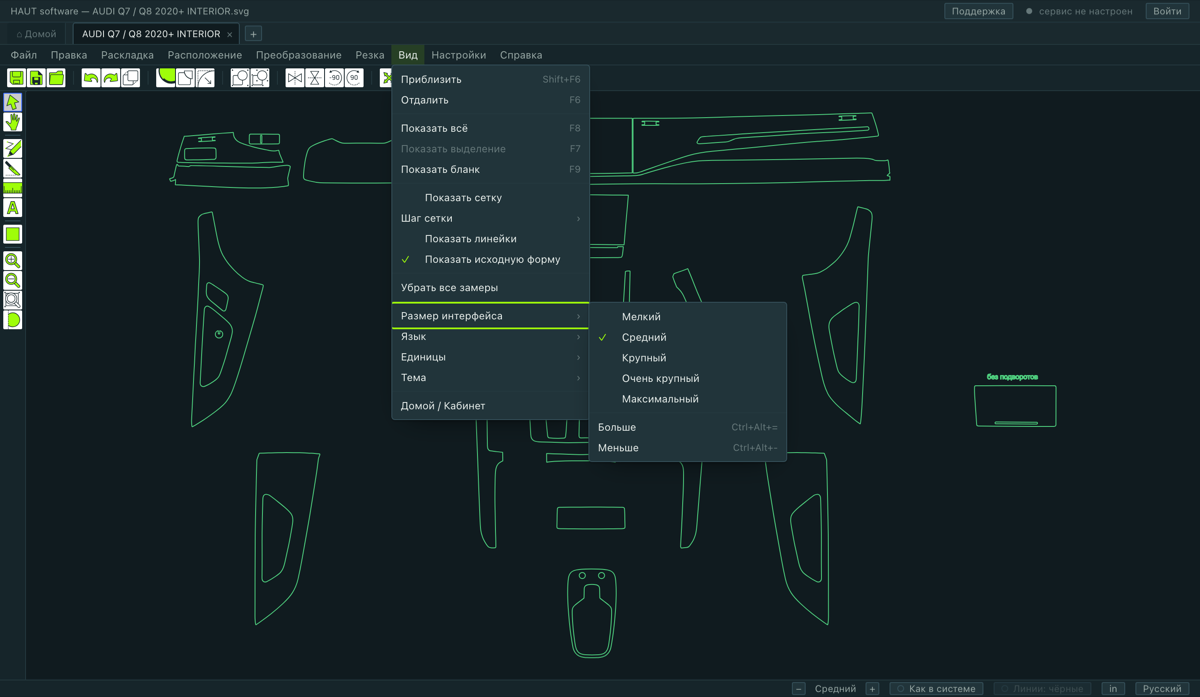
Все четыре — в меню Вид, и все четыре есть в нижней строке окна, где до них одно нажатие.
- Размер интерфейса
- Пять ступеней от Мелкий до Максимальный. Масштабируется всё вместе — меню, кнопки, диалоги и поля внутри них. Ctrl+Alt+= и Ctrl+Alt+− ходят по ступеням.
- Язык
- English, Русский, Español, Português. Меняется сразу и запоминается.
- Единицы
- Дюймы или миллиметры. Меняет каждое поле и каждое показание в программе, включая те, что внутри полос инструментов.
- Тема
- Тёмная, Светлая или Как в системе — следует за настройкой самого компьютера и переключается вместе с ним на закате. Свежая установка стоит на Как в системе.
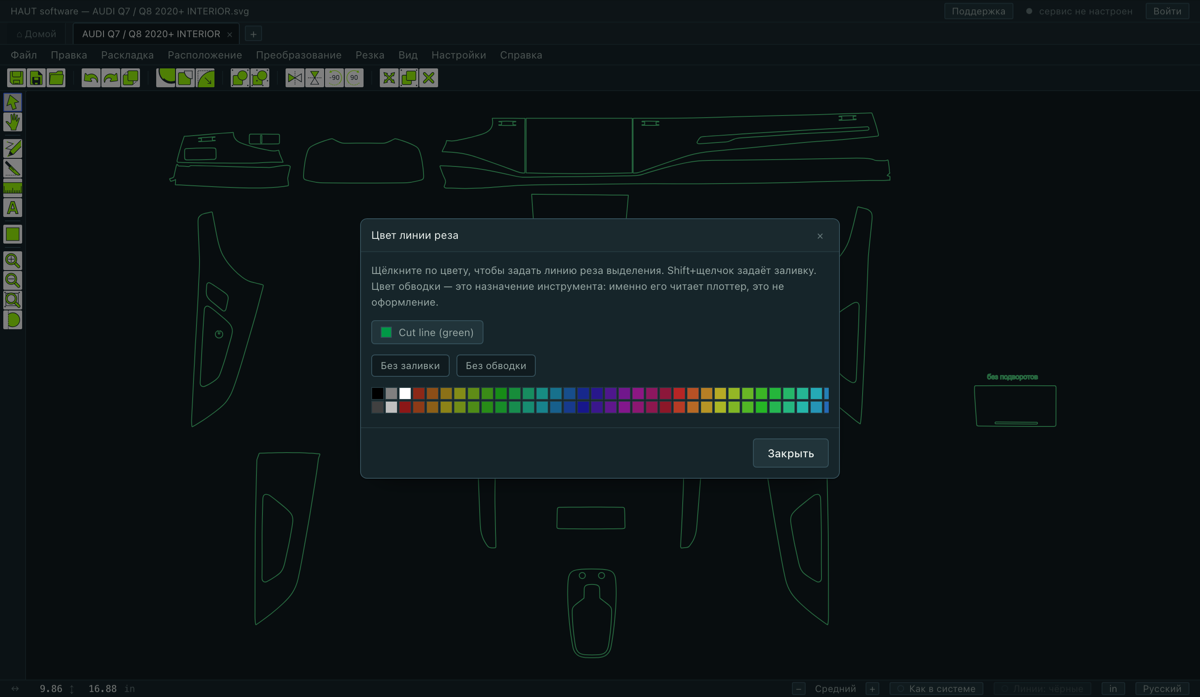
Цвет линий
В нижней строке есть переключатель Линии: чёрные. Включён — каждый контур рисуется чёрным, каким бы цветом он ни пришёл. Это важно, потому что цвета в файле выкройки не значат ничего — они дизайнерские, и программа никогда не режет по цветам.
4.4Настройка панели и палитры
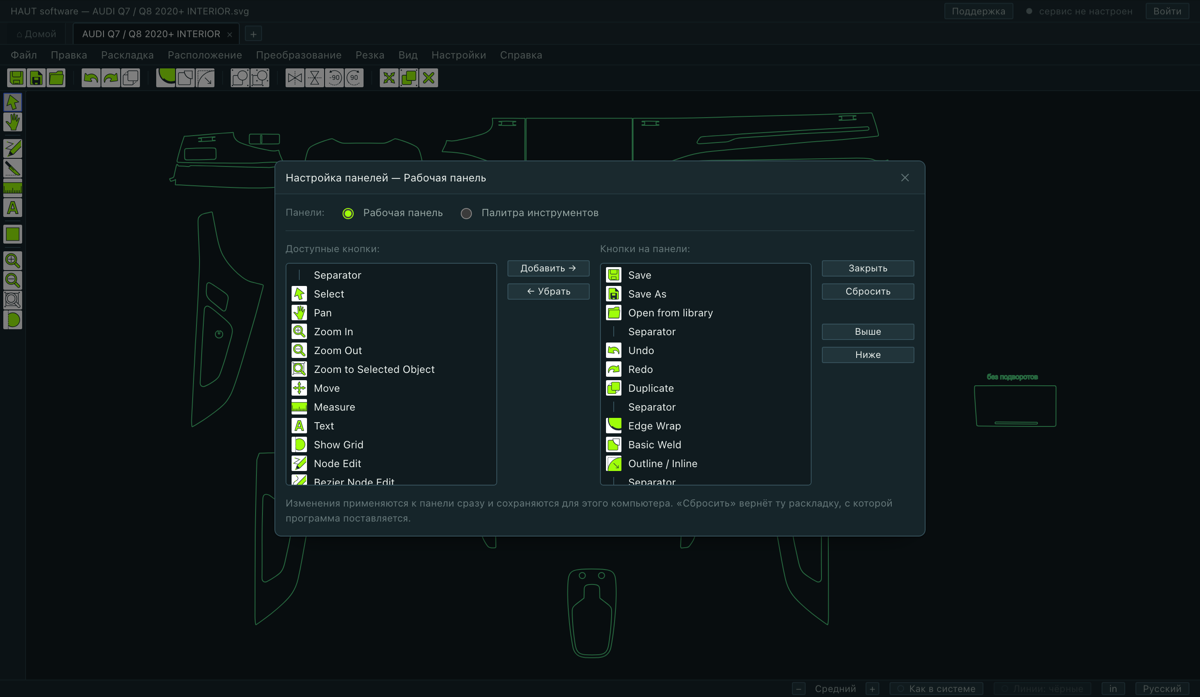
Настройки ▸ Настроить панели… держит два списка: всё, что программа может положить на панель, и то, что на ней сейчас. Добавить, убрать, выше, ниже и разделитель, чтобы сгруппировать.
Что соберёте — запомнится на этом компьютере. Мастерская, которая никогда не пользуется текстом, может его убрать; мастерская, которая зеркалит каждую работу, может поставить пару зеркал в левый край.
Горячие клавиши
Настройки ▸ Горячие клавиши… перечисляет каждую команду, которой можно назначить клавишу, и даёт назначить свою. Встроенные клавиши из следующих глав отнять нельзя, но всему, у чего клавиши нет, её можно дать.
4.5Импорт, сохранение и что выходит из программы
Импорт
Файл ▸ Импорт файла… читает ваш собственный чертёж: SVG, EPS, AI и PLT. Он приезжает в новую вкладку и ведёт себя как любая другая выкройка.
Сохранение
- Ctrl+S — Сохранить, поверх открытого файла.
- Shift+Ctrl+S — Сохранить как…, под новым именем. Выкройку, приехавшую из каталога или из импорта, в первый раз надо сохранить в своё место — поэтому это сохранение нужно чаще обычного.
- Вкладка с несохранённой работой несёт точку рядом с именем, и при закрытии спрашивает.
Автосохранение
Настройки ▸ Автосохранение… сохраняет каждые несколько минут все открытые файлы, в которых есть несохранённые изменения. Пока вы его не включите, оно выключено.
Что выйти не может
Экспорта нет — ни векторного файла, ни картинки, ни PDF — и векторные данные не копируются в системный буфер обмена. Ctrl+C и Ctrl+V двигают детали внутри этой программы и не кладут ничего туда, откуда их прочтёт другая.
Выйти может бумага: Резка ▸ Печать раскладки… печатает пронумерованную карту деталей на бланке, а расчёт печатает предложение клиенту.
4.6Выделение и перемещение деталей
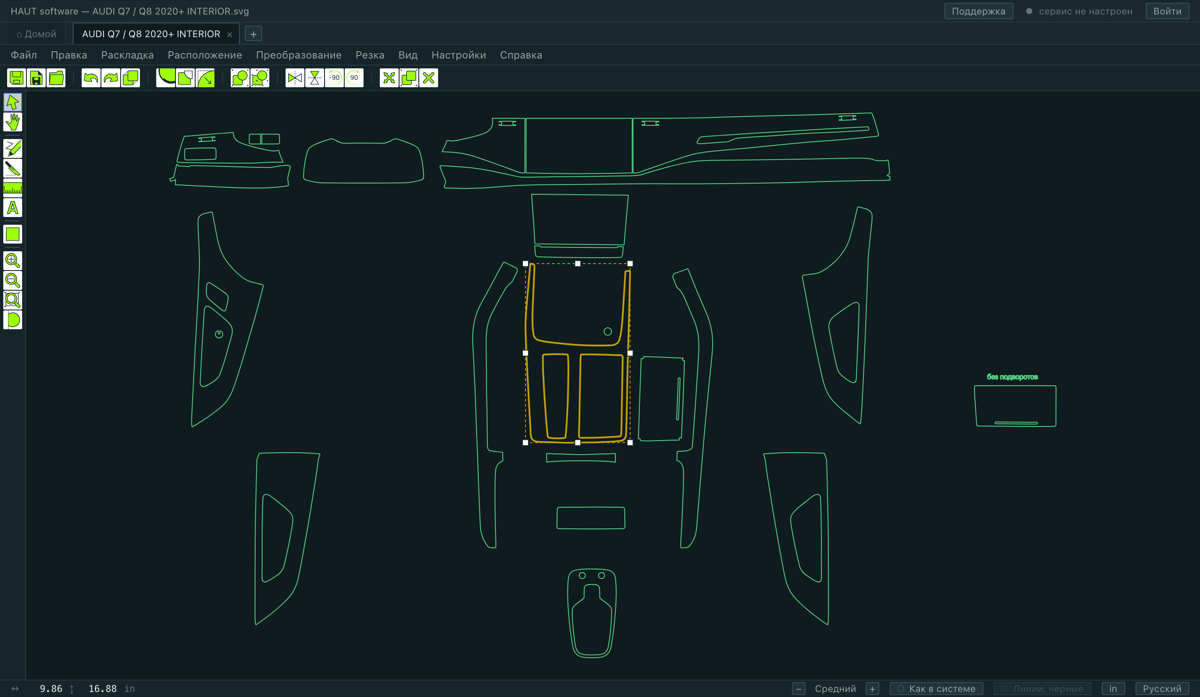
| Клик | Выделить одну деталь. Она обводится утолщённой линией, чтобы было видно, какая. |
|---|---|
| Shift + клик | Добавить деталь к выделению или снять её обратно. |
| Тяга по пустой плёнке | Рамка — выделяется всё, чего она коснулась. |
| Ctrl+A | Выделить всё |
| Esc | Снять выделение |
| Тяга за выделенную деталь | Двигать. Вместе с ней едет всё выделенное. |
| Стрелки | Подвинуть на шаг. Shift делает шаг крупнее. |
| Ctrl+D | Дублировать |
| Delete | Удалить — но см. примечание ниже |
Магнит
Пока вы тянете, деталь липнет к направляющим, к краям бланка, к сетке и к краям и центрам других деталей. Линия, за которую она зацепилась, рисуется штриховой на время жеста.
- Держите Alt, чтобы выключить магнит на это перетаскивание.
- Направляющие и сетка ловят только пока они видны.
Delete над разложенными деталями
Размер детали изменить нельзя
5.1Сказать программе, чем заряжена машина
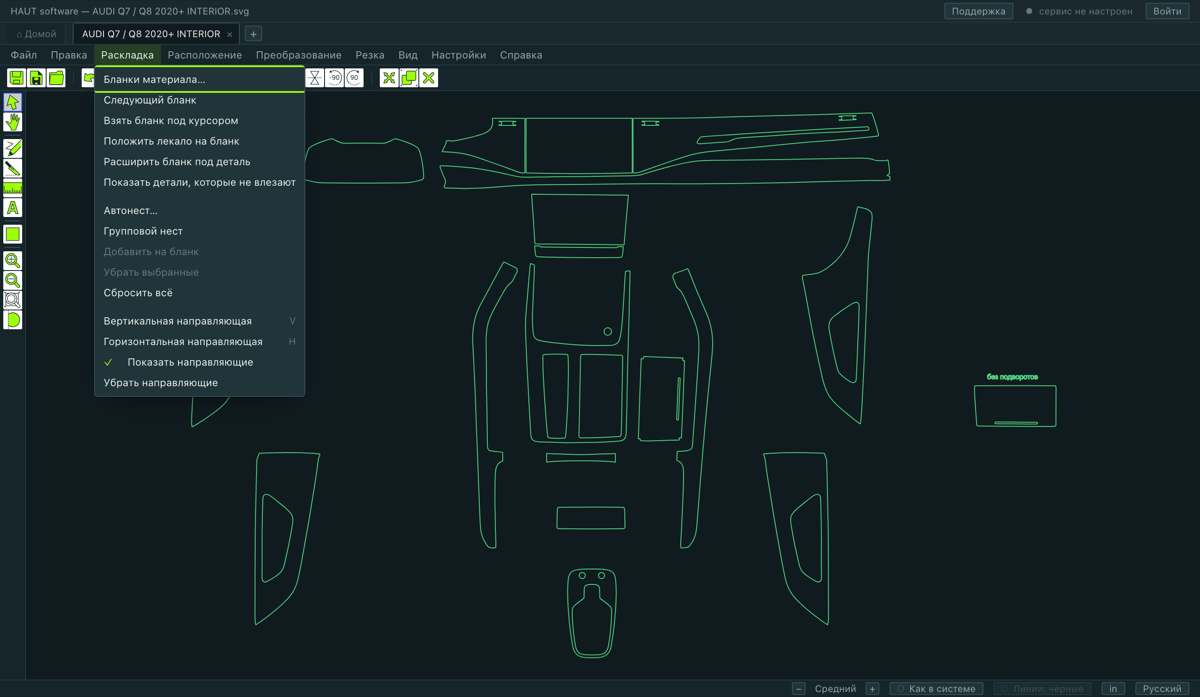
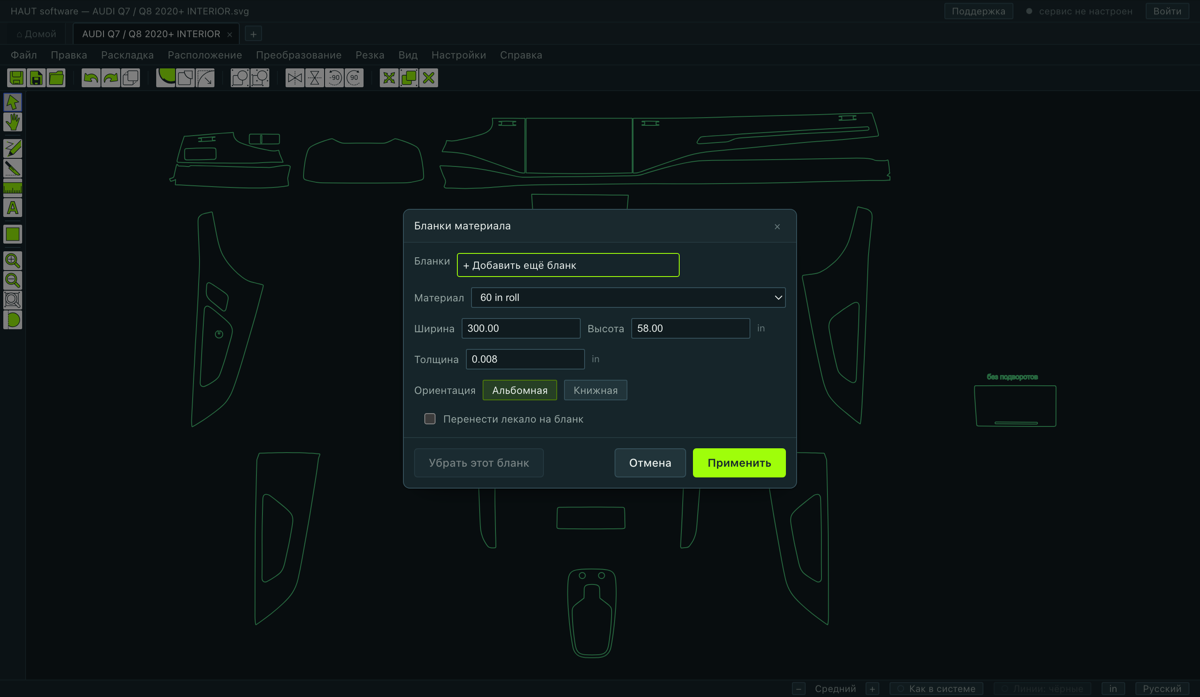
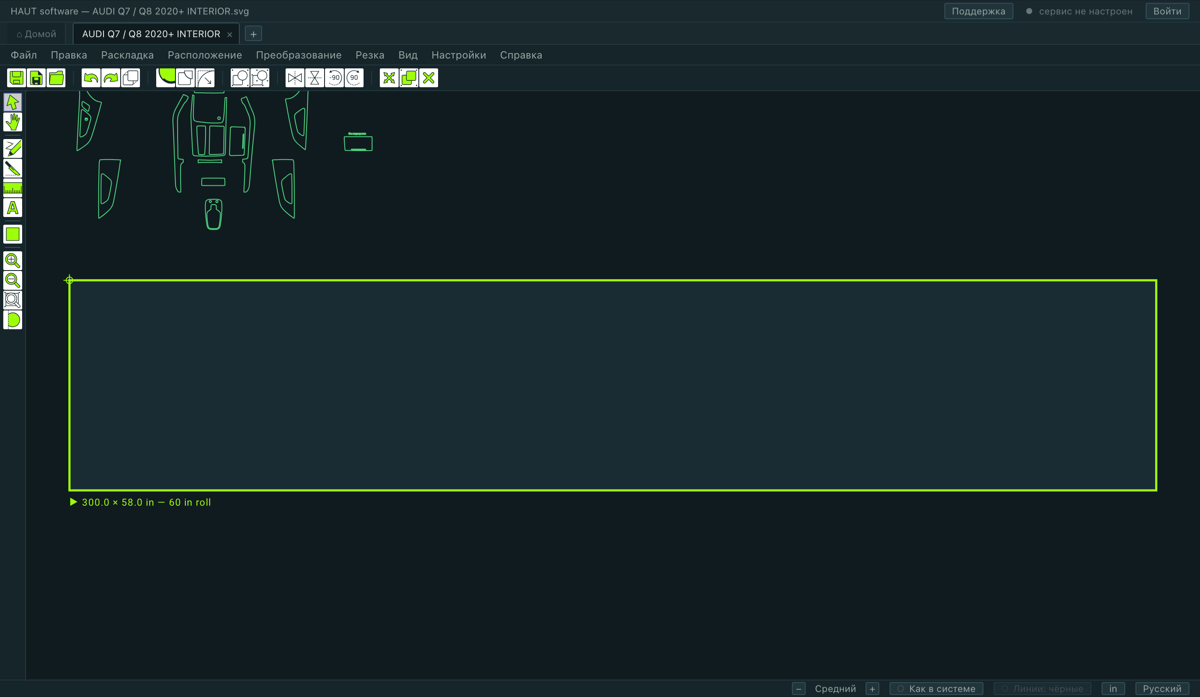
Бланк — это плёнка, заряженная в машину, нарисованная на холсте прямоугольником под деталями. Всё, что касается раскладки и того, что пойдёт в рез, решается относительно него, — поэтому его задают первым, как только выкройка открыта.
Раскладка ▸ Бланки материала….
- Выберите рулон в Материал — 60, 48, 36, 30, 24 или 12 in. Ширина поперёк рулона подставится сама.
- Задайте длину, если нужна не та, что по умолчанию.
- Нажмите Применить. Лист появится под чертежом, с размером на подписи.
5.2Несколько листов и две команды, которые стоит знать
На холсте может лежать больше одного бланка — скажем, 60-дюймовый рулон и 30-дюймовый. Один из них активный, и каждая команда действует на него. Переключиться:
- двойным щелчком по листу, или
- правой кнопкой по нему и Use This Blank, или
- Раскладка ▸ Следующий бланк.
- Расширить бланк под деталь
- Ставит бланк настолько широким поперёк рулона, насколько нужно самой широкой детали, — вплоть до полудюйма от края рулона. 60-дюймовый рулон при должной сноровке действительно режется на 59.5, и это та самая правка, сделанная оттуда, где проблема замечена.
- Показать детали, которые не влезают
- Выделяет и обводит детали, которые не лягут поперёк активного бланка, — чтобы увидеть, какие это, до того как выяснить это у машины.
6.1Палитра инструментов
Вдоль левого края, сверху вниз. Взведён всегда один, и взведённый обведён синим кольцом.
- Выбор
- Выбирать, двигать и группировать детали. S взводит его откуда угодно. С него начинают и к нему возвращаются.
- Рука
- Тянуть холст. Нужен редко — пробел и средняя кнопка делают то же, не выходя из текущего инструмента.
- Правка узлов
- Работа с узлами одной детали. Двойной щелчок по детали тоже его взводит.
- Нож
- Разрезать деталь надвое по линии, которую вы провели.
- Линейка
- Поставить размер между двумя точками. Он остаётся на чертеже, пока его не уберут.
- Текст
- Положить слово на чертёж — подпись на детали, заметку для мастера.
- Фигура
- Квадрат, круг, треугольник, звезда, многоугольник. Кнопка раскрывается вбок на пять.
- Приблизить / Отдалить / Показать выбранный объект
- Вид. Первые два колесо делает быстрее.
- Показать сетку
- Сетка вкл/выкл.
6.2Подворот — припуск PPF
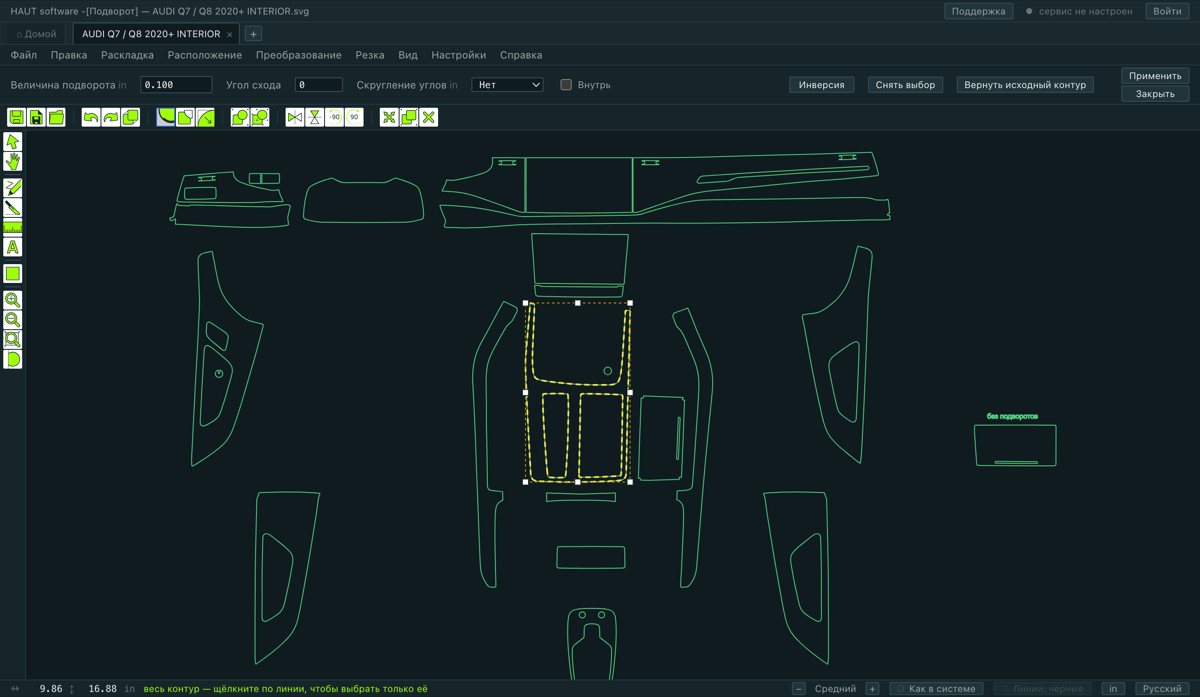
Ради этого инструмента программу, в общем, и покупают. Он выпускает плёнку за край панели, чтобы её можно было подвернуть, — и делает это на тех участках, которые вы выбрали, а не на всей детали: капот подворачивают по передней кромке и режут в стык по зазорам.
Преобразование ▸ Подворот…, или кнопка на панели.
- Выделите деталь.
- Кликните по линии на ней, чтобы выбрать участок. Shift-клик добавляет ещё один или снимает обратно. Показание в нижней строке говорит, сколько вы уже набрали; если не выбрано ничего, припуск ляжет на все контуры детали.
- Наберите Величина подворота — насколько плёнка выходит за край.
- Нажмите Применить.
Поля
- Величина подворота
- Насколько плёнка уходит за край. Это то число, которое решает привычка самого мастера.
- Угол схода
- Градусы. 0 обрывает припуск прямо поперёк кромки. Положительный угол сводит его на нет на последнем отрезке, чтобы на конце не осталось ступеньки.
- Скругление углов
- Скругляет углы, которые делает припуск, — где он начинается и кончается на контуре, и углы ступеньки, которую он поднимает. Нет оставляет их острыми — так инструмент работал всегда. Варианты: 0.05, 0.1, 0.2 и 0.3 in.
- Внутрь
- Уводит припуск внутрь детали вместо наружу. На отверстии «внутрь» открывает отверстие шире.
Три кнопки
- Инверсия
- Выбрать на этом контуре всё, кроме набранного, — и длинный путь между двумя точками.
- Снять выбор
- Сбросить все выбранные участки. Apply после этого снова покроет все контуры детали. Это выход, когда лишний участок уже набран.
- Вернуть исходный контур
- Снять все припуски и вернуть контуры к тому, как деталь была нарисована.
6.3Обводка / Втяжка — вырастить и ужать контур
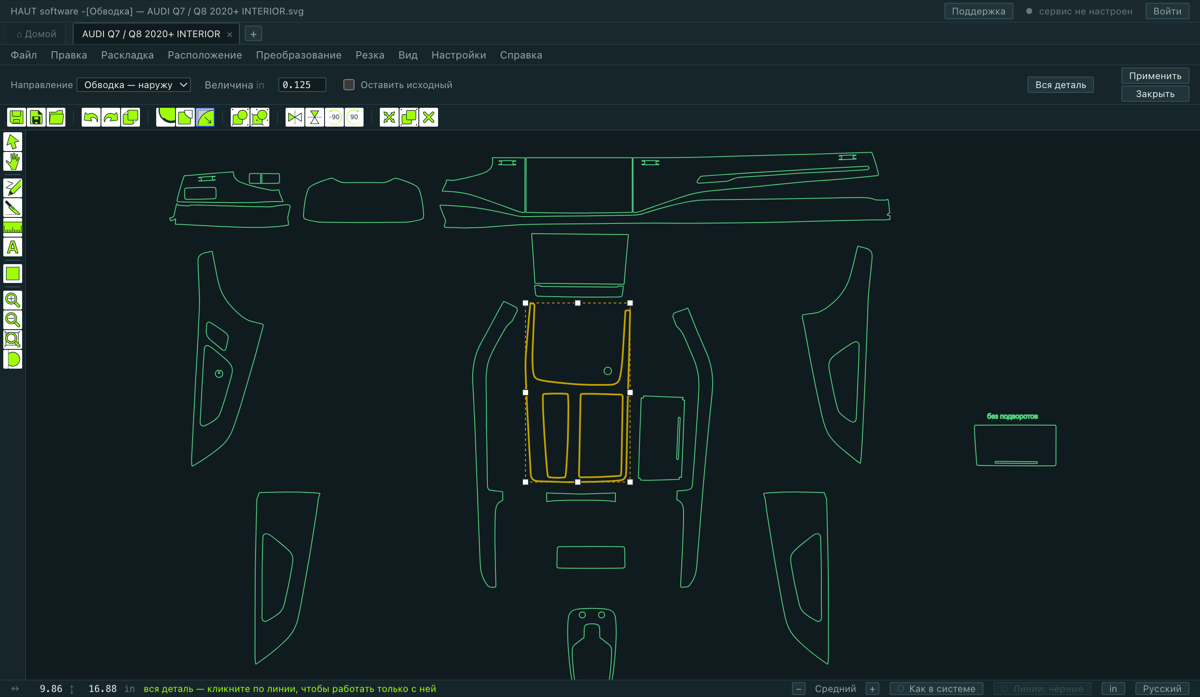
Преобразование ▸ Обводка / Втяжка…. Двигает контур наружу или внутрь на точную величину, сохраняя форму: углы остаются углами, а не скругляются.
- Направление
- Обводка — наружу прибавляет величину со всех сторон; Втяжка — внутрь на столько же ужимает.
- Величина
- Насколько. По умолчанию 0.125 in.
- Оставить исходный
- Оставить прежний контур рядом с новым. По умолчанию выключено, и это нарочно — резались бы оба.
- Вся деталь
- Сбросить выбранные линии, чтобы Apply снова покрыл все контуры детали.
Как и Подворот, он умеет работать по выбранным линиям: клик по линии выбирает её, Shift-клик добавляет или снимает. Выбранное и выращенное отверстие под датчик откроется шире, а остальная панель останется как нарисована.
6.4Нож — разрезать деталь надвое
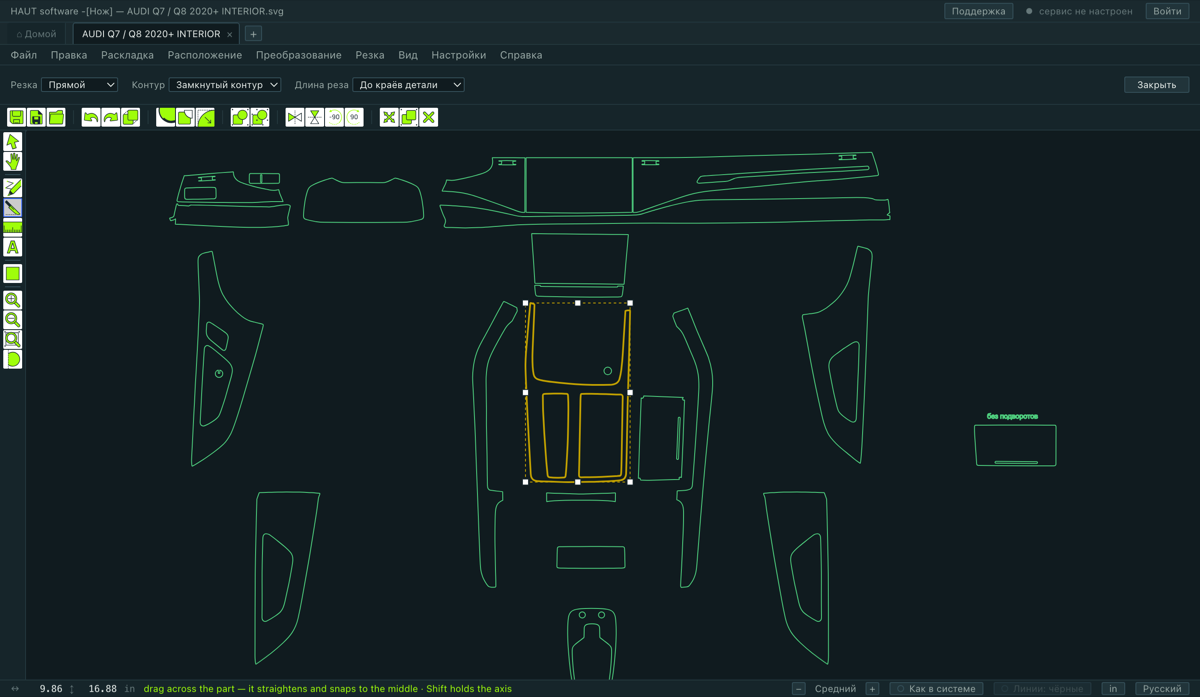
Взведите Нож в палитре, выделите детали, которые режете, и проведите линию поперёк. У полосы три поля, и они не зависят друг от друга.
- Резка — Прямой или Дугой
- Форма реза. Прямой: тянете поперёк деталей. Дугой: тянете хорду, потом ведёте, выгибая рез, и щёлкаете. Оба выпрямляются на горизонталь или вертикаль вблизи этих углов; Shift держит ось при любом угле.
- Контур — Замкнутый контур или Открытый контур
- Что рез оставляет. Замкнутый контур разваливает деталь на целые замкнутые куски, которые можно растащить, — это обычный рез. Открытый контур делает то же разделение в том же месте, но оставляет контуры вдоль реза разомкнутыми.
- Длина реза — До краёв детали или Только где провёл
- Насколько рез идёт. До краёв детали: короткий штрих делит всю деталь в этом месте. Только где провёл: рез — ровно та линия, что вы провели, и он кончается там, где кончилась рука.
Когда нож отказывает и почему
- Штрих, который не пересекает деталь, отвергается по имени. Линия внутри оконного проёма не касается плёнки — резать нечего.
- Рез — это штрих и ничего больше. Он не появится там, где вы не вели. Штрих по одному острову детали оставит остальные острова целыми, вместе с их отверстиями.
- «Только где провёл» может оставить один кусок, и это исход, а не отказ. Надрез поперёк узкой перемычки оставляет деталь целой, а рез всё равно в чертеже: под ножом плёнка по нему разойдётся.
6.5Правка узлов — работа с самой линией
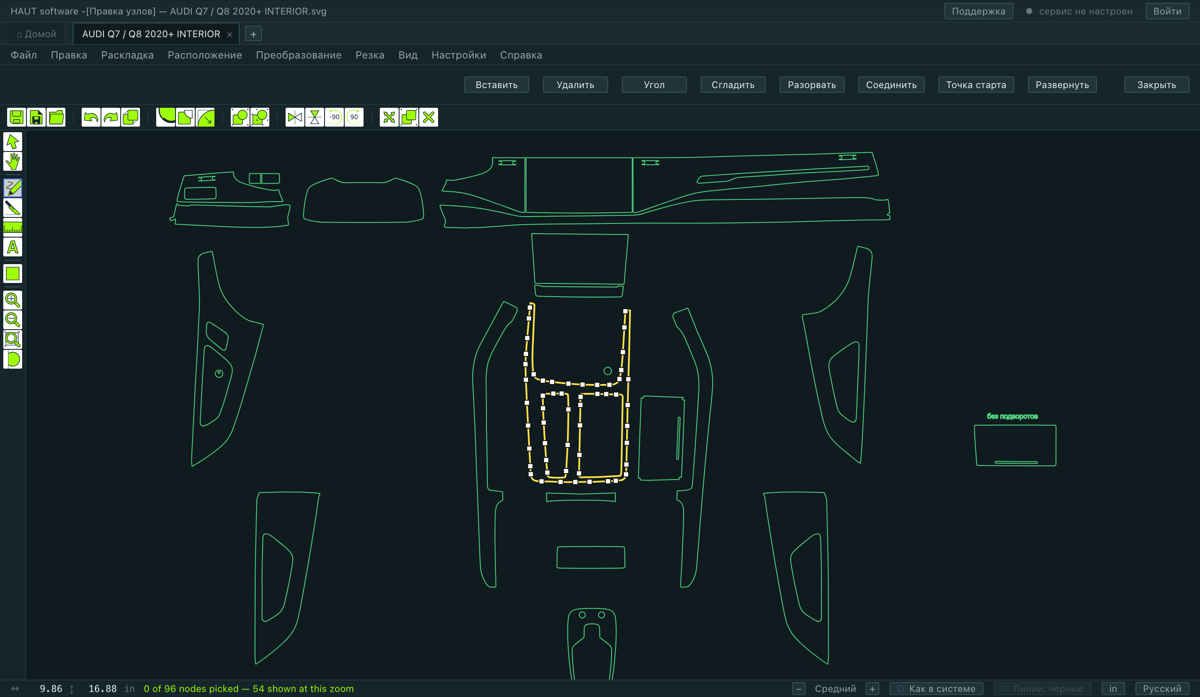
Двойной щелчок по детали или Правка узлов в палитре. Узлы детали появляются квадратиками: выбранный — залитый, невыбранный — колечко. Тяните узел, чтобы его двигать; тяните ручки, чтобы гнуть кривую.
На полосе и на правой кнопке
- Вставить
- Вставить узел — или двойной щелчок по линии там, где он нужен.
- Удалить
- Убрать выбранные узлы. Delete делает то же.
- Угол
- Сделать выбранные узлы жёсткими углами.
- Сгладить
- Уложить ручки выбранных узлов вдоль кривой, чтобы линия проходила гладко.
- Разорвать
- Разомкнуть контур в выбранном узле.
- Соединить
- Соединить два выбранных свободных конца — или замкнуть контур, если это его собственные два конца.
- Точка старта
- Начинать рез этого контура с выбранного узла.
- Развернуть
- Резать этот контур в обратную сторону. Это меняет то, как отходит плёнка, поэтому он здесь, а не в косметике.
На плотной детали рисуются не все узлы
Поставленная панель может нести четыреста узлов, и на том зуме, где видно всю деталь, квадратики касались бы друг друга и читались сплошной полосой. Поэтому программа рисует только те, которым хватает места, а нижняя строка говорит, сколько из общего числа показано. От указателя не скрыто ничего — ненарисованный узел по-прежнему выбирается щелчком по своему месту и тут же появляется.
6.6Упростить узлы
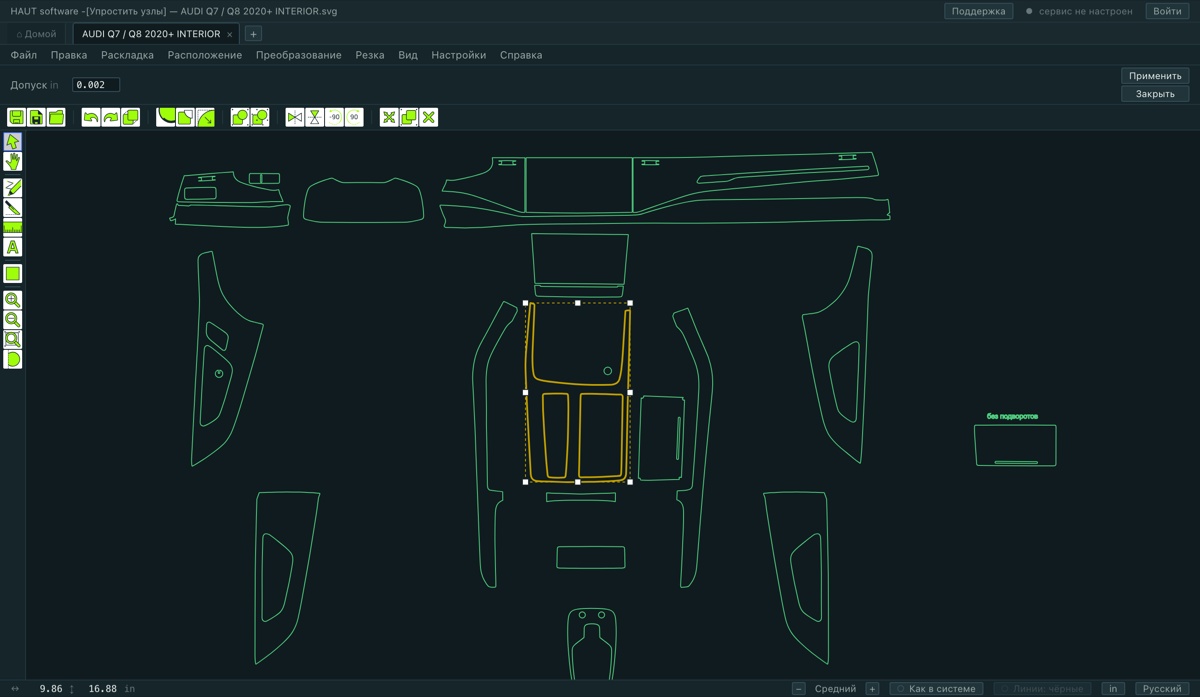
Расположение ▸ Упростить узлы… убирает те узлы, которые можно убрать, не сдвинув линию реза дальше, чем на заданный допуск. Узлы, несущие настоящую форму, остаются.
- Допуск
- Насколько линии реза позволено сдвинуться. Шаг плоттера — 0.001 in (0.025 мм), так что всё на этой величине и меньше машине не видно. По умолчанию 0.002 in.
Его стоит прогнать после смещения или булевой операции: обе возвращают ломаные с бо́льшим числом точек, чем форме нужно.
6.7Выборка — рамка, по которой отходит лишнее
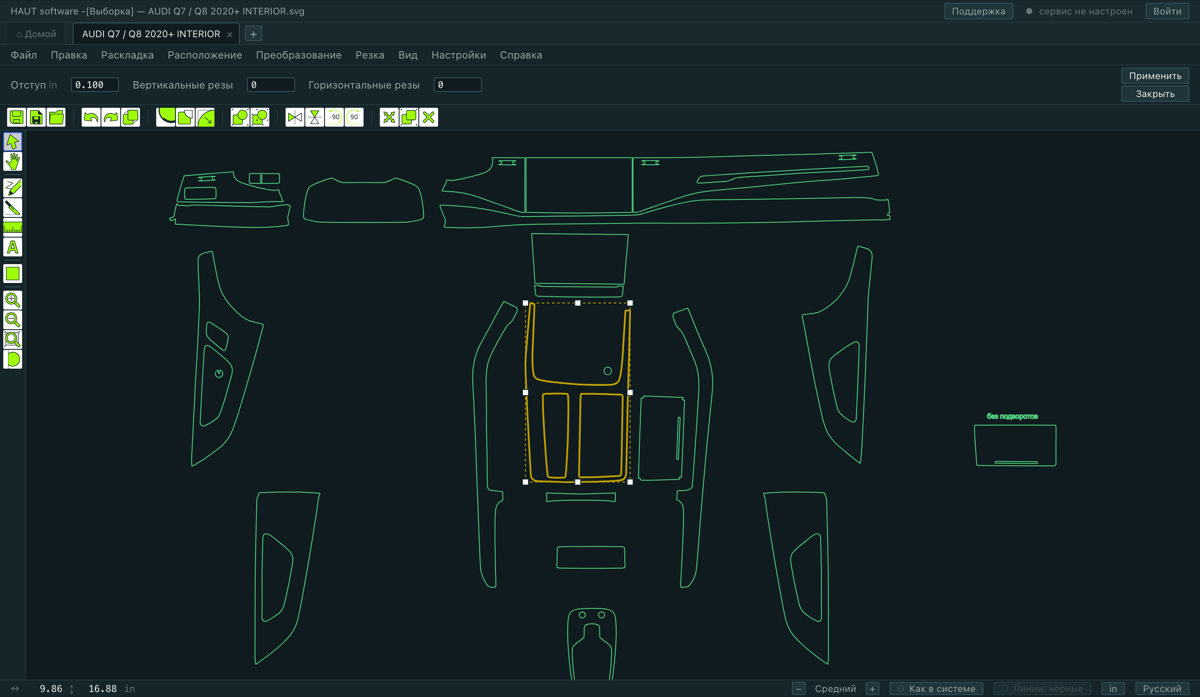
Преобразование ▸ Выборка… рисует линию реза вокруг выделенных деталей, чтобы лишняя плёнка снималась одним куском, а не выковыривалась.
- Отступ
- Насколько рамка идёт снаружи детали. 0.10 in — обычная величина в цехе.
- Вертикальные резы / Горизонтальные резы
- Дополнительные резы, которые делят отход на полосы, чтобы длинная работа снималась удобными кусками, а не одним неповоротливым листом.
6.8Текст, фигуры и размеры
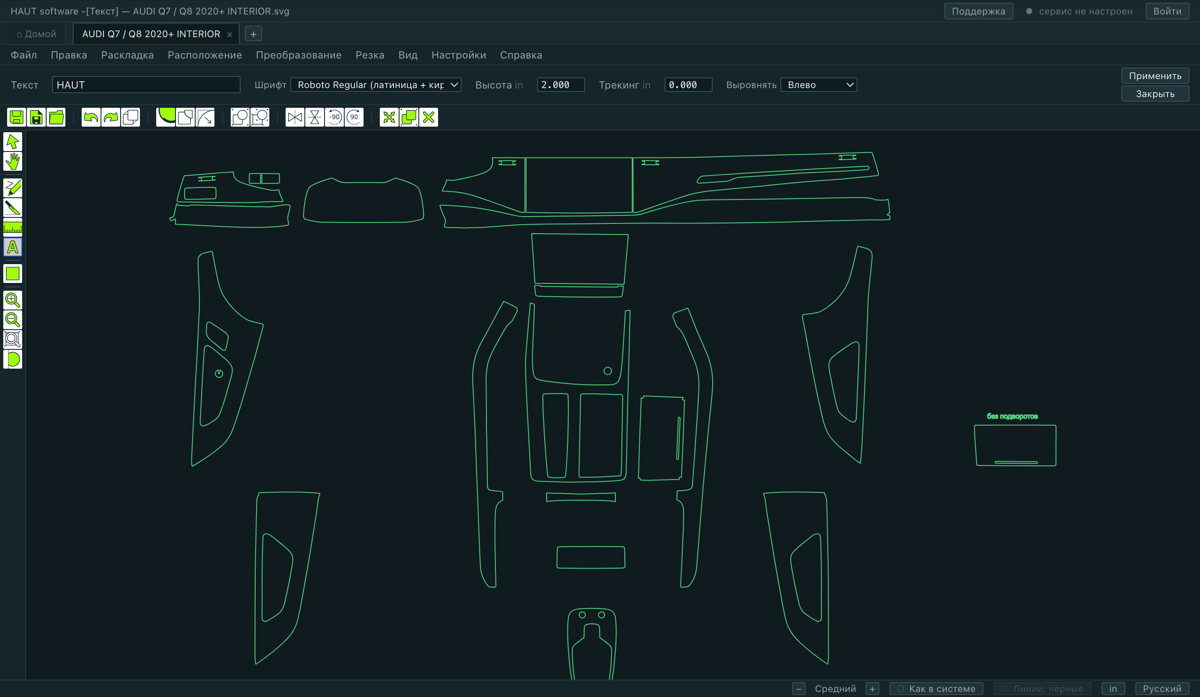
Текст
Преобразование ▸ Текст… или кнопка A в палитре. Наберите слова, выберите шрифт, задайте Высота (это высота прописной), поставьте на место. Трекинг разгоняет буквы; отрицательное значение их сжимает.
Преобразование ▸ Текст в кривые превращает текст в обычные контуры. Это нужно, когда буквы надо править по узлам, или перед тем как отдать чертёж туда, где нужного шрифта может не оказаться.
Фигуры
Кнопка фигур в палитре раскрывается вбок на пять: квадрат, круг, треугольник, звезда и многоугольник. Тяните по холсту, чтобы нарисовать. Нарисованная вами фигура — единственное в этой программе, чей размер можно задать руками: всё, что пришло из выкройки, защищено.
Размеры
Взведите Линейка и протяните между двумя точками. Размер остаётся на чертеже; он не режется и не входит в геометрию. Убрать один — правой кнопкой по детали, на которой он поставлен, и Delete Measurement; Вид ▸ Убрать все замеры убирает все.
6.9Контуры: объединить, разбить, замкнуть, кривые
- Объединить контуры
- Делает из нескольких контуров одну деталь с отверстиями. Так и собирается панель с вырезом под датчик: внутреннее кольцо становится отверстием, а не второй деталью.
- Разъединить контуры
- Обратное — каждый контур становится отдельной деталью. Нужно, когда отверстие надо подвинуть или удалить само по себе.
- Замкнуть открытые контуры
- Открытый контур — это рез, который не возвращается к своему началу. Эта команда их замыкает.
- В кривые
- Превращает ломаные обратно в кривые. Узлов становится сильно меньше, но линия может уехать дальше, чем от смещения — до шестой доли дюйма на контуре, пришедшем со смещения. Посмотрите на результат прежде, чем резать.
- Сгруппировать / Разгруппировать
- Ctrl+G и Shift+Ctrl+G. Группа двигается, поворачивается и режется как одно целое.
- Заблокировать объект / Разблокировать объект
- Запертую деталь нельзя случайно взять и сдвинуть.
6.10Зеркало, поворот и выравнивание
Всё в Преобразование и Расположение, а четыре самых ходовых — на панели.
- Отразить по горизонтали / Отразить по вертикали
- Отражает выделенное. Левая панель становится правой.
- Повернуть на 90° / Повернуть на −90°
- Четверть оборота. Для любого другого угла тяните ручку поворота в углу выделения.
- Выровнять
- Влево, по центру, вправо, вверх, по середине, вниз — и равные промежутки, по горизонтали или по вертикали.
- Разрезать пополам по горизонтали / Разрезать пополам по вертикали
- Делит выделенное линией через собственную середину. Длинная деталь, которая не ложится поперёк вашего рулона, делится двумя нажатиями, а не рисованием линии.
7.1Автонест
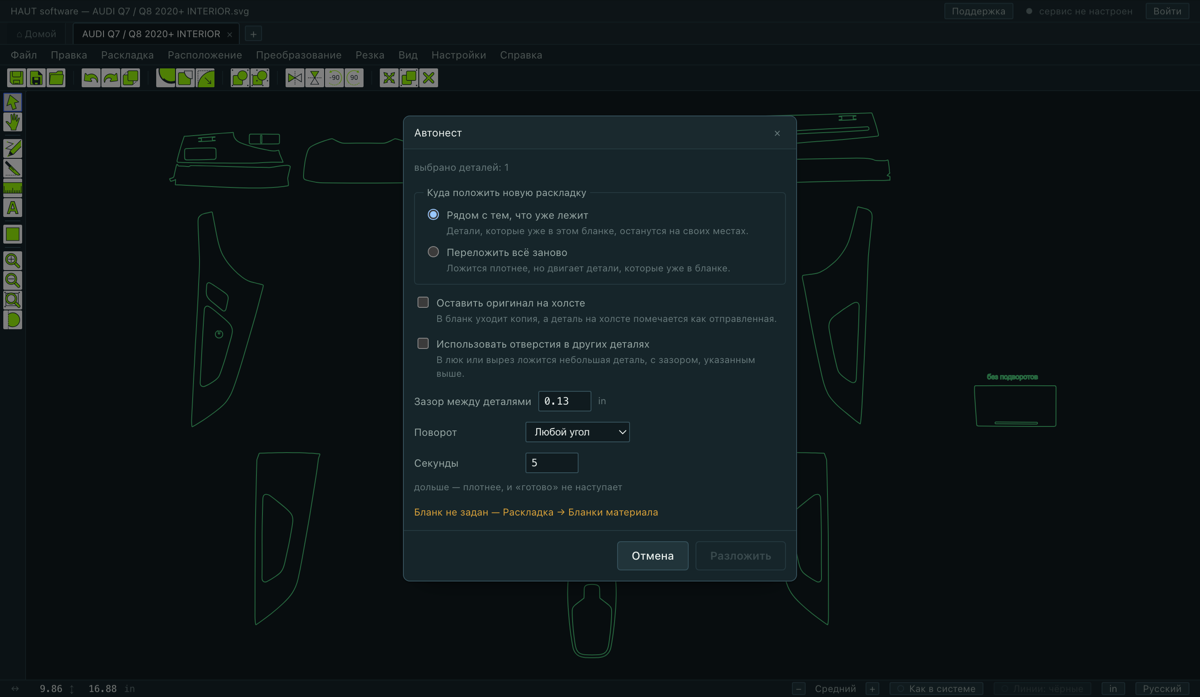
Вот это и экономит плёнку. Выделите детали, откройте Раскладка ▸ Автонест… — и программа уложит их на активный бланк настолько плотно, насколько успеет за отведённые секунды.
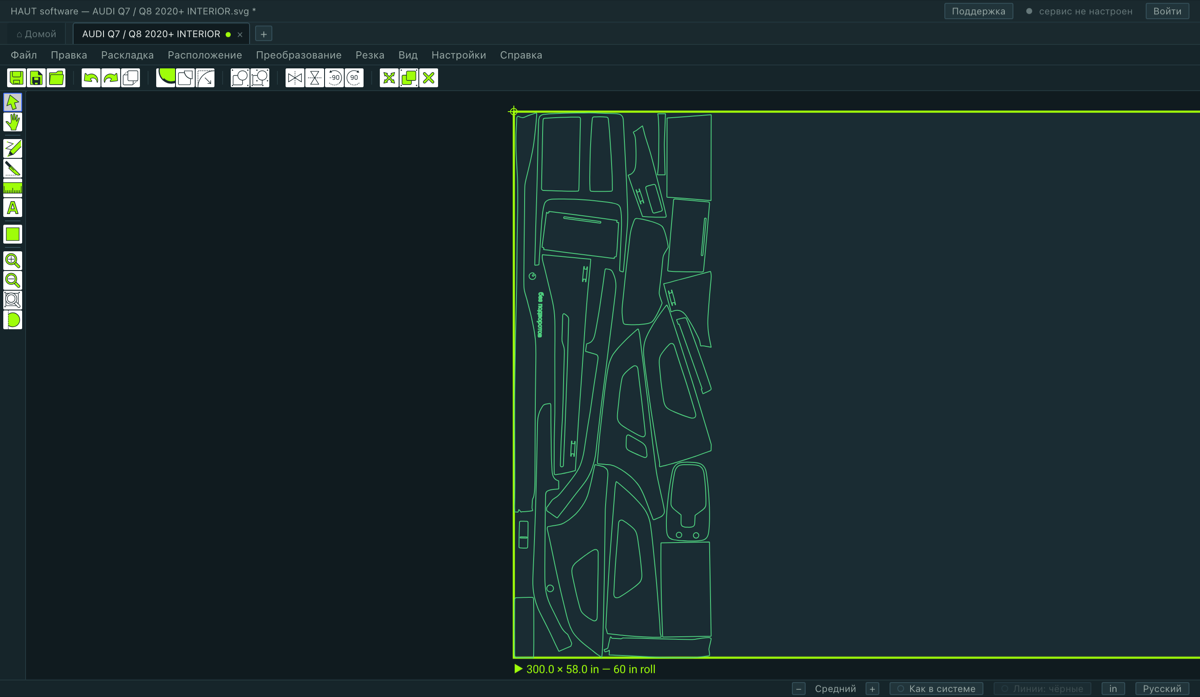
Окно
- Зазор
- Промежуток между деталями. Набирается один раз и запоминается — мастерская нестит со своим зазором каждый раз.
- Секунды
- Сколько солверу думать. Дольше — плотнее, с убывающей отдачей.
- Куда класть
- Рядом с тем, что уже лежит оставляет то, что уже на листе, ровно на месте и кладёт новую раскладку за ним. Переложить берёт лежащее вместе с выбранным и раскладывает всё заново. «Рядом» стоит по умолчанию, потому что это единственный из двух, который не может испортить работу, расставленную руками.
- Оставить оригинал на холсте
- В бланк уходит копия, а оригинал остаётся на месте и красится — чтобы мастер видел, что уже ушло в бланк, а что ещё нет.
- Класть в отверстия других деталей
- Укладывает мелкие детали внутрь пустых серединок крупных — крыша с люком, дверь с окном. По умолчанию выключено: лист, на котором деталь лежит внутри другой, читается как наложение тем, кто этого не просил. Стоит примерно вдвое большего ожидания, потому что лист решается дважды.
Что он говорит после
Заметка называет, сколько дюймов рулона ушло и какая вышла плотность, а если детали уехали в отверстия — то сколько. Раскладка, внезапно ставшая на треть короче с как будто пропавшей деталью, — это работа, которую иначе пойдут проверять руками.
Два способа положить одну деталь
- Добавить на бланк
- Находит выделенным деталям место, не двигая то, что уже лежит. Это половина «по одной»: мастер передумал, и надо доложить ещё один кусок.
- Групповой нест
- Делает всё, что на активном бланке, одним объектом, чтобы раскладка тащилась, поворачивалась и резалась как одно целое.
Как снять детали обратно
- Убрать выбранные
- Снимает выделенные детали с плёнки и возвращает туда, откуда они пришли. Копия удаляется, и метка снимается с оригинала; ехавшая деталь поворачивается назад и встаёт на свой прежний центр. Delete над разложенными деталями делает то же и перекладывает остаток.
- Сбросить всё
- Снимает с активного бланка всё.
7.2Проверить раскладку до реза
- Резка ▸ Проверить наложения
- Не легли ли детали друг на друга? Две детали, делящие плёнку, — это две испорченные детали, и этот вопрос задают до того, как тронется нож.
- Резка ▸ Общая площадь объектов
- Настоящая замкнутая площадь выделенного — или всего чертежа, если не выделено ничего.
- Раскладка ▸ Показать детали, которые не влезают
- Какие детали не лягут поперёк активного бланка.
8.1Отправить задание
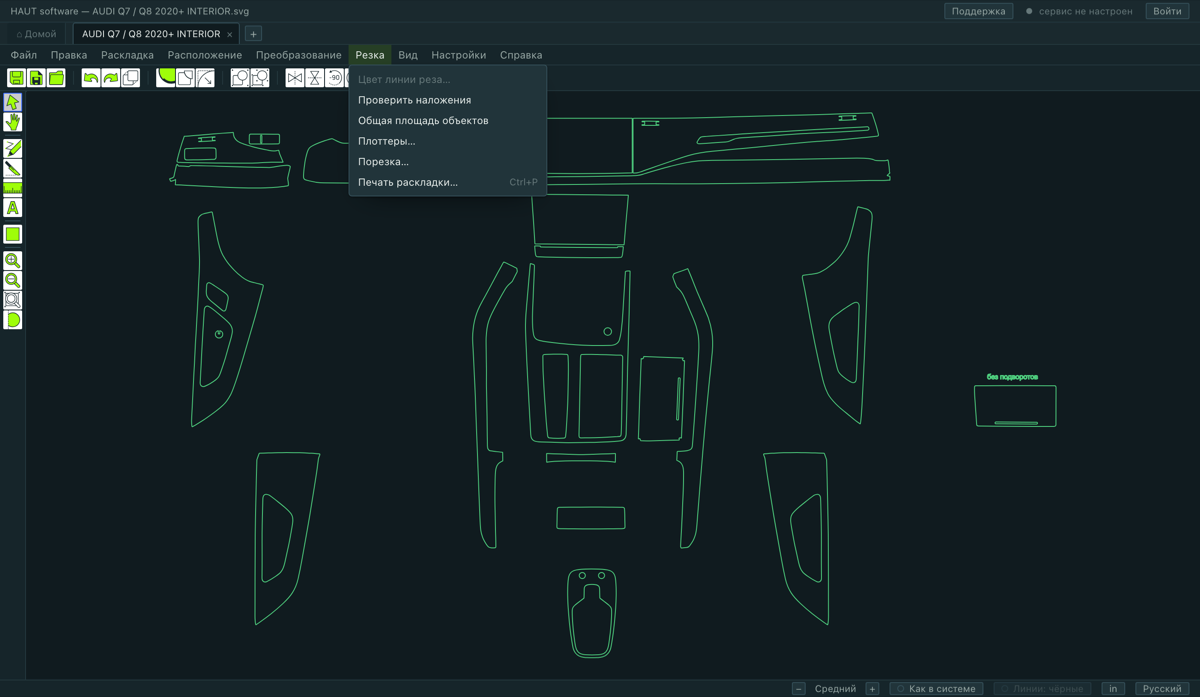
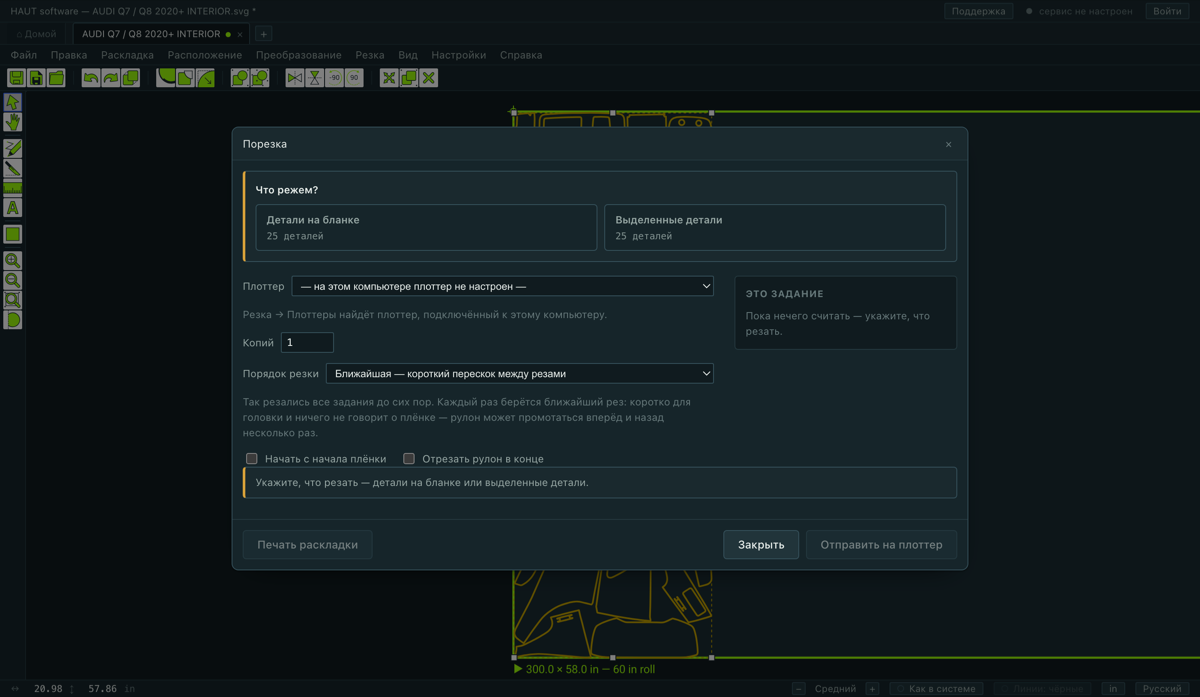
Резка ▸ Порезка…. Окно сперва задаёт один вопрос, в своей рамке наверху: что режем? — детали на бланке или выделенные детали. Пока на него не ответили, живого там нет ничего.
- Плоттер
- Какой плоттер. Если написано, что плоттер не настроен, сперва в Плоттеры….
- Копий
- Сколько раз резать то же задание.
- Порядок резки
- Порядок, в котором идёт нож. Ближайшая — короткий перескок между резами берёт каждый раз ближайший рез — коротко для головки, и так резались все задания до сих пор. Змейка идёт полосами вдоль рулона, одна полоса поперёк плёнки, следующая обратно, и мотает заметно меньше плёнки. По умолчанию ближайший, и ничей порядок не меняется, пока не попросят.
- Начать с начала плёнки
- Сдвигает задание так, чтобы первый рез оказался в нуле, вместо того чтобы машина мотала до места, где детали оказались на холсте. По умолчанию выключено: деталь, намеренно положенную дальше по рулону, чтобы обойти брак на плёнке, двигать без спроса нельзя.
- Отрезать рулон в конце
- Закончить тем, что плёнка встанет под нож кросс-ката.
Два числа, которые читают до нажатия
- Вдоль рулона — сколько плёнки берёт само задание.
- До первого реза — сколько машина промотает, прежде чем нож чего-нибудь коснётся. Выше фута программа предупреждает: на обрезке это плёнка, которая сходит с прижимных роликов, и вернуть её нечем.
Карта
Окно рисует детали в том порядке, в каком их возьмёт нож, холостые ходы пунктиром и номер детали на ней — и проигрывает это. Порядок приходит оттуда же, откуда сам рез, поэтому картинка с машиной разойтись не может.
Что машина оставляет себе
Сила, скорость и смещение ножа не шлются никогда. Их ставят на панели самого плоттера, где мастер видит плёнку и чувствует рез. В конце задания каретка возвращается в начало координат.
8.2Печать раскладки на бумаге
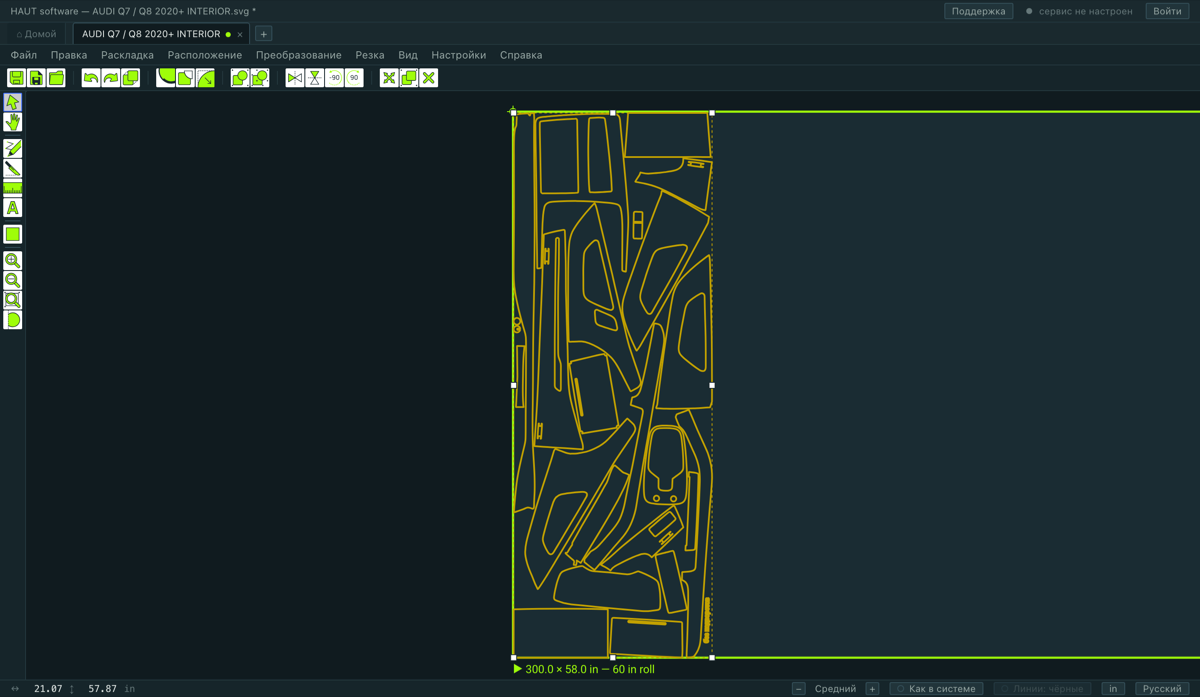
Резка ▸ Печать раскладки… или Ctrl+P. Печатает пронумерованную карту деталей на бланке, на A4, чтобы выбранный кусок можно было отличить от соседнего на столе.
Это и предложение клиенту из расчёта — единственные две вещи, которые эта программа кладёт на бумагу. Print-and-cut и RIP нет и не будет.
9.1Пакеты — как вы это продаёте
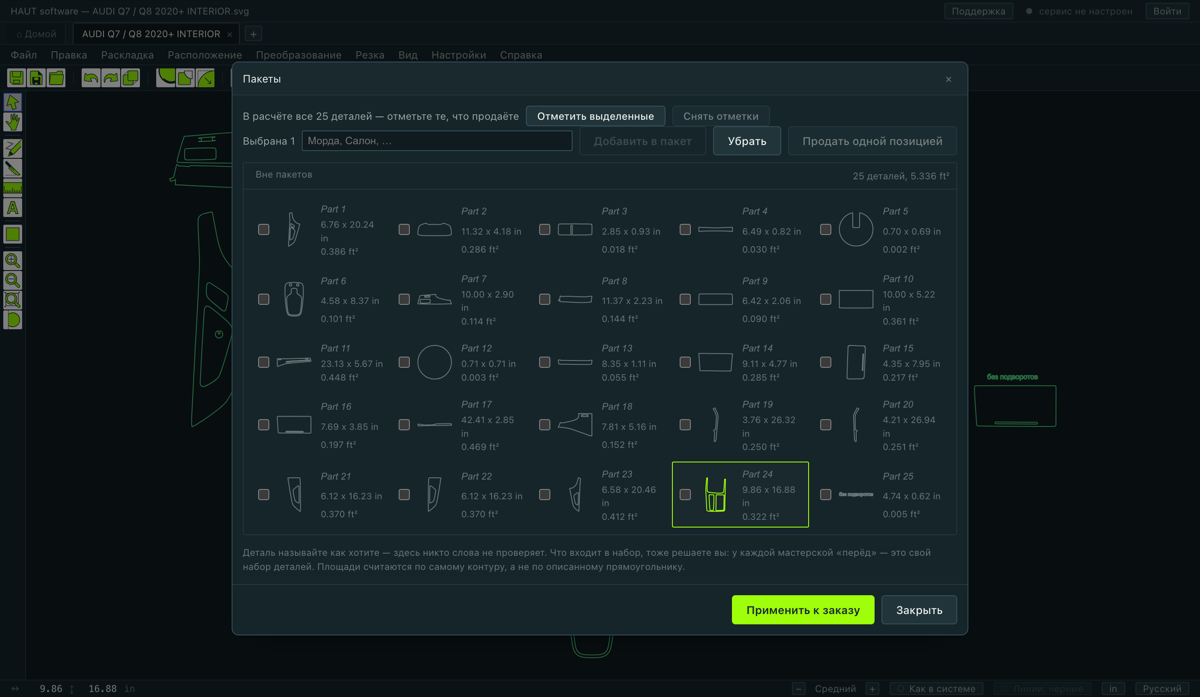
Файл ▸ Пакеты…. Клиент не покупает двадцать пять контуров — он покупает перёд и комплект дверей. Пакет — это оно: именованная группа деталей, которую расчёт считает, а предложение печатает одной строкой.
- Выделите детали, откройте окно и положите их в пакет.
- Назовите пакет так, как его прочтёт клиент.
- Деталь можно назвать и отдельно — тем, что клиент прочтёт в предложении, а не именем из чертежа.
- Всё, что не в пакете, считается само по себе.
9.2Расчёт стоимости
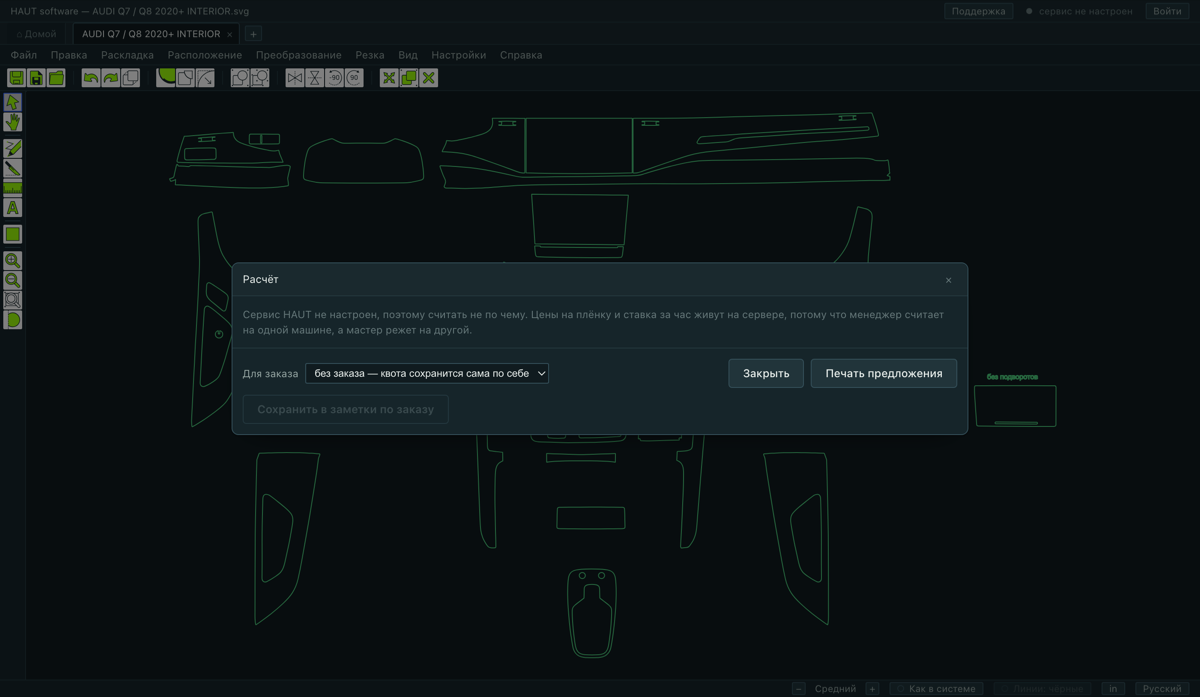
Файл ▸ Расчёт стоимости…. Один экран: во что работа обходится мастерской и за сколько продаётся.
Два режима
- С работой
- Плёнка и часы. Это работа, которую вы клеите.
- Только нарезка
- Только плёнка. Часы остаются на чертеже и не берутся в расчёт — поэтому уровень сложности и мастер спрятаны: без часов им нечего умножать и некому платить. Переключитесь обратно — набранное на месте.
Как считается плёнка
Только выделенное
Расчёт — про выделенные детали и ни про что больше. Строка рядом с галочкой говорит, скольких деталей чертежа расчёт не касается, чтобы деталь не выпала из заказа молча. Откройте экран без выделения — он посчитает весь чертёж.
Скидка, налог и карта
Порядок жёсткий, и он не общепринятый — ошибиться в нём это не копейка округления:
нетто = сумма − скидка
налог = нетто × ставка
карта = (нетто + налог) × ставка
итого = нетто + налог + карта
- Скидка бывает процентом или фиксированной суммой и применяется ко всему расчёту, до налога.
- Налог применяется не всегда — физлицу выставляют без него, а та же мастерская юрлицу с ним. Это факт об этом расчёте, поэтому он хранится на чертеже.
- Комиссия карты берётся от суммы с налогом и выставляется вручную — не всегда.
- Незапрошенная строка отсутствует, а не равна нулю. «Скидка 0» в предложении клиенту — это строка, о которой спрашивают.
Фраза клиенту
Есть поле для одного комментария на весь расчёт. Он доходит до напечатанного предложения — под итогом, над постоянными условиями мастерской, — до сохранённой копии и до архива с поиском.
Сохранение
Сохранение в заметки по заказу замораживает расчёт: то, что клиенту уже сказали, стоит, что бы потом ни делали ставки. Мастерская, открывшая чертёж через месяцы, вполне может увидеть на экране цифру, отличную от бумажной, — и это правильно.
10.1Если что-то не так
Пишет, что на этом компьютере нет лицензии, а лицензия оплачена и действительна
Плоттера нет в списке
Нажал резать — у машины ничего не произошло
Каталог пуст или собственные чертежи не открываются
Ни одна строка расчёта не имеет цены
Нож отрезал больше, чем я провёл
Нож ничего не сделал и сказал, что линия не пересекает деталь
Автонест отказывается работать
При разворачивании окна часть его остаётся пустой
Отправил заявку и ничего не услышал
Меня выкинуло на втором компьютере
Деталь шире моей плёнки
10.2Как получить помощь
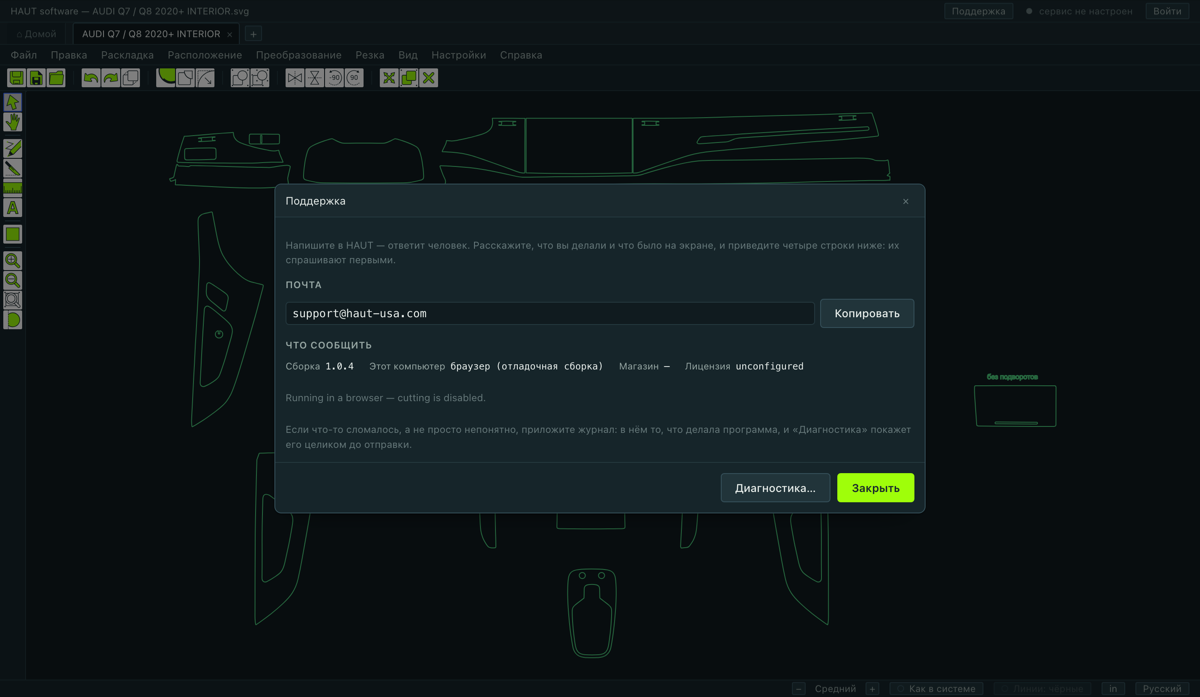
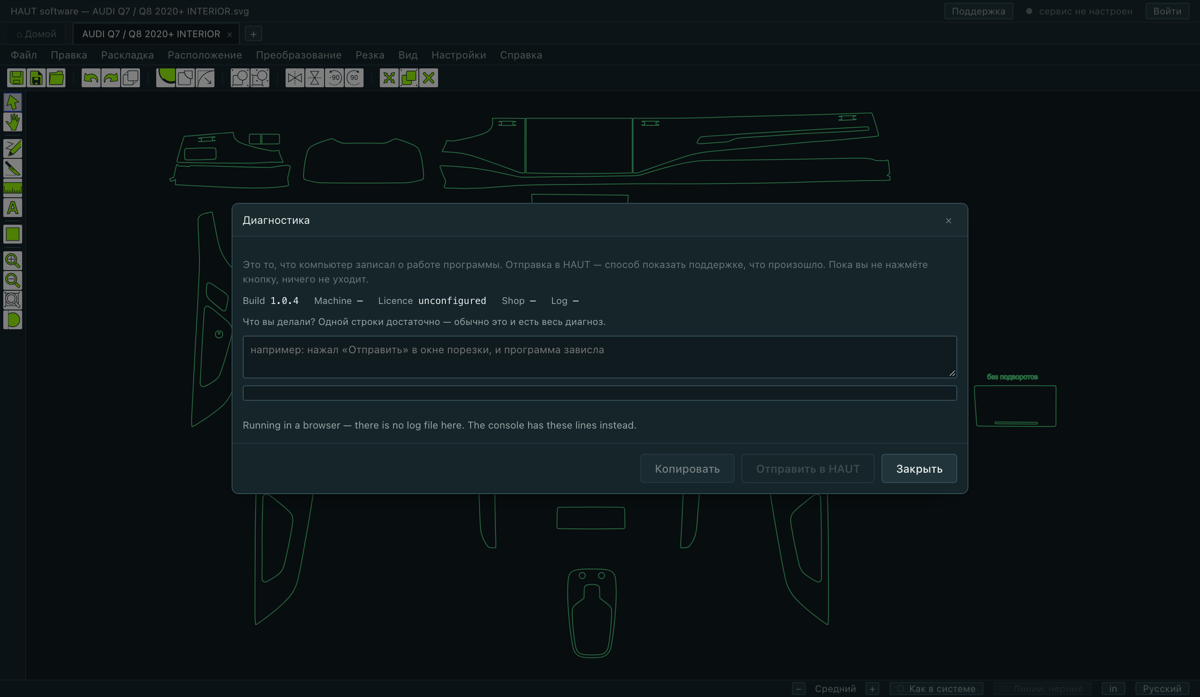
Справка ▸ Поддержка… держит поле для сообщения. Напишите, что случилось, и отправьте — четыре факта, с которых начинается любой разговор с поддержкой, уходят вместе с ним сами: какая мастерская, какой аккаунт, какая сборка, какая машина. Искать их не надо.
Адрес стоит под полем как запасной путь — на случай, когда не работает как раз сам сервис.
Диагностика
Справка ▸ Диагностика… — это отчёт, который прикладывают, когда что-то не так и никто не видит почему. Он несёт сборку, состояние лицензии, плоттер, под который настроен компьютер, и лог того, что программа делала. Шлите его с первым письмом, а не с третьим — обычно ответ лежит в нём.
10.4Клавиатура и мышь
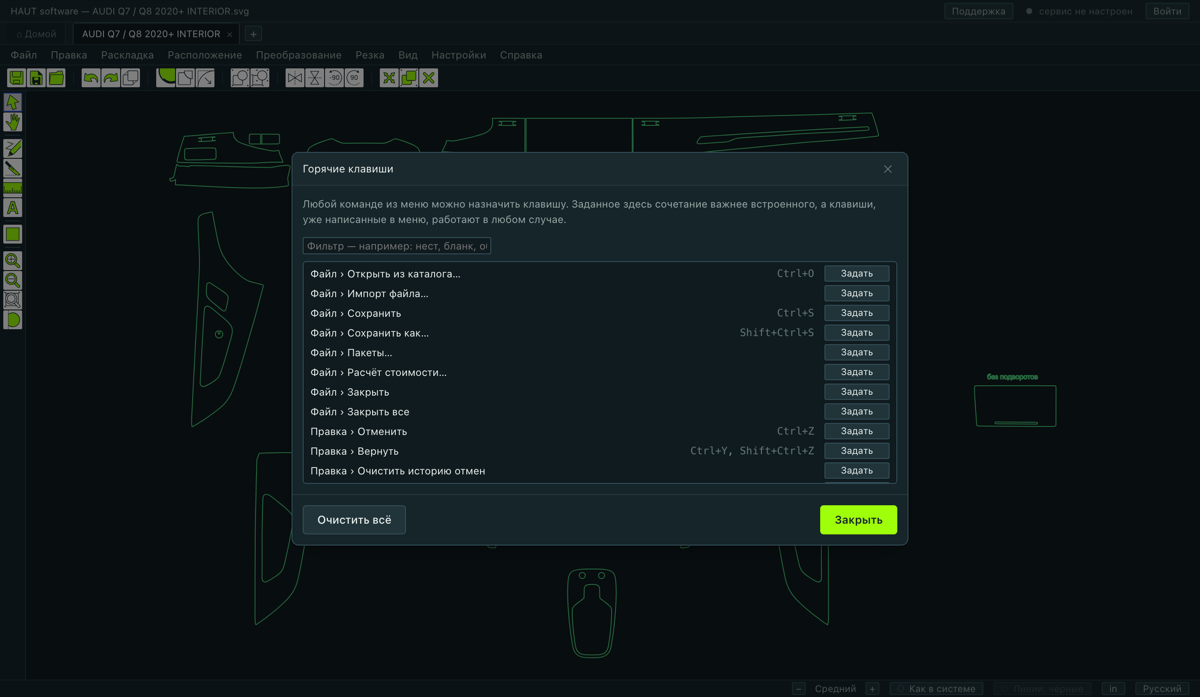
Всему, у чего своей клавиши нет, её можно назначить в Настройки ▸ Горячие клавиши….
Файлы
| Ctrl+O | Открыть из каталога |
|---|---|
| Ctrl+S | Сохранить |
| Shift+Ctrl+S | Сохранить как |
| Ctrl+P | Печать раскладки |
Правка
| Ctrl+Z | Отменить |
|---|---|
| Ctrl+Y / Shift+Ctrl+Z | Вернуть |
| Ctrl+X | Вырезать (внутри программы) |
| Ctrl+C | Копировать |
| Ctrl+V | Вставить |
| Ctrl+D | Дублировать |
| Delete / Backspace | Удалить — или снять с бланка |
| Ctrl+A | Выделить всё |
| Esc | Снять выделение |
| Ctrl+G | Группировать |
| Shift+Ctrl+G | Разгруппировать |
| Стрелки | Подвинуть — Shift для крупного шага |
Вид
| F8 | Показать всё |
|---|---|
| F7 | Показать выделенное |
| F9 | Показать бланк |
| F6 | На шаг от себя |
| Shift+F6 | На шаг к себе |
| + / − | Ближе / дальше |
| Ctrl+Alt+= / Ctrl+Alt+− | Размер интерфейса больше / меньше |
Инструменты и направляющие
| S | Инструмент выбора |
|---|---|
| V | Вертикальная направляющая |
| H | Горизонтальная направляющая |
Мышь
| Колесо | Зум с центром под курсором |
|---|---|
| Пробел + тяга | Двигать холст |
| Средняя кнопка + тяга | Двигать холст |
| Двойной щелчок по детали | Правка узлов |
| Двойной щелчок по бланку | Сделать его активным |
| Правая кнопка | Что здесь можно сделать |
| Alt при перетаскивании | Магнит выключен |
| Shift при рисовании реза | Держать ось |
1.1Qué es este programa
HAUT software acomoda patrones de wrap y PPF y los corta en su plotter. Hace tres cosas y no finge hacer más: abre un patrón, acomoda las piezas sobre la lámina que usted tiene cargada y manda el corte a la máquina.
- Los patrones vienen del catálogo HAUT. Usted elige un carro y el kit se abre. También puede importar un dibujo propio.
- El acomodo es automático. El programa empaca las piezas en el ancho de rollo que usted indique e informa cuántas pulgadas de lámina lleva el trabajo.
- El corte va directo al plotter, por la cola de impresión que el sistema operativo ya le crea.
- La cotización está incluida. Lo que el trabajo le cuesta al taller y en cuánto se vende, en una sola pantalla y en una sola hoja para el cliente.
1.2Descargar e instalar
Hay una sola dirección, y siempre entrega la compilación más nueva:
Windows
- Abra el enlace de Windows. El navegador guarda un archivo cuyo nombre termina en
-setup.exe. - Ejecútelo. Windows puede decir que el editor es desconocido — presione Más información y luego Ejecutar de todas formas.
- El programa se instala y arranca. Durante la instalación no hay nada que elegir.
macOS
- Abra el enlace de macOS. El navegador guarda un archivo
.dmg. - Ábralo y arrastre HAUT software a la carpeta Aplicaciones.
- Ábralo desde Aplicaciones. El primer arranque tarda unos segundos más mientras macOS revisa la firma.
Actualizaciones
El programa busca una compilación más nueva cada cuatro horas y en cada arranque. Cuando la hay, lo dice y la instala en el siguiente reinicio. Nunca hay que volver a la página de descarga.
1.3Solicitar una cuenta de taller
La cuenta se otorga, no se toma. No hay registro: usted envía una solicitud, una persona de HAUT la lee, y el taller con su licencia nacen en el momento de la aprobación. Para una solicitud rechazada no se crea nada — por eso todavía no se elige contraseña.
- Abra el programa. En la pantalla de acceso presione Solicitar una cuenta de taller.
- Llene el formulario. Todos los campos son obligatorios salvo los que un negocio honesto puede no tener — número de IVA, certificado de reventa, oficina en la dirección, dirección de entrega aparte.
- Dé un enlace por cada uno de los tres: su sitio, un perfil social y una ficha en mapas. Si de alguno no tiene, marque la casilla que lo dice — esa es una respuesta real, no un vacío.
- Responda la declaración sobre si trabaja para una empresa que hace software o catálogos de patrones PPF. Responder sí no rechaza la solicitud; abre un campo donde se nombra la relación, y decide una persona.
- Envíela. La pantalla le da una referencia. Guárdela: así consulta qué pasó sin tener cuenta.
Cómo consultarla
En la pantalla de acceso, Consultar una solicitud toma la referencia y dice en qué va: en revisión, aprobada, o no aprobada con las palabras de quien revisó. Si no fue aprobada, puede corregir y volver a solicitar cuando esté resuelto.
1.4El código de invitación y el primer acceso
Cuando la solicitud se aprueba, HAUT envía un código de invitación al correo que figura en ella. Ese es el momento en que se elige contraseña.
- En la pantalla de acceso presione Tengo un código de invitación.
- Escriba el código, el correo al que llegó la invitación y una contraseña de al menos ocho caracteres.
- Lea los Términos del servicio y la Política de privacidad y marque la casilla.
- Presione Unirme al taller. Ya está dentro, la licencia toma un lugar en esta computadora y el catálogo se abre.
Lugares
Una licencia trae dos lugares — dos computadoras. Los toman las dos primeras máquinas en las que usted entre. Una tercera se rechaza por su nombre en vez de sacar a alguien, porque la máquina que sacaría podría estar cortando. Para mover un lugar, cierre sesión en la máquina que ya no lo necesita, o escriba a HAUT.
Si olvida la contraseña
En la pantalla de acceso, ¿Olvidaste tu contraseña? manda un enlace al correo al que se emitió la licencia. Abra el enlace, elija una contraseña nueva y entre aquí con ella.
1.5Conectar el plotter
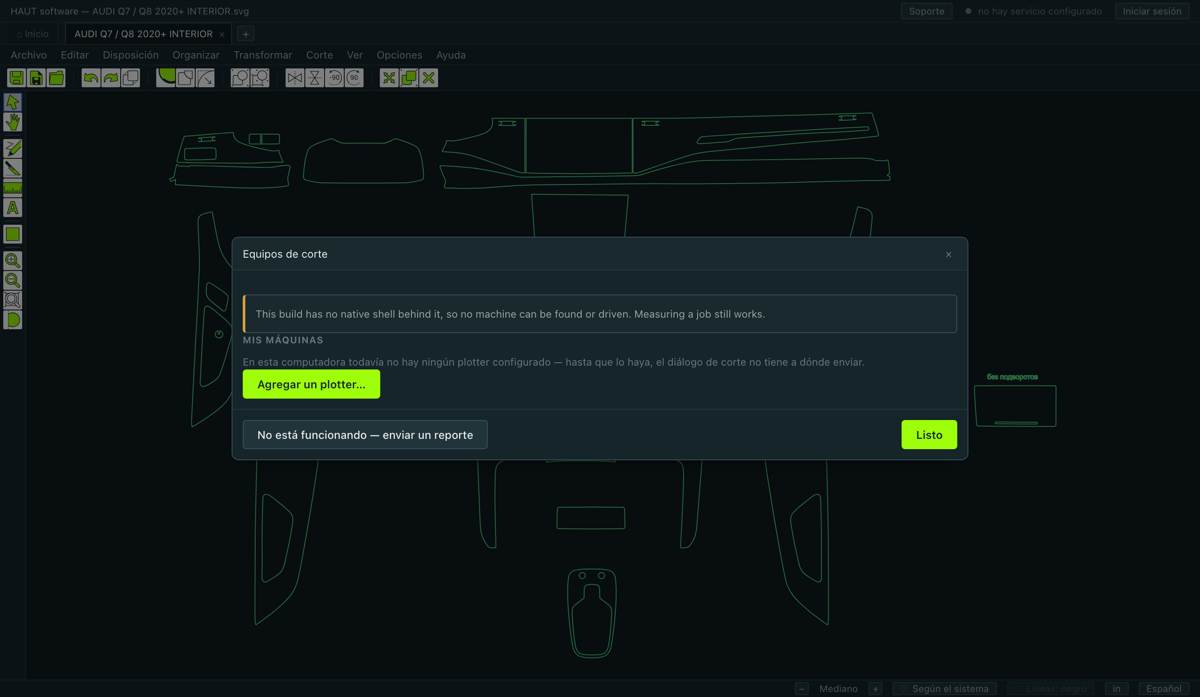
Haga esto ahora, antes de abrir su primer patrón. Se configura una vez y nunca más, y es el paso que más tiempo cuesta cuando se deja para cuando la lámina ya está cargada.
El programa habla con el plotter por la cola de impresión que le crea el sistema operativo, así que la máquina tiene que existir allí antes de poder aparecer aquí.
Windows
- Conecte el plotter con el cable USB y enciéndalo.
- Abra Configuración → Bluetooth y dispositivos → Impresoras y escáneres (o el viejo Panel de control → Dispositivos e impresoras).
- Si el plotter ya está ahí, ábralo, vaya a Propiedades de impresora → Puertos y anote el puerto — USB001, USB002 o similar. Luego salte al paso del nombre.
- Si no está, presione Agregar dispositivo y después La impresora que quiero no está en la lista.
- Elija Agregar una impresora local o de red con configuración manual.
- Como puerto tome el USB00… en el que está el plotter. Si la máquina está en red, elija Puerto TCP/IP estándar, escriba su dirección y deje el tipo en RAW en el puerto 9100.
- Como controlador elija fabricante Generic e impresora Generic / Text Only. Es a propósito: este programa manda el archivo de corte a la máquina sin tocarlo, y un controlador de impresora de verdad lo reescribiría en algo que un plotter no puede leer.
- Nómbrelo HAUT, luego su marca y modelo. No lo comparta. Termine.
macOS
- Conecte el plotter con el cable USB y enciéndalo.
- Abra Ajustes del Sistema → Impresoras y escáneres. Un plotter USB suele aparecer solo — si ya está en esa lista, listo.
- Si no está, presione Añadir impresora, escáner o fax… y espere unos segundos en la pestaña Por omisión a que aparezca la máquina.
- Si el plotter está en red en vez de cable, use la pestaña IP: escriba su dirección, elija el protocolo HP Jetdirect – Socket y deje el puerto en 9100.
- Lo que ofrezca en «Usar:» está bien — este programa manda el archivo de corte sin tocarlo y el controlador nunca lo ve. Si no ofrece nada, elija «Seleccionar software…» y tome Generic PostScript Printer.
- Póngale el nombre HAUT … y presione Añadir.
Por qué importa el nombre
El programa vuelve a leer el nombre de la cola. Una cola llamada HAUT … se toma como el plotter y se ofrece sola, porque ese nombre lo escribió alguien que veía el cable — y eso vence a cualquier suposición que el programa pueda hacer por marca o puerto. Una cola con otro nombre igual funciona; sólo queda en la lista larga detrás del botón que muestra todos los puertos.
1.6El cuadrado de prueba — lo que prueba que corta
Corte ▸ Equipos de corte… lista las máquinas para las que está configurada esta computadora. Una vez elegida una, presione Cortar un cuadro de prueba.
La máquina corta un cuadradito. Después el programa hace una sola pregunta: ¿se movió la cuchilla?
- Sí — la máquina queda marcada como probada, con la fecha. Eso es lo que aquí significa «conectada».
- No se movió nada — la respuesta nombra las tres cosas a revisar, en el orden en que se revisan: el panel no está en HP-GL, es la cola equivocada, o la cuchilla no está abajo.
Qué controlador se usa
Una cola cuyo nombre el programa reconoce se pone en el controlador propio de esa máquina, si ese controlador es de los que está probado que cortan. Si no, va al controlador HP-GL estándar, que sí corta — y la línea bajo la máquina lo dice, y dice que el límite de ancho propio de la máquina no se usa y que la plancha es lo que acota el trabajo.
2.1La pestaña Inicio
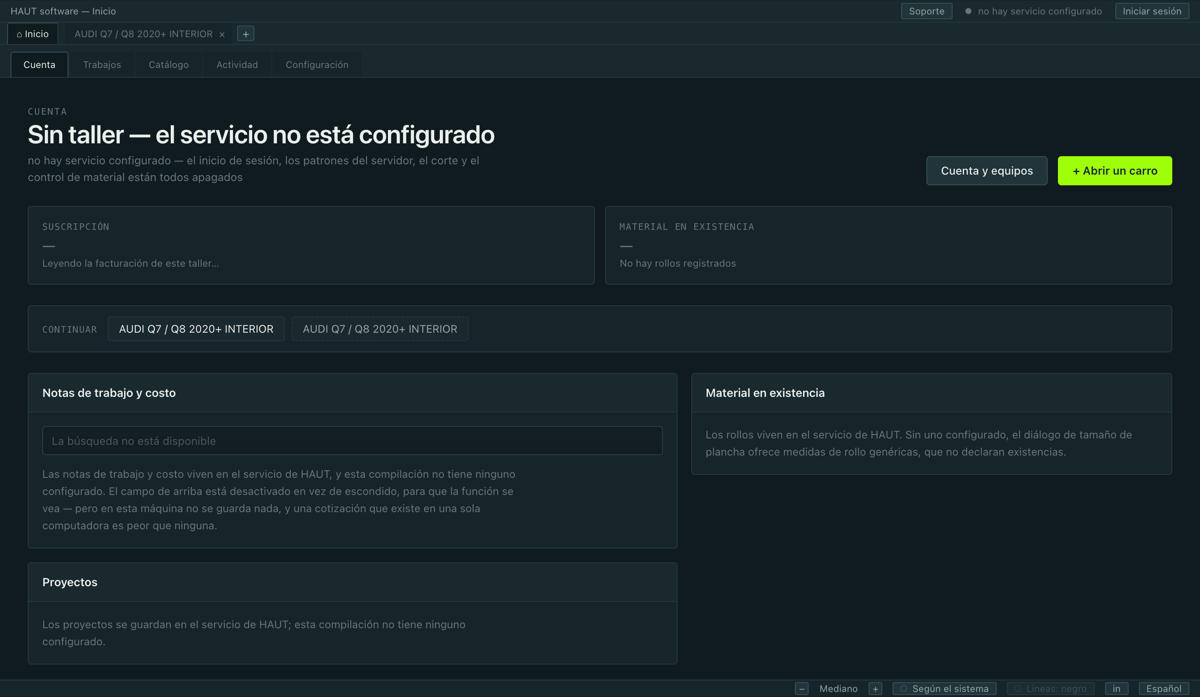
Inicio es la pestaña más a la izquierda y siempre está. Todo lo que es del taller y no de un dibujo vive ahí, en caras entre las que se cambia:
- Catálogo
- Los patrones que su licencia le deja ver. Aquí empieza un trabajo — vea el capítulo siguiente.
- Trabajos
- Las cotizaciones que este taller archivó, con búsqueda. Una cotización guardada aquí queda congelada: lo que se le dijo al cliente queda.
- Ajustes
- Las cifras propias del taller — tarifa por hora, precios de lámina, el margen sobre material, instaladores, niveles de dificultad, impuesto, y el nombre del negocio que va en una propuesta impresa.
- Facturación
- La suscripción, y la compra de lámina y herramientas a HAUT donde eso aplique a su taller.
2.2Las cifras del taller, escritas una vez
Inicio ▸ Ajustes guarda lo que una cotización lee en vivo: cambie una tarifa ahí y toda cotización posterior la usa, mientras que una ya archivada conserva las cifras con que se costeó.
- Cuánto vale una hora
- Dos números: lo que usted cobra por una hora y lo que una hora le cuesta. La diferencia es el margen de la mano de obra.
- Margen sobre material
- Un multiplicador sobre lo que la lámina le costó. ×2.5 vende la lámina a dos veces y media lo que usted pagó. Nada en una cotización tiene precio hasta que esto se fije: es el único número sin el cual la pantalla no calcula, y se escribe una vez.
- Lámina en existencia
- Cada lámina con la que trabaja, y lo que usted paga por ella — no por lo que la vende. El margen de arriba hace la venta.
- Niveles de dificultad
- Un nombre y un multiplicador. El nivel multiplica el trabajo, no el total: la lámina cuesta lo mismo sea lo que sea que se le pegue.
- Instaladores
- Quién hace el trabajo y cuánto vale su hora si difiere de la del taller. A un instalador se le puede pagar por hora o por un porcentaje del trabajo — hay talleres con ambos.
- Impuesto
- Cómo se llama la línea de impuesto en sus propuestas, y la tasa. Deje el nombre vacío y se usa la palabra propia del mercado.
- Comisión de tarjeta
- Lo que le cuesta la tarjeta. Se cobra sobre la suma con el impuesto encima, y está apagada salvo que una cotización la pida.
- Membrete
- El nombre del negocio que va en una propuesta impresa. Sin él, una propuesta no llevaría ningún nombre.
2.3Licencia, lugares y equipos
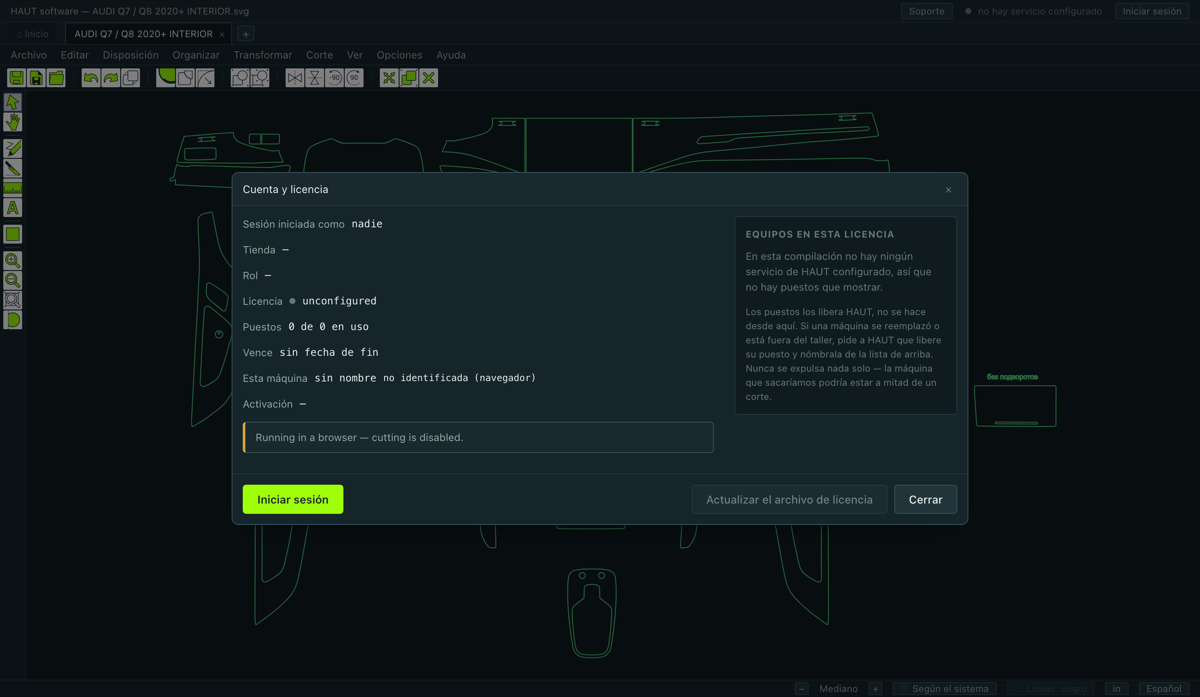
Ayuda ▸ Cuenta, licencia y equipos… muestra a qué tiene derecho esta computadora: el taller, el plan, hasta cuándo corre, qué máquinas tienen los dos lugares y cuál de ellas es la que corta.
Cómo se revisa la licencia
- En cada arranque, en cada acceso y una vez por hora mientras el programa esté abierto. También pregunta cuando usted vuelve a la ventana después de ausentarse.
- Una licencia que termina a mediodía cierra a mediodía, no a la mañana siguiente. No hay que reiniciar nada.
- Sin conexión, la última respuesta sirve siete días. Una máquina en un taller sin red sigue cortando; una que lleva más tiempo sin conexión tiene que volver a ver el servicio.
Cuándo se detiene el corte
Si la licencia venció o está suspendida, el catálogo se cierra y los dibujos guardados del propio taller se cierran con él — no sólo la lista, las filas. El editor y la biblioteca incluida siguen funcionando. Ésa es la licencia haciendo su trabajo, y se arregla con un pago o con una palabra con HAUT, no con un ajuste.
3.1Abrir un patrón del catálogo
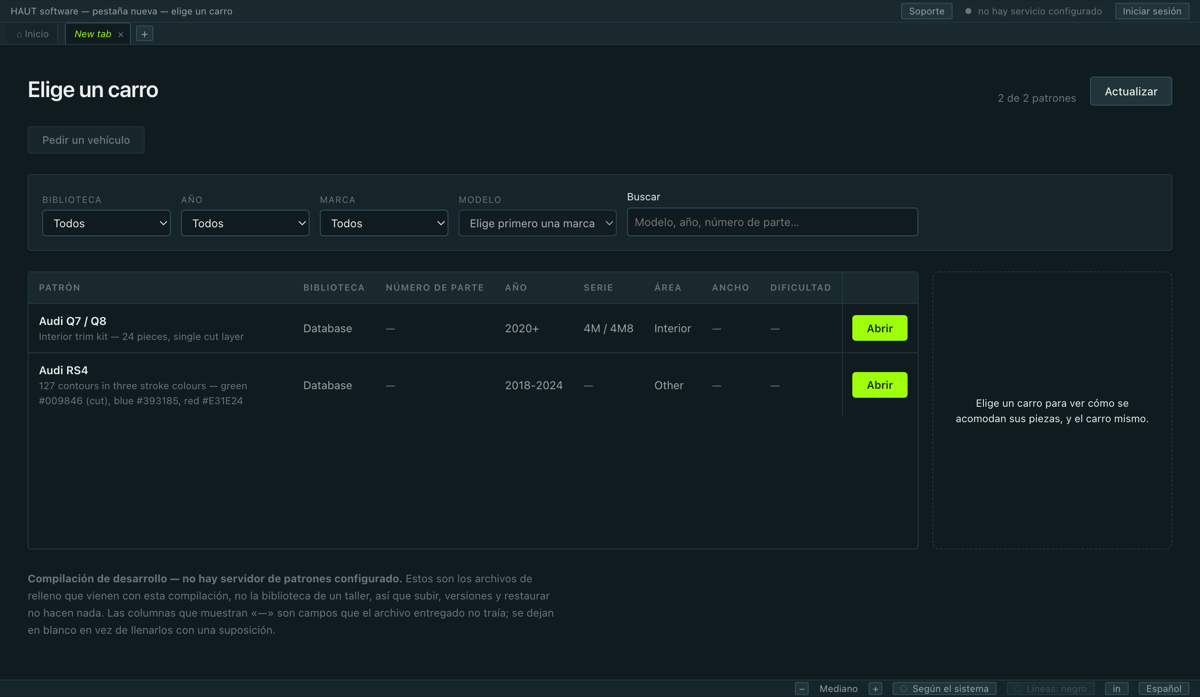
Archivo ▸ Abrir de la biblioteca…, o Ctrl+O, o el + en la barra de pestañas.
- Acote con los filtros de arriba: biblioteca, año, marca, modelo.
- O escriba en el buscador — un nombre de modelo, parte de uno, un número de parte.
- Presione Abrir en la fila que quiere. El kit llega en una pestaña nueva.
Qué significan las columnas
- Biblioteca
- A qué catálogo pertenece el patrón. Qué bibliotecas ve usted es parte de la licencia.
- Número de parte
- El número propio de HAUT para ese kit.
- Ancho
- Lo más ancho que el kit necesita a lo ancho del rollo. Un kit más ancho que su lámina no se corta de una pieza.
- Dificultad
- Qué tan difícil es la instalación. Es la calificación del diseñador, no un precio.
3.2Cuando el patrón no está
Si el carro no está en el catálogo, pídalo. La solicitud va al propio taller de dibujo de HAUT y vuelve como patrón en la biblioteca: no hay que dibujarlo usted ni buscarlo por fuera.
El formulario está en la pantalla del catálogo. Nombre el carro con la mayor precisión posible: marca, modelo, los años, la carrocería y la versión donde cambie los paneles. Una solicitud que dice «BMW» recibe como respuesta la pregunta de cuál; una que dice «BMW M3 CS 2024, coupé» recibe un patrón.
4.1De qué se compone la ventana
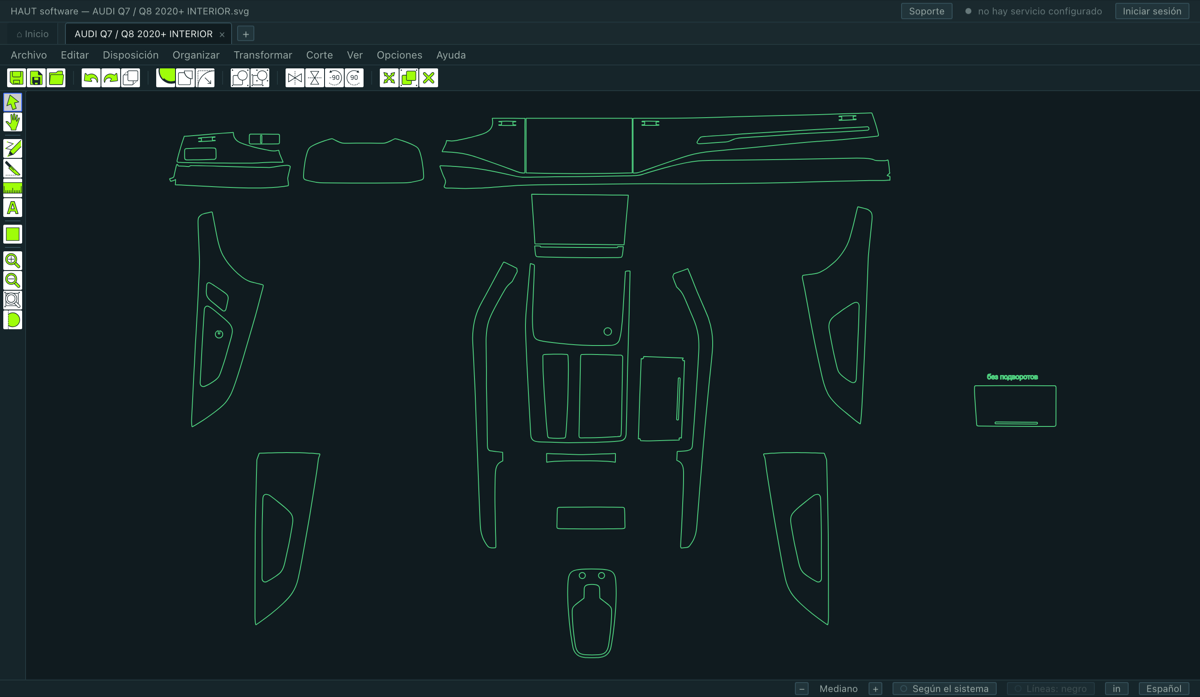
De arriba abajo:
- Barra de título
- El archivo abierto. Cuando corre una herramienta modal su nombre aparece aquí también —
HAUT software -[Traslape] — …, y así se ve de un vistazo que la herramienta sigue activa. - Pestañas
- Una por archivo abierto, más Inicio a la izquierda y + a la derecha. Se pueden tener varios patrones abiertos a la vez.
- Barra de menús
- Ocho menús, en el orden en que ocurre el trabajo: tomar el archivo, cambiarlo, ponerlo sobre material, ordenarlo, trabajar la geometría, mandarlo — luego la vista y los ajustes.
- Barra de herramientas
- Botones de lo que más se presiona. Se reordena por completo — vea Personalizar la barra y la paleta….
- Paleta de herramientas
- En el borde izquierdo: las herramientas modales. La que está activa lleva un anillo azul.
- Lienzo
- El dibujo. La plancha de material, cuando la hay, se dibuja debajo con su medida en una etiqueta.
- Línea de estado
- Abajo: el tamaño de lo seleccionado, el tamaño de interfaz, el tema, el color de línea, las unidades y el idioma.
4.2Cómo moverse por el dibujo
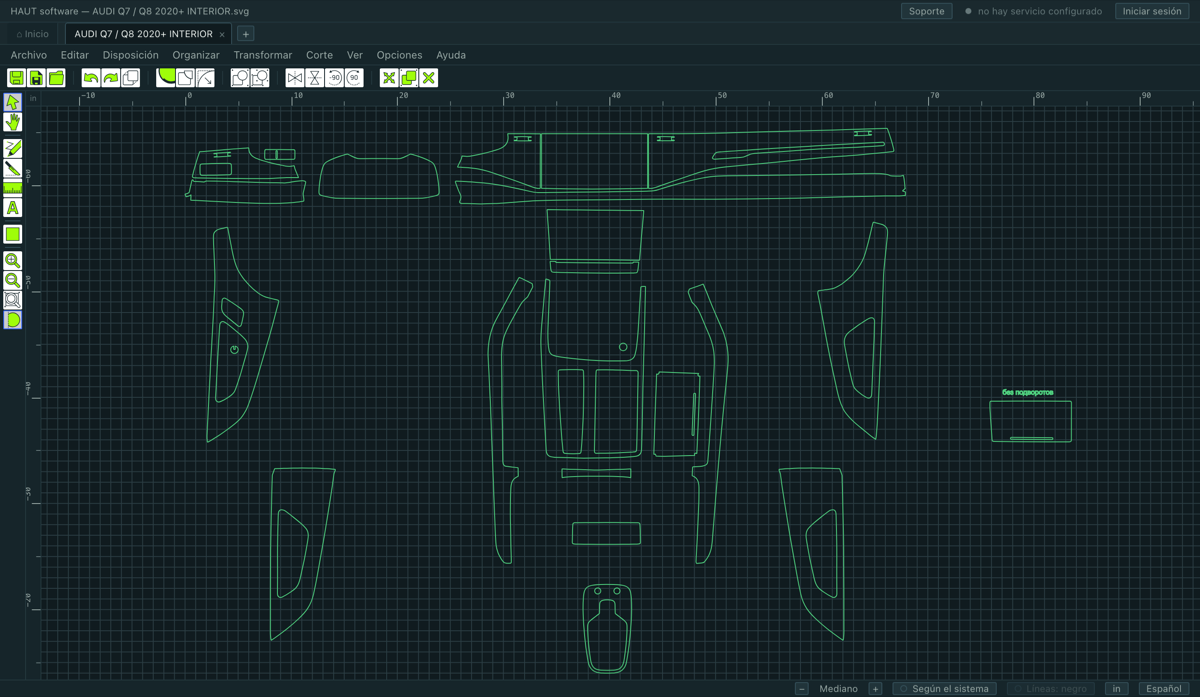
| Rueda del mouse | Zoom, centrado en el puntero. A la rueda no hay nada más asignado. |
|---|---|
| Espacio + arrastrar | Mover el lienzo. |
| Botón central + arrastrar | Mover el lienzo. |
| F8 | Ver todo |
| F7 | Ver lo seleccionado |
| F9 | Ver la plancha |
| F6 / Shift+F6 | Un paso afuera / un paso adentro |
| + / − | Un paso adentro / un paso afuera |
Cuadrícula, reglas y guías
- Mostrar la cuadrícula en el menú Ver dibuja la cuadrícula, y Tamaño de la cuadrícula al lado fija su paso — 0.25, 0.5, 1, 2 o 5 in.
- Mostrar las reglas pone una regla arriba y a la izquierda.
- Una guía es una línea que usted coloca: V suelta una vertical, H una horizontal, ambas en el puntero. Las piezas se pegan a ellas.
- Para quitar una guía, clic derecho sobre ella y Delete Guide. Borrar las guías las quita todas.
4.3Tema, tamaño, unidades e idioma
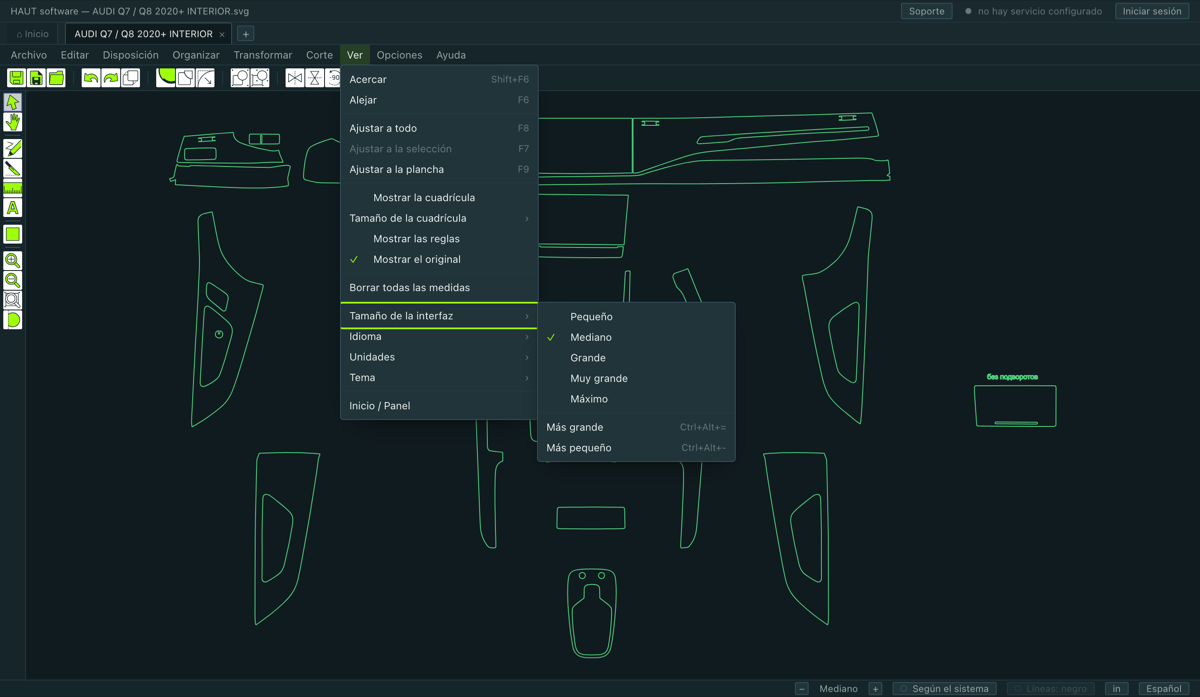
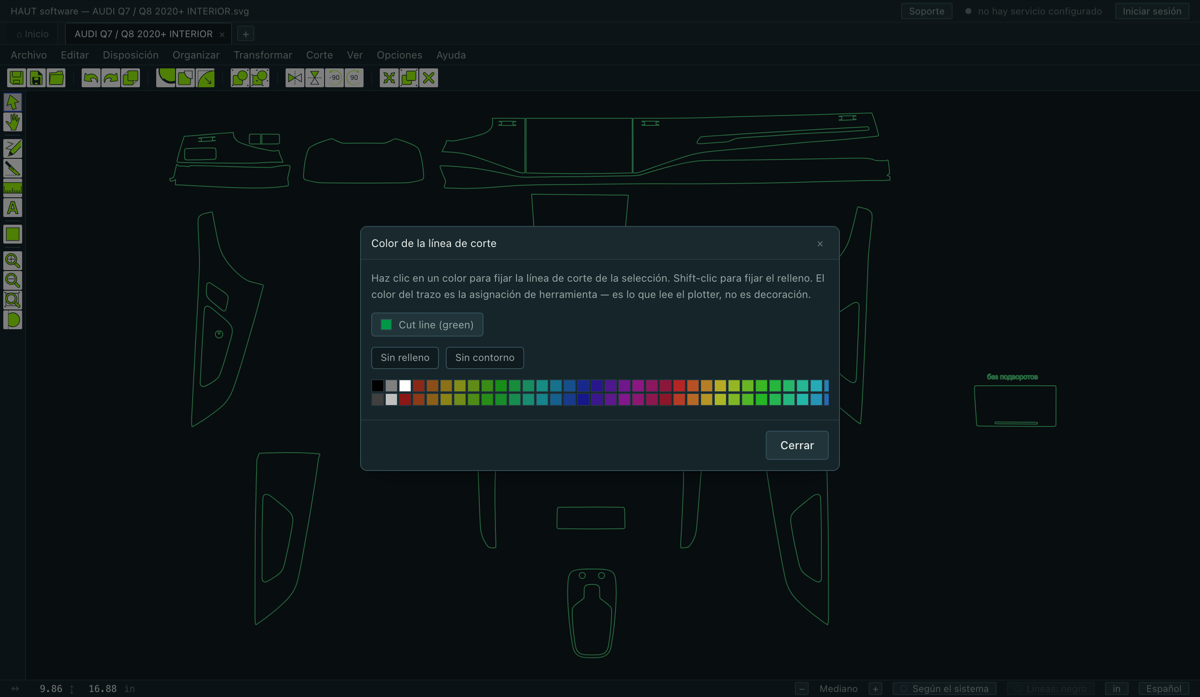
Los cuatro están en el menú Ver, y los cuatro están también en la línea de estado al pie de la ventana, a un clic.
- Tamaño de la interfaz
- Cinco pasos, de Pequeño a Máximo. Todo escala junto — menús, botones, diálogos y los campos dentro de ellos. Ctrl+Alt+= y Ctrl+Alt+− suben y bajan un paso.
- Idioma
- English, Русский, Español, Português. Cambia de inmediato y se recuerda.
- Unidades
- Pulgadas o milímetros. Cambia cada campo y cada lectura del programa, incluidas las de las barras de herramientas.
- Tema
- Oscuro, Claro o Según el sistema — que sigue el ajuste de la computadora y cambia con ella al anochecer. Una instalación nueva queda en Según el sistema.
El color de las líneas
La línea de estado tiene un interruptor Líneas: negro. Activado, cada contorno se dibuja negro sea cual sea el color con que llegó. Importa porque los colores del archivo de patrón no significan nada — son del diseñador, y el programa nunca corta por color.
4.4Reacomodar la barra y la paleta
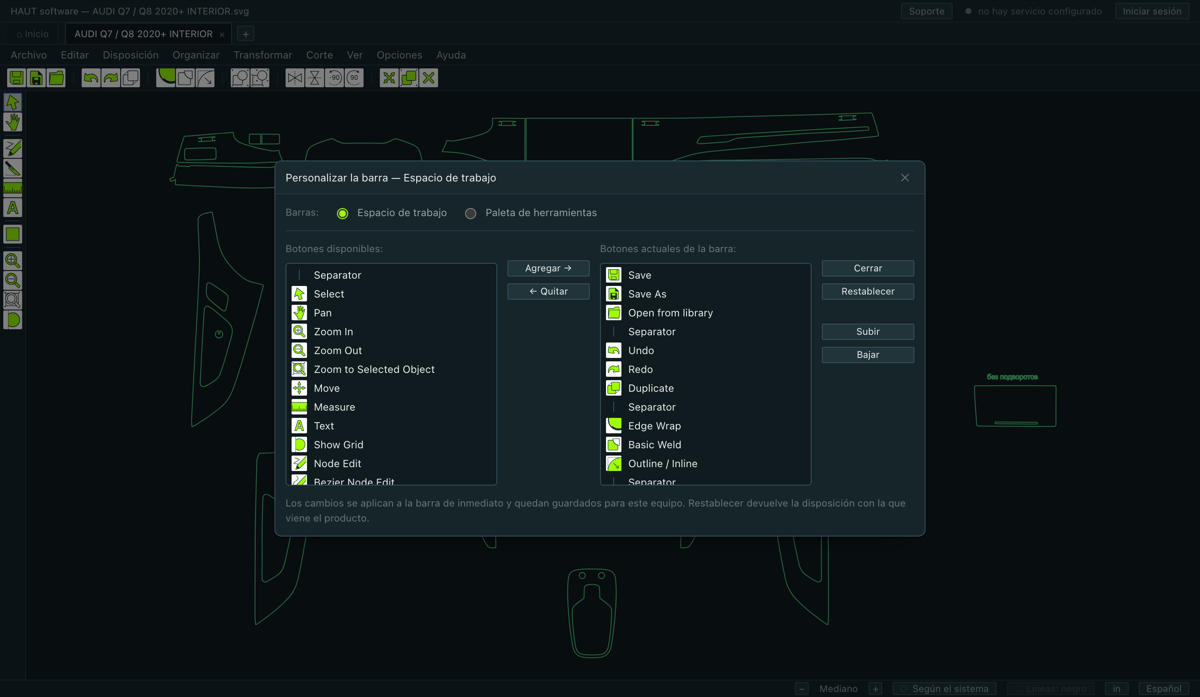
Opciones ▸ Personalizar la barra y la paleta… tiene dos listas: todo lo que el programa puede poner en una barra, y lo que hay en ella ahora. Agregar, quitar, subir, bajar, y un separador para agrupar.
Lo que arme queda guardado en esta computadora. Un taller que nunca usa la herramienta de texto puede quitarla; uno que espeja cada trabajo puede poner el par de espejos en el extremo izquierdo.
Atajos de teclado
Opciones ▸ Atajos de teclado… lista cada comando que puede llevar una tecla y deja asignar las suyas. Las teclas de fábrica de los capítulos siguientes no se pueden quitar, pero a todo lo que no tiene una se le puede dar.
4.5Importar, guardar, y qué sale del programa
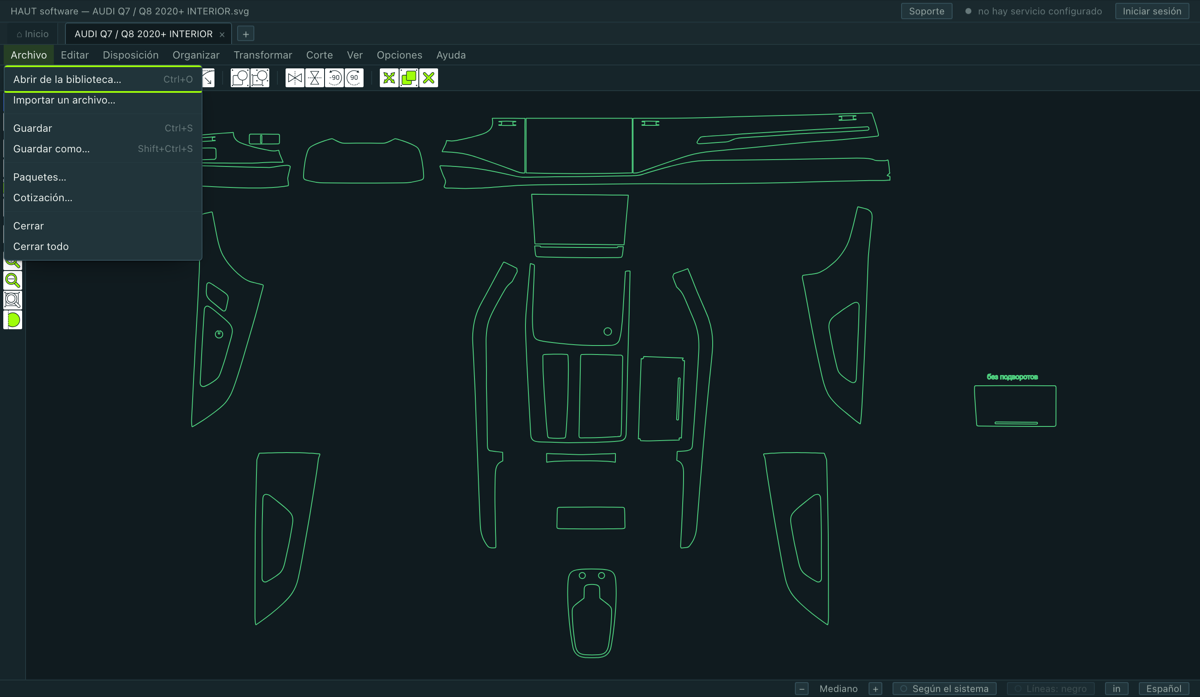
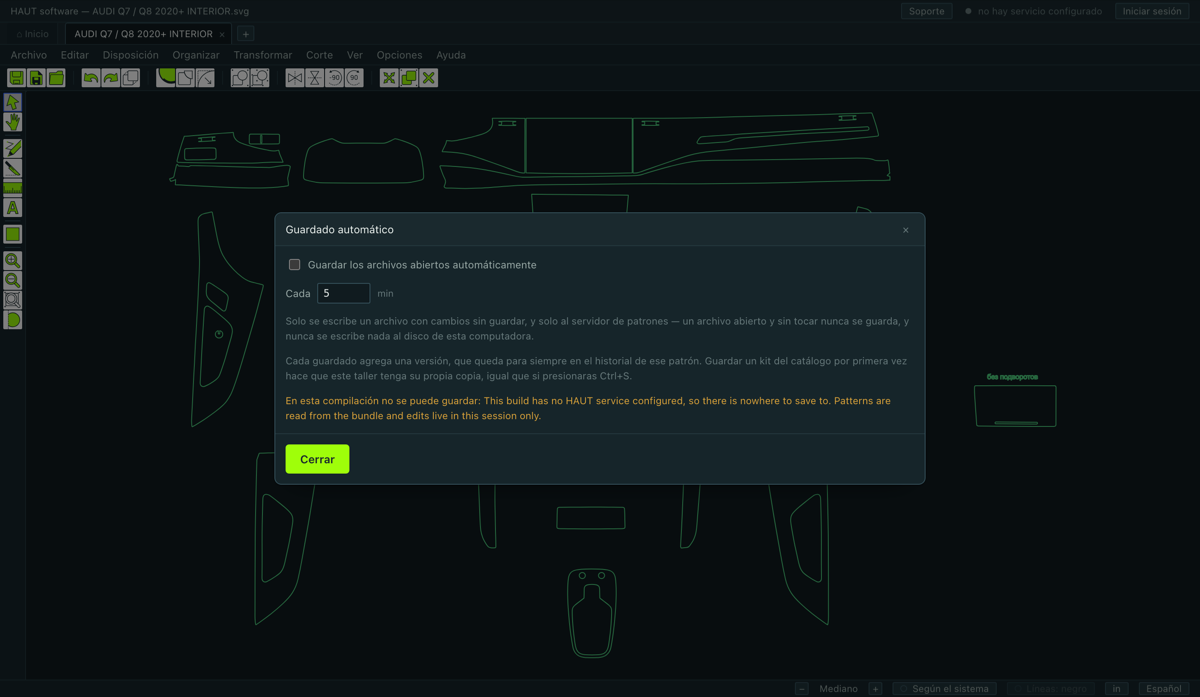
Importar
Archivo ▸ Importar un archivo… lee un dibujo suyo: SVG, EPS, AI y PLT. Llega en una pestaña nueva y se comporta como cualquier otro patrón.
Guardar
- Ctrl+S — Guardar, sobre el archivo abierto.
- Shift+Ctrl+S — Guardar como…, con otro nombre. Un patrón que vino del catálogo o de una importación hay que guardarlo en un lugar propio la primera vez, así que este guardado hace falta más seguido que el simple.
- Una pestaña con trabajo sin guardar lleva un punto junto al nombre, y al cerrarla pregunta.
Autoguardado
Opciones ▸ Guardado automático… guarda cada pocos minutos todos los archivos abiertos con cambios sin guardar. Está apagado hasta que usted lo encienda.
Qué no puede salir
No hay exportación — ni archivo vectorial, ni imagen, ni PDF — y los datos vectoriales no se copian al portapapeles del sistema. Ctrl+C y Ctrl+V mueven piezas dentro de este programa y no dejan nada donde otro programa pueda leerlo.
Lo que sí sale es papel: Corte ▸ Imprimir el acomodo… imprime un mapa numerado de las piezas sobre la plancha, y la cotización imprime una propuesta para el cliente.
4.6Seleccionar y mover piezas
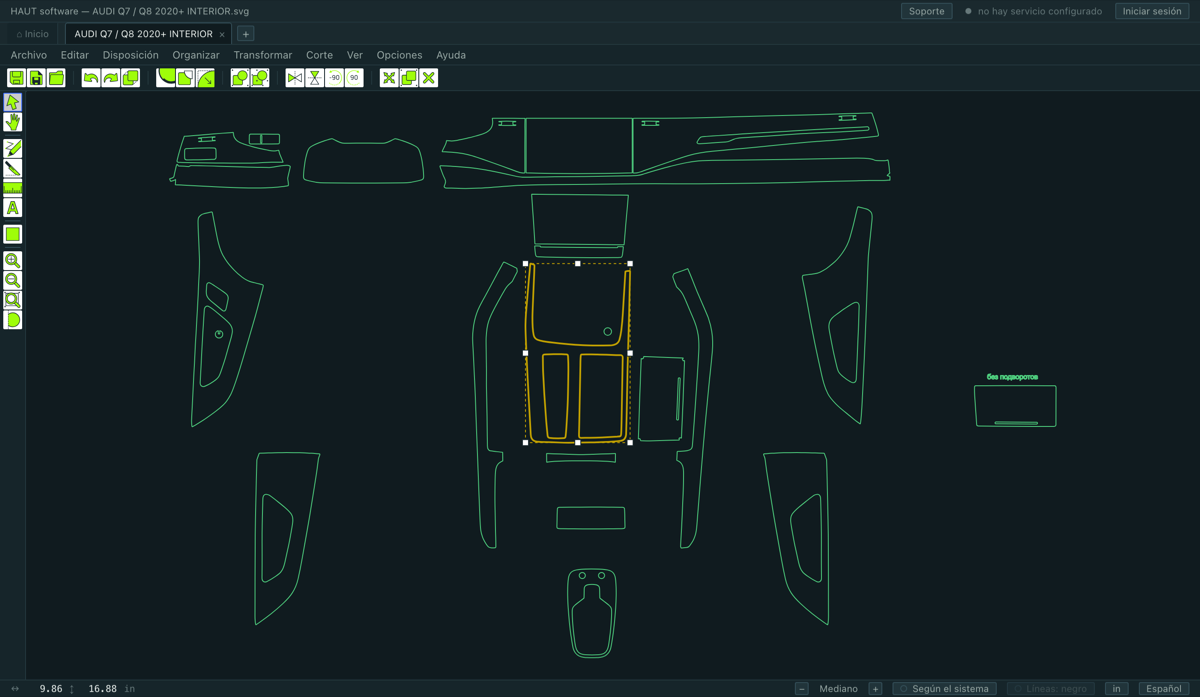
| Clic | Seleccionar una pieza. Se contornea con línea más gruesa para que se vea cuál. |
|---|---|
| Shift + clic | Sumar una pieza a la selección, o quitarla. |
| Arrastrar sobre lámina vacía | Un marco — se selecciona todo lo que toca. |
| Ctrl+A | Seleccionar todo |
| Esc | No seleccionar nada |
| Arrastrar una pieza seleccionada | Moverla. Todo lo seleccionado se mueve con ella. |
| Flechas | Empujar un paso. Shift agranda el paso. |
| Ctrl+D | Duplicar |
| Delete | Borrar — pero vea la nota de abajo |
Imán
Mientras arrastra, la pieza se pega a las guías, a los bordes de la plancha, a la cuadrícula, y a los bordes y centros de las demás piezas. La línea que atrapó se dibuja punteada mientras dure el arrastre.
- Mantenga Alt para apagar el imán en ese arrastre.
- Las guías y la cuadrícula sólo atrapan mientras están visibles.
Delete sobre piezas acomodadas
El tamaño de una pieza no se puede cambiar
5.1Decirle al programa qué lámina hay cargada
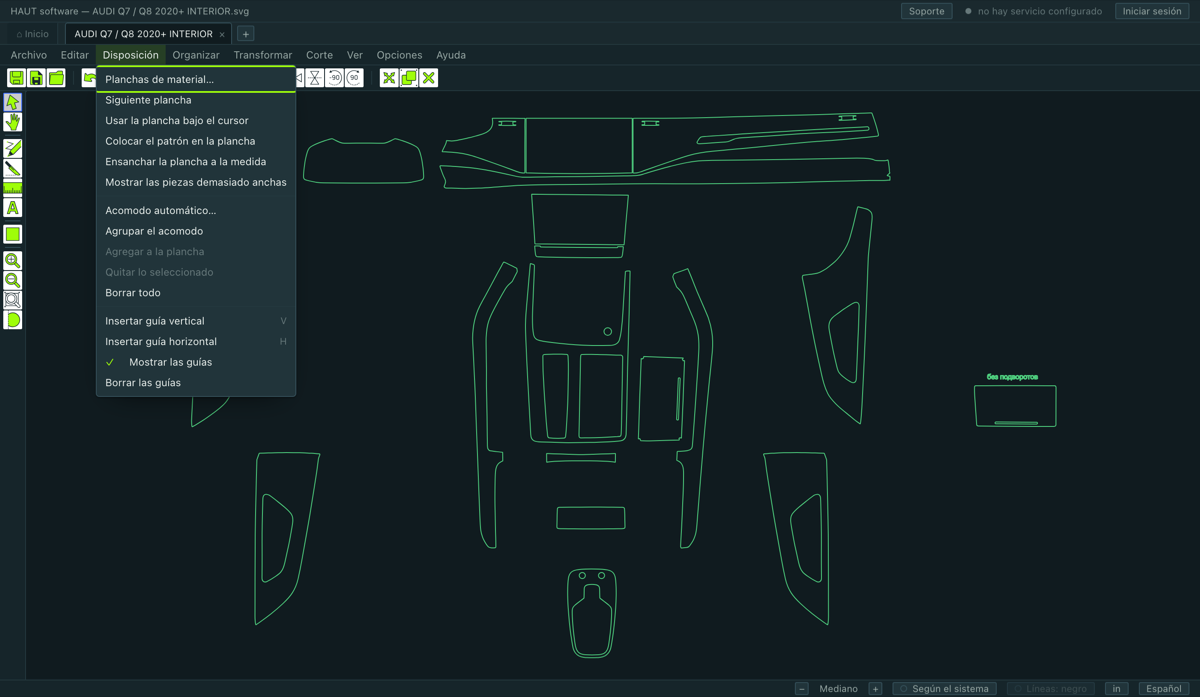
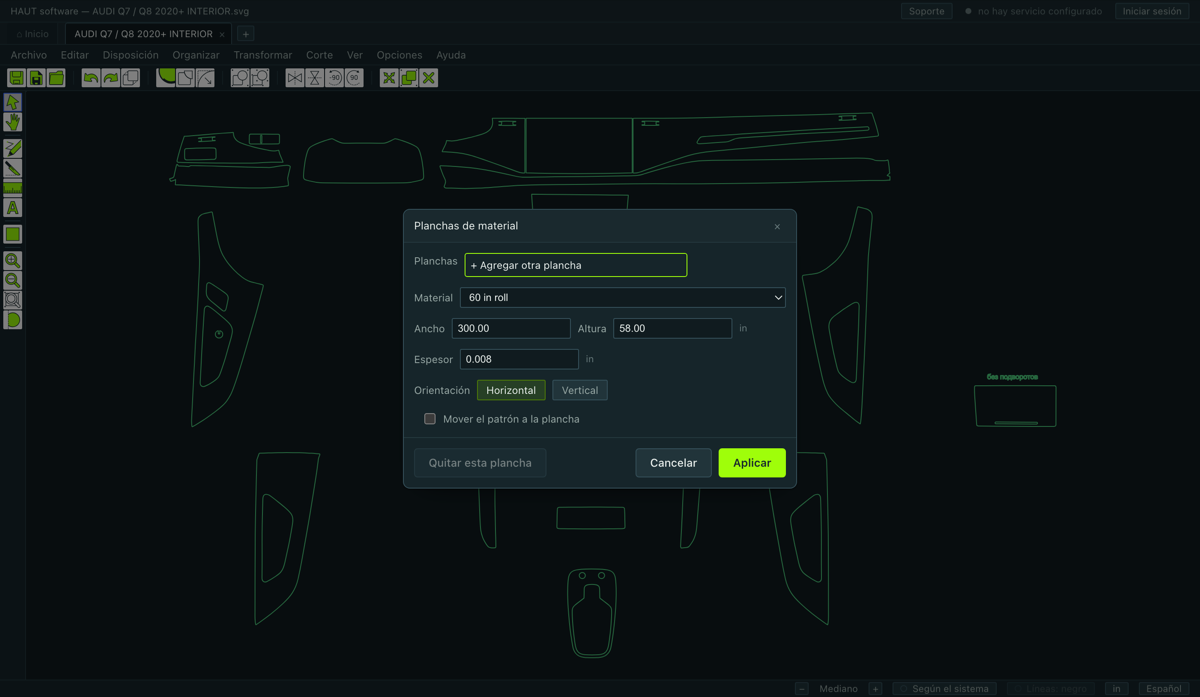
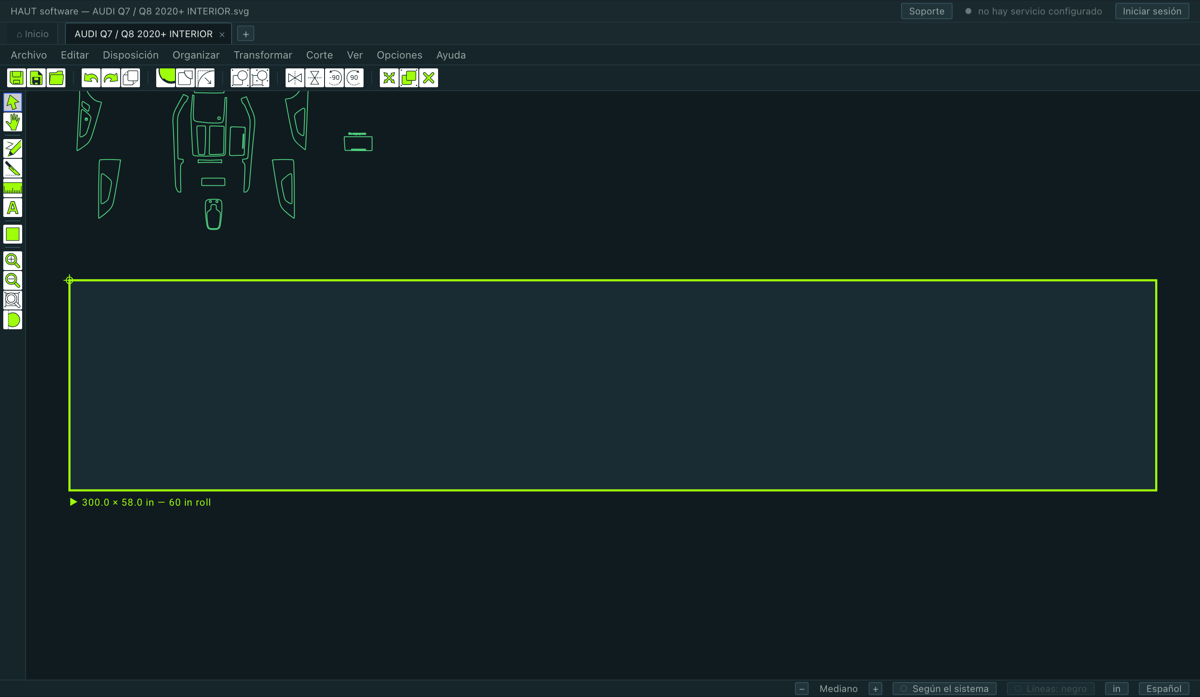
Una plancha es la lámina que usted tiene en la máquina, dibujada en el lienzo como un rectángulo bajo las piezas. Todo lo del acomodo y lo que se corta se decide contra ella, así que es lo primero que se fija en cuanto hay un patrón abierto.
Disposición ▸ Planchas de material….
- Elija el rollo en Material — 60, 48, 36, 30, 24 o 12 in. El ancho a lo ancho del rollo se llena solo.
- Fije el largo si lo quiere distinto del predeterminado.
- Presione Aplicar. La hoja aparece bajo el dibujo con su medida en una etiqueta.
5.2Varias hojas, y dos comandos que vale conocer
Puede tener más de una plancha en el lienzo — un rollo de 60 in y uno de 30 in, por decir. Una de ellas es la activa, y cada comando actúa sobre ésa. Para cambiar:
- doble clic en la hoja, o
- clic derecho y Use This Blank, o
- Disposición ▸ Siguiente plancha.
- Ensanchar la plancha a la medida
- Pone la plancha tan ancha como necesita la pieza más ancha — hasta media pulgada del borde del rollo. Un rollo de 60 in de verdad se puede cortar a 59.5 con buen pulso, y ésta es esa edición hecha desde donde se nota el problema.
- Mostrar las piezas demasiado anchas
- Selecciona y encuadra las piezas que no van a caber a lo ancho de la plancha activa, para ver cuáles son antes de enterarse en la máquina.
6.1La paleta de herramientas
Por el borde izquierdo, de arriba abajo. Sólo una está activa a la vez, y la activa lleva un anillo azul.
- Seleccionar
- Elegir, mover y agrupar piezas. S la activa desde donde sea. Aquí se empieza y aquí se vuelve.
- Desplazar
- Arrastrar el lienzo. Casi no hace falta — el espacio y el botón central hacen lo mismo sin salir de la herramienta en la que está.
- Editar nodos
- Trabajar los nodos de una pieza. Doble clic en una pieza también la activa.
- Cuchilla
- Cortar una pieza en dos por una línea que usted traza.
- Medir
- Trazar una cota entre dos puntos. Queda en el dibujo hasta que la quite.
- Texto
- Poner una palabra en el dibujo — una etiqueta en una pieza, una nota para el instalador.
- Figura
- Cuadrado, círculo, triángulo, estrella, polígono. El botón se abre de lado con las cinco.
- Acercar / Alejar / Ajustar al objeto seleccionado
- La vista. La rueda hace las dos primeras más rápido.
- Mostrar la cuadrícula
- La cuadrícula, encendida o apagada.
6.2Traslape — el margen de PPF
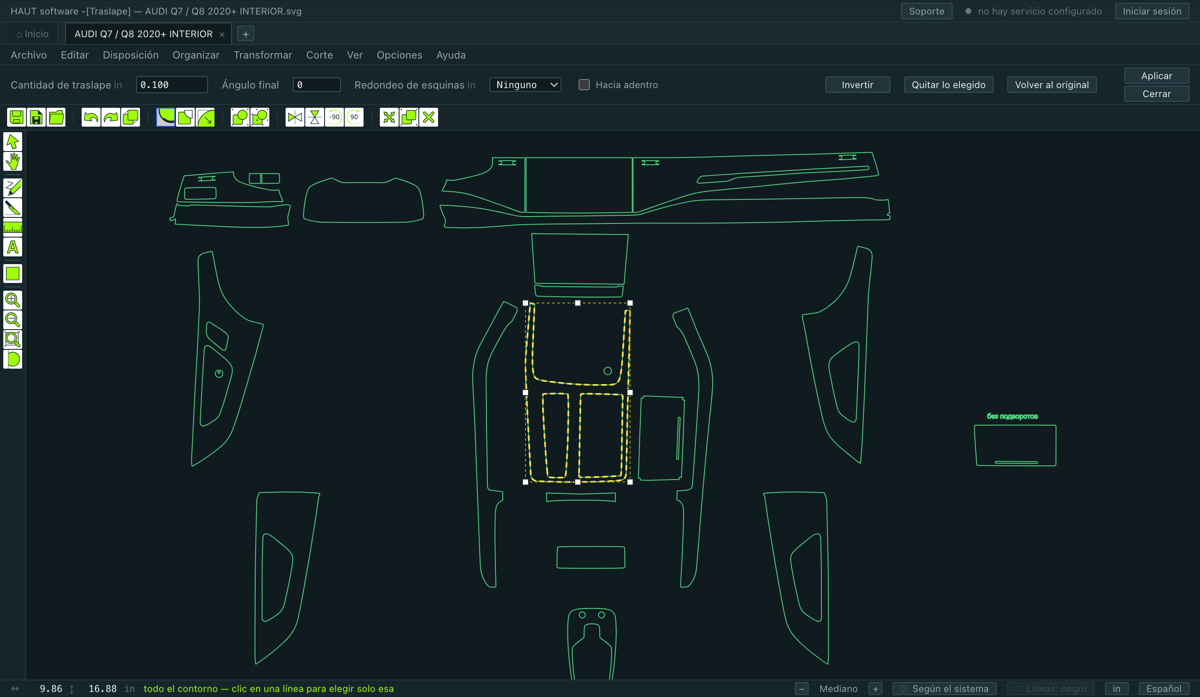
Ésta es la herramienta por la que el oficio compra este programa. Saca la lámina más allá del borde del panel para poder doblarla por detrás — y lo hace en los tramos que usted elige, no en toda la pieza, porque un cofre se traslapa en el borde de ataque y se corta a ras en las juntas.
Transformar ▸ Traslape…, o el botón de la barra.
- Seleccione la pieza.
- Haga clic en una línea de ella para elegir ese tramo. Shift-clic agrega otro, o lo quita. La lectura en la línea de estado dice cuánto lleva elegido; sin nada elegido, el margen cubre todos los contornos de la pieza.
- Escriba la Cantidad de traslape — cuánto sale la lámina del borde.
- Presione Aplicar.
Los campos
- Cantidad de traslape
- Cuánto pasa la lámina del borde. Es el número que decide la costumbre del propio instalador.
- Ángulo final
- Grados. 0 corta el margen a escuadra en el borde. Un ángulo positivo lo va reduciendo a nada en su último tramo, para que no deje escalón donde termina.
- Redondeo de esquinas
- Redondea las esquinas que hace el margen — donde empieza y termina en el contorno, y las esquinas del escalón que levanta. Ninguno las deja en punta, que es como la herramienta siempre trabajó. Las opciones son 0.05, 0.1, 0.2 y 0.3 in.
- Hacia adentro
- Mete el margen hacia adentro de la pieza en lugar de hacia afuera. En un agujero, hacia adentro lo abre más.
Los tres botones
- Invertir
- Elegir en este contorno todo menos lo que usted eligió — y el camino largo entre dos puntos.
- Quitar lo elegido
- Soltar todos los tramos elegidos. Apply vuelve entonces a cubrir todos los contornos de la pieza. Ésta es la salida cuando eligió un tramo de más.
- Volver al original
- Quitar todos los márgenes y devolver los contornos a como se dibujó la pieza.
6.3Contorno / interior — agrandar y encoger
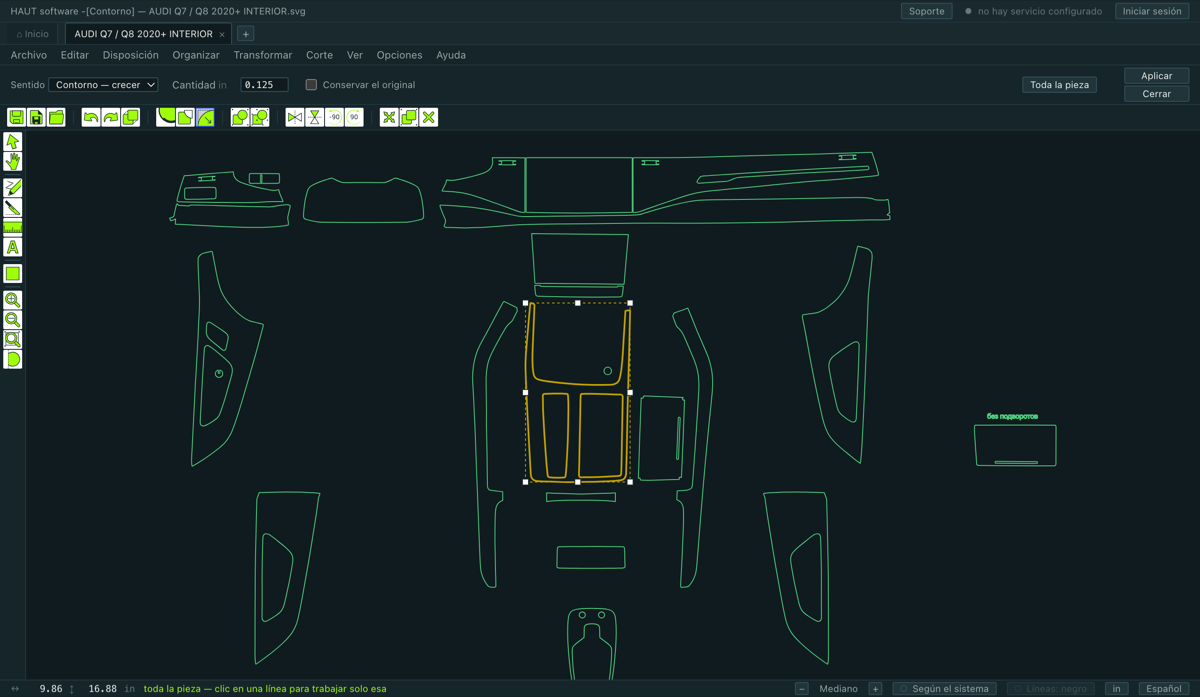
Transformar ▸ Contorno / interior…. Mueve un contorno hacia afuera o hacia adentro una cantidad exacta, conservando la forma: las esquinas siguen siendo esquinas, no se redondean.
- Sentido
- Contorno — crecer agrega la cantidad por todo el borde; Interior — encoger quita esa misma cantidad.
- Cantidad
- Cuánto. Por omisión, 0.125 in.
- Conservar el original
- Dejar el contorno que estaba junto al nuevo. Apagado por omisión, y es a propósito — se cortarían los dos.
- Toda la pieza
- Soltar las líneas elegidas, para que Apply vuelva a cubrir todos los contornos de la pieza.
Como el Traslape, puede trabajar sobre líneas elegidas: clic en una línea para elegirla, Shift-clic para agregar o quitar. Un agujero de sensor elegido y agrandado se abre, mientras el resto del panel queda como se dibujó.
6.4La cuchilla — cortar una pieza en dos
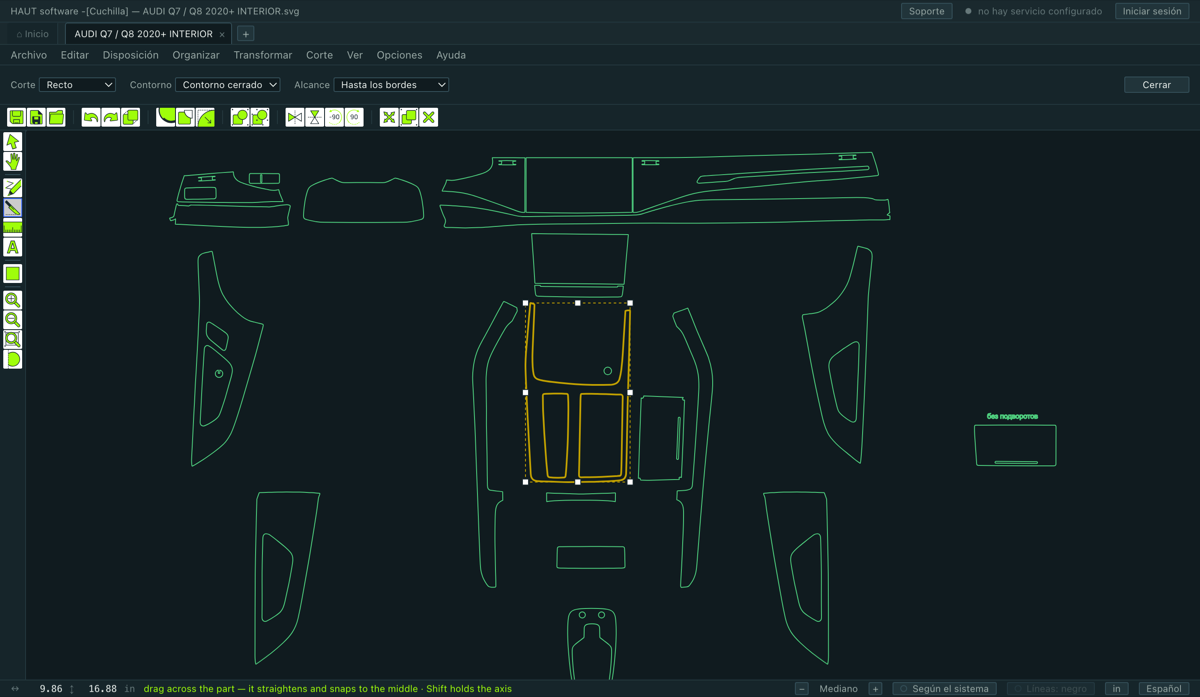
Active Cuchilla en la paleta, seleccione las piezas a cortar y arrastre una línea a través. Su barra tiene tres campos, y son independientes entre sí.
- Corte — Recto o Arco
- La forma del corte. Recto: arrastre a través de las piezas. Arco: arrastre la cuerda, luego mueva para curvar el corte y haga clic. Ambos se enderezan a horizontal o vertical cerca de esos ángulos; Shift fija el eje sea cual sea el ángulo.
- Contorno — Contorno cerrado o Contorno abierto
- Qué deja el corte. Contorno cerrado parte la pieza en trozos cerrados enteros que se pueden apartar — éste es el corte de siempre. Contorno abierto hace la misma división en el mismo lugar, pero deja los contornos abiertos a lo largo de ella.
- Alcance — Hasta los bordes o Solo donde se trazó
- Hasta dónde llega el corte. Hasta los bordes: un trazo corto divide toda la pieza en ese punto. Sólo donde se trazó: el corte es exactamente la línea que hizo y se detiene donde se detuvo su mano.
Cuándo se niega la cuchilla, y por qué
- Un trazo que no cruza la pieza se rechaza por su nombre. Una línea dentro del vano de una ventana no toca lámina, así que no hay nada que cortar.
- El corte es el trazo y nada más. Nunca aparece donde usted no trazó. Un trazo sobre una isla de la pieza deja las demás islas enteras, con sus agujeros y todo.
- «Sólo donde se trazó» puede dejar una sola pieza, y eso es un resultado, no un rechazo. Un tajo a través de un puente angosto deja la pieza entera y el corte igual queda en el dibujo: bajo la cuchilla la lámina se separa por ahí.
6.5Editar nodos — trabajar la línea misma
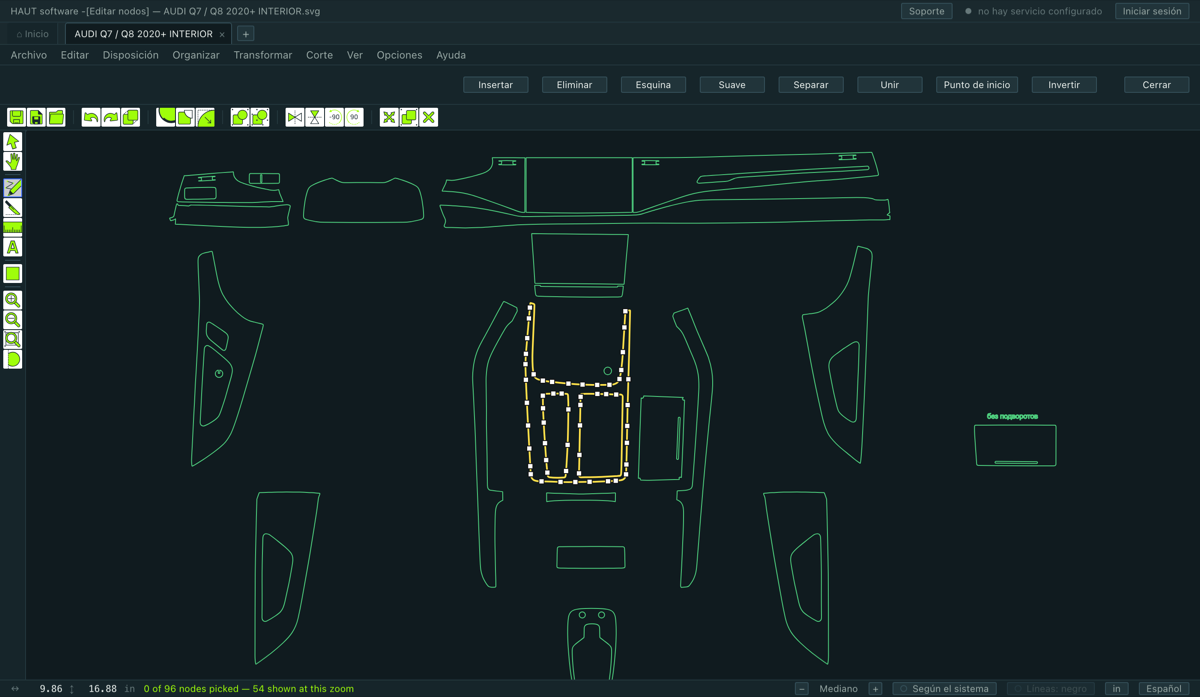
Doble clic en una pieza, o active Editar nodos en la paleta. Los nodos de la pieza aparecen como cuadritos: el elegido está relleno, el no elegido es un anillo. Arrastre un nodo para moverlo; arrastre sus manijas para curvar la línea.
En la barra y en el clic derecho
- Insertar
- Agregar un nodo — o doble clic en la línea donde lo quiere.
- Eliminar
- Quitar los nodos elegidos. Delete hace lo mismo.
- Esquina
- Volver esquinas duras los nodos elegidos.
- Suave
- Acostar las manijas de los nodos elegidos sobre la curva, para que la línea pase suave.
- Separar
- Abrir el contorno en el nodo elegido.
- Unir
- Unir las dos puntas sueltas elegidas — o cerrar el contorno, si son sus propias dos puntas.
- Punto de inicio
- Empezar el corte de este contorno en el nodo elegido.
- Invertir
- Cortar este contorno al revés. Cambia cómo se despega la lámina, por eso está aquí y no archivado como cosmético.
En una pieza densa no se dibujan todos los nodos
Un panel entregado puede traer cuatrocientos nodos, y en el zoom donde se ve la pieza entera los cuadritos se tocarían y se leerían como una banda sólida. Así que el programa dibuja sólo los que tienen lugar, y la línea de estado dice cuántos del total se muestran. Nada está oculto al puntero: un nodo que no se dibuja igual se elige haciendo clic donde está, y aparece en ese momento.
6.6Reducir nodos
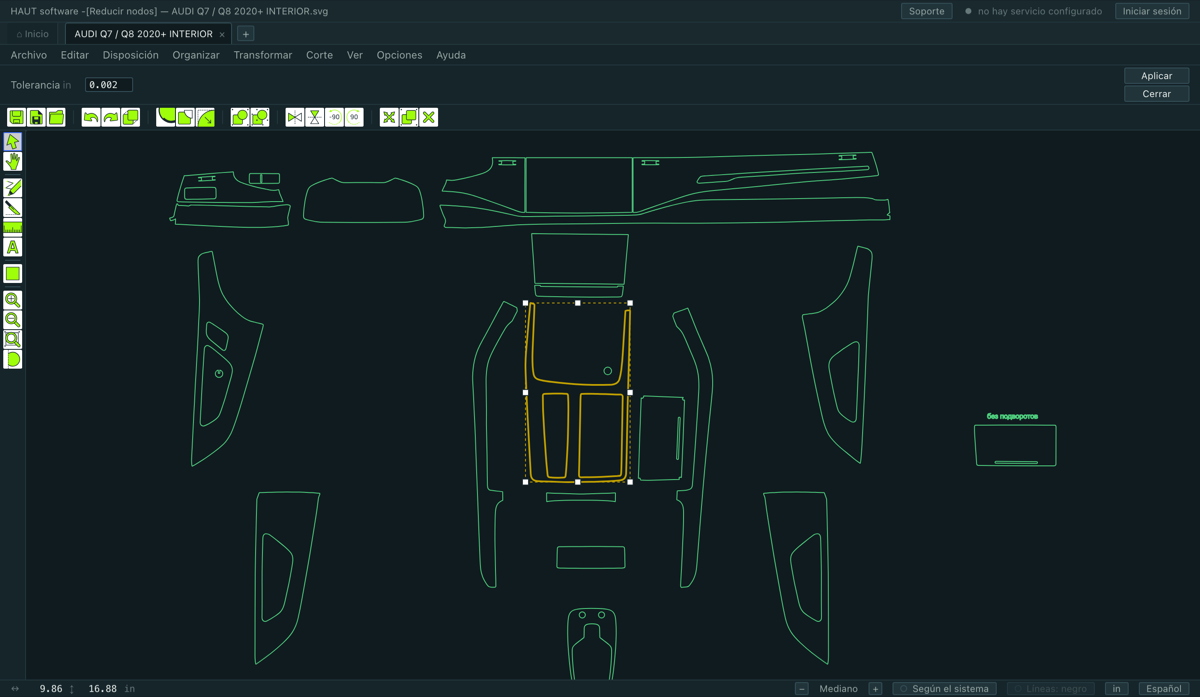
Organizar ▸ Reducir nodos… quita los nodos que pueden irse sin mover la línea de corte más allá de la tolerancia que usted fije. Los nodos que llevan forma real se quedan.
- Tolerancia
- Cuánto puede moverse la línea de corte. Un paso de plotter es 0.001 in (0.025 mm), así que todo lo que esté en eso o por debajo es invisible para la máquina. Por omisión, 0.002 in.
Vale correrlo después de un desplazamiento o de una booleana: las dos devuelven líneas de segmentos con más puntos de los que la forma necesita.
6.7Descarte — el borde por el que sale el sobrante
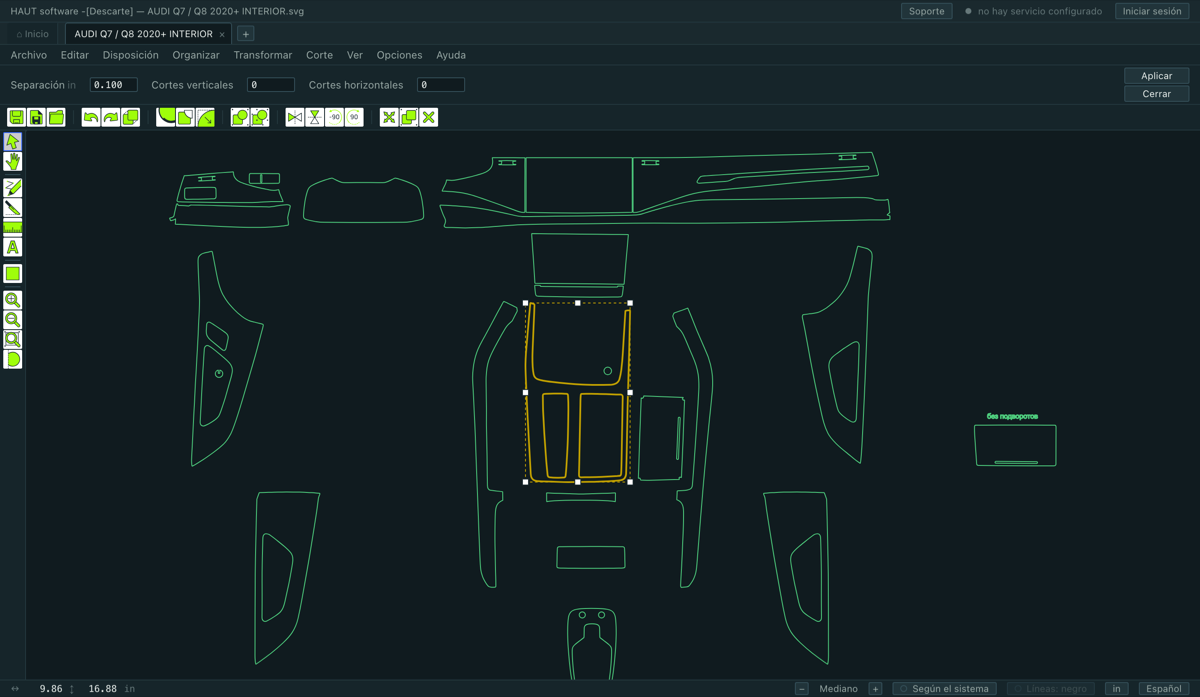
Transformar ▸ Descarte… traza una línea de corte alrededor de las piezas seleccionadas para que la lámina sobrante salga de una pieza en vez de irse picando.
- Separación
- Qué tan afuera de la pieza corre el borde. 0.10 in es lo habitual en el oficio.
- Cortes verticales / Cortes horizontales
- Cortes extra que dividen el sobrante en tiras, para que un trabajo largo salga en pedazos manejables y no en una hoja inmanejable.
6.8Texto, figuras y medidas
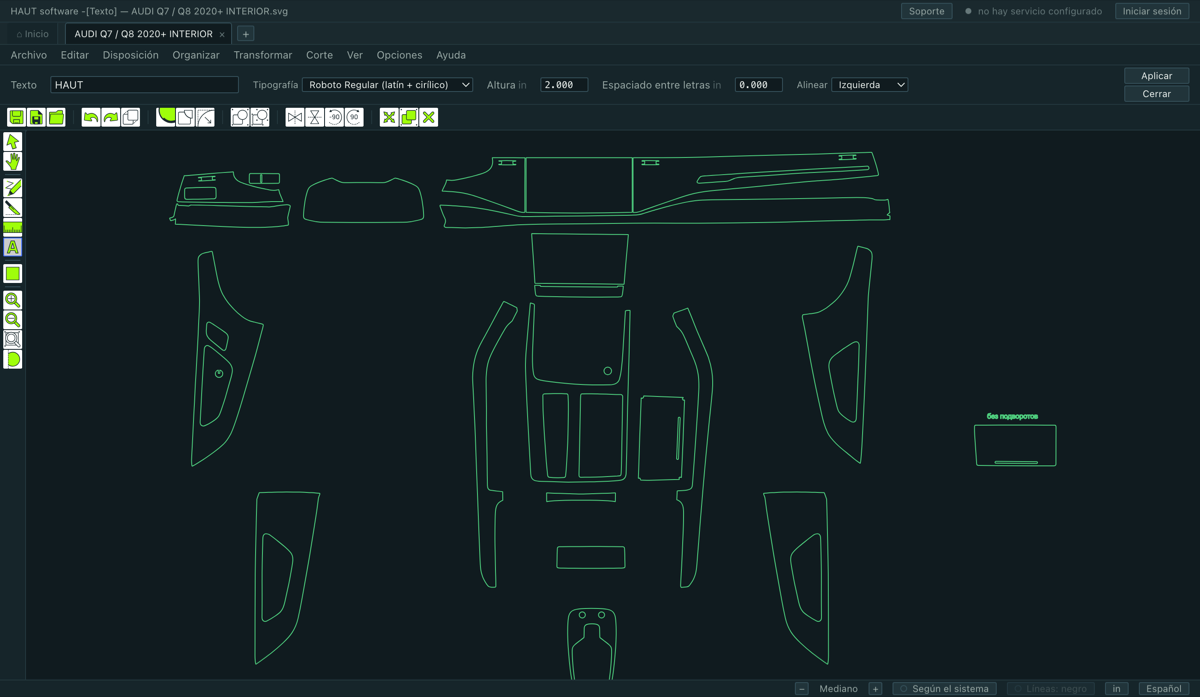
Texto
Transformar ▸ Texto… o el botón A de la paleta. Escriba las palabras, elija una fuente, fije la Altura (es la altura de mayúscula) y colóquelo. Espaciado entre letras separa las letras; un valor negativo las junta.
Transformar ▸ Texto a gráfico convierte el texto en contornos comunes. Hágalo cuando quiera editar las letras por nodos, o antes de entregar el dibujo a alguien cuya computadora puede no tener la fuente.
Figuras
El botón de figuras de la paleta se abre de lado con cinco: cuadrado, círculo, triángulo, estrella y polígono. Arrastre en el lienzo para dibujar una. Una figura que usted dibujó es lo único en este programa cuyo tamaño se puede fijar a mano: todo lo que vino de un patrón está protegido.
Medidas
Active Medir y arrastre entre dos puntos. La cota queda en el dibujo; no se corta ni forma parte de la geometría. Para quitar una, clic derecho en la pieza sobre la que se midió y Delete Measurement; Ver ▸ Borrar todas las medidas las quita todas.
6.9Contornos: combinar, separar, cerrar, curvas
- Combinar trazados
- Hace de varios contornos una pieza con agujeros. Así se arma un panel con recorte de sensor: el anillo interior queda como agujero y no como segunda pieza.
- Separar
- Lo contrario — cada contorno queda como pieza propia. Sirve cuando hay que mover o borrar un agujero por separado.
- Cerrar los contornos abiertos
- Un contorno abierto es un corte que no vuelve a su inicio. Esto los cierra.
- Convertir a curvas
- Convierte líneas de segmentos de vuelta en curvas. Baja mucho la cantidad de nodos, pero puede mover la línea más que un desplazamiento — hasta un sexto de pulgada en un contorno que salió de un desplazamiento. Mire el resultado antes de cortarlo.
- Agrupar / Desagrupar
- Ctrl+G y Shift+Ctrl+G. Un grupo se mueve, gira y corta como uno solo.
- Bloquear el objeto / Desbloquear el objeto
- Una pieza bloqueada no se puede tomar ni mover por accidente.
6.10Espejo, rotación y alineación
Todo está en Transformar y Organizar, y los cuatro más usados están en la barra.
- Espejo horizontal / Espejo vertical
- Voltea la selección. Un panel izquierdo se vuelve el derecho.
- Girar 90° / Girar −90°
- Un cuarto de vuelta. Para cualquier otro ángulo, arrastre la manija de rotación en la esquina de la selección.
- Alinear
- Izquierda, centro, derecha, arriba, medio, abajo — y espaciado igual, horizontal o vertical.
- Cortar por la mitad en horizontal / Cortar por la mitad en vertical
- Divide la selección por una línea que pasa por su propio centro. Una pieza larga que no entra a lo ancho de su rollo se parte en dos clics, sin trazar una línea.
7.1Acomodo automático
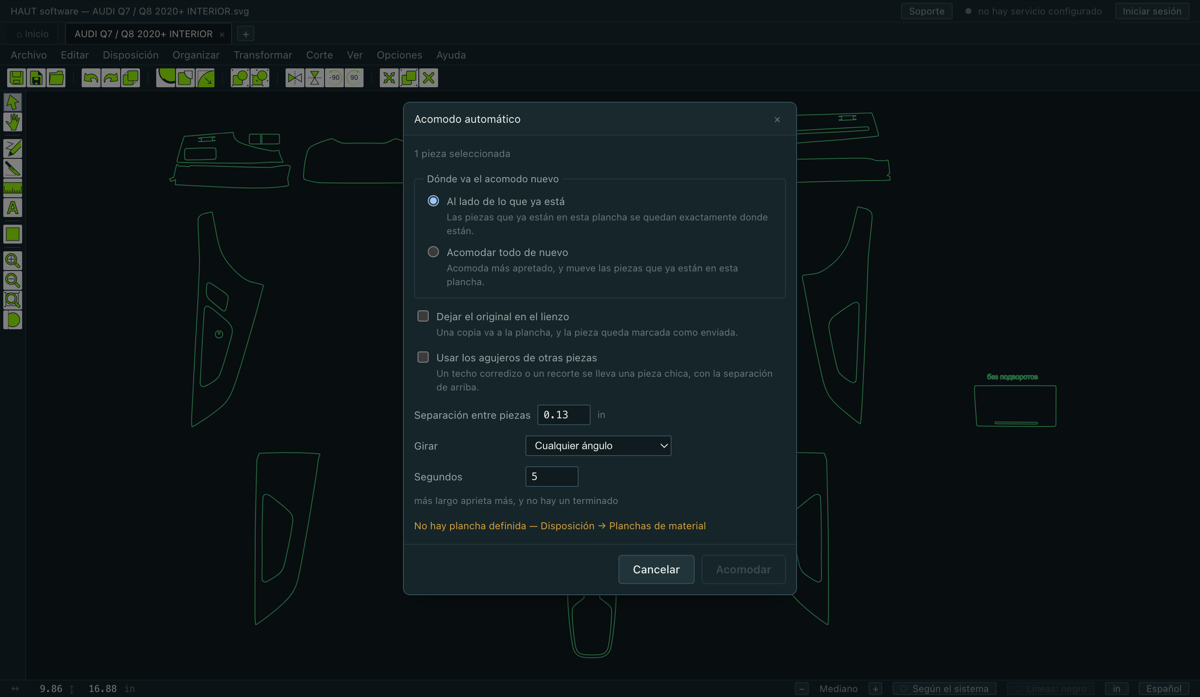
Esto es lo que ahorra lámina. Seleccione las piezas, abra Disposición ▸ Acomodo automático… y el programa las empaca en la plancha activa tan apretado como alcance en los segundos que le dé.
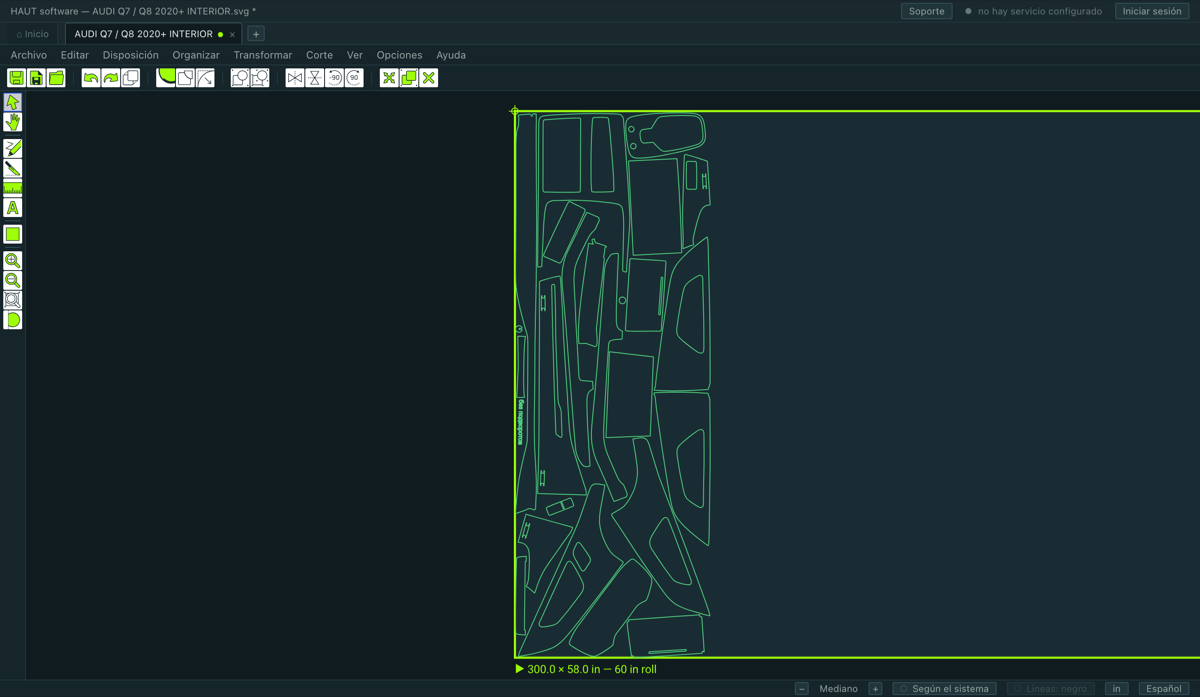
La ventana
- Separación
- El hueco que queda entre piezas. Se escribe una vez y se recuerda — cada taller acomoda con su propia separación.
- Segundos
- Cuánto puede pensar el solucionador. Más largo es más apretado, con rendimientos decrecientes.
- Dónde ponerlo
- Al lado de lo que ya está deja lo que está en la hoja exactamente donde está y pone el acomodo nuevo después. Reacomodar toma lo que está ahí junto con lo que eligió y lo acomoda todo de nuevo. «Al lado» es el predeterminado porque es el único de los dos que no puede arruinar un trabajo que alguien acomodó a mano.
- Dejar el original en el lienzo
- A la plancha va una copia y el original se queda donde estaba, marcado con un color — para que el instalador vea qué ya entró en la plancha y qué no.
- Usar los agujeros de otras piezas
- Pone piezas chicas dentro de los huecos vacíos de las grandes — un techo con quemacocos, una puerta con ventana. Apagado por omisión, porque una hoja donde una pieza queda dentro de otra se lee como un empalme para quien no lo pidió. Cuesta cerca del doble de espera, porque la hoja se resuelve dos veces.
Qué le dice después
La nota nombra las pulgadas de rollo usadas y la densidad y — cuando hubo piezas que entraron en agujeros — cuántas fueron. Un acomodo que de pronto salió un tercio más corto con una pieza aparentemente perdida es trabajo que alguien iría a revisar a mano.
Las dos formas de poner una pieza
- Agregar a la plancha
- Le encuentra lugar a las piezas seleccionadas sin mover lo que ya está. Ésta es la mitad de a una por vez: el instalador cambió de idea y hay que meter un pedazo más.
- Agrupar el acomodo
- Hace de todo lo que está en la plancha activa un solo objeto, para que el acomodo se arrastre, gire y corte como uno.
Sacar piezas otra vez
- Quitar lo seleccionado
- Saca de la lámina las piezas seleccionadas y las devuelve de donde vinieron. Una copia se elimina y la marca sale de su original; una pieza que viajó se gira de regreso y se asienta en su centro anterior. Delete sobre piezas acomodadas hace lo mismo y reacomoda lo que queda.
- Borrar todo
- Saca todo lo que está en la plancha activa.
7.2Revisar el acomodo antes de cortar
- Corte ▸ Revisar traslapes
- ¿Alguna pieza quedó encima de otra? Dos piezas compartiendo lámina son dos piezas arruinadas, y ésta es la pregunta que se hace antes de que la cuchilla se mueva.
- Corte ▸ Área total del objeto
- El área encerrada real de la selección, o de todo el dibujo si no hay nada seleccionado.
- Disposición ▸ Mostrar las piezas demasiado anchas
- Qué piezas no van a caber a lo ancho de la plancha activa.
8.1Mandar el trabajo
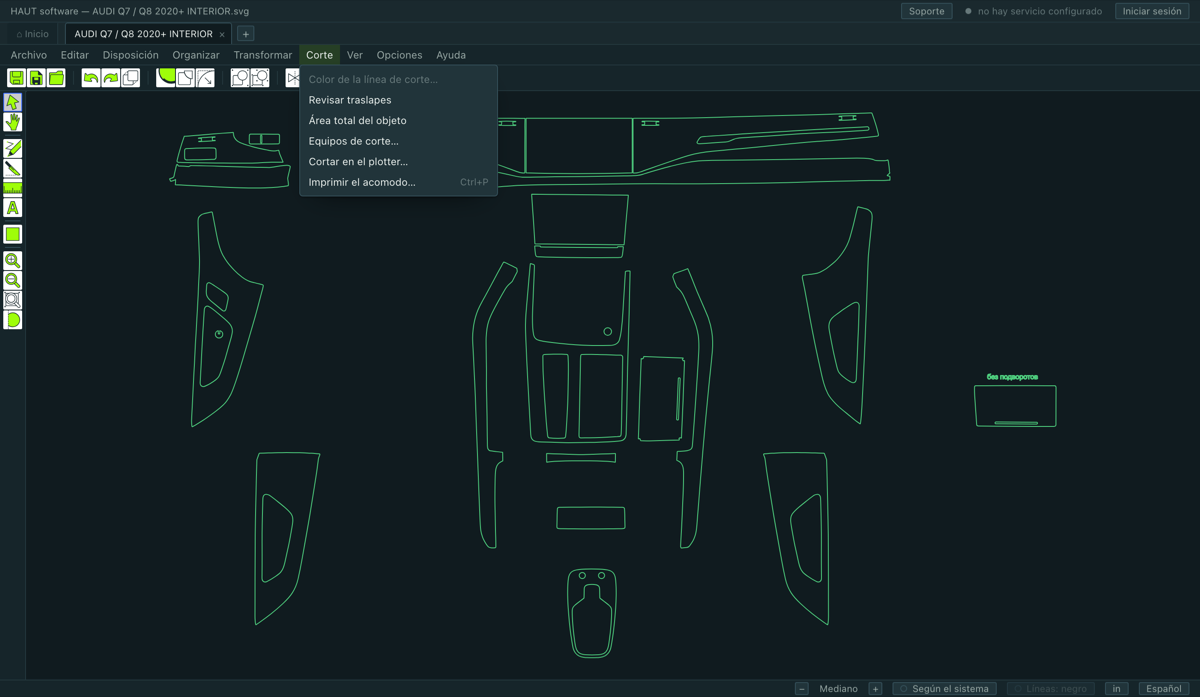
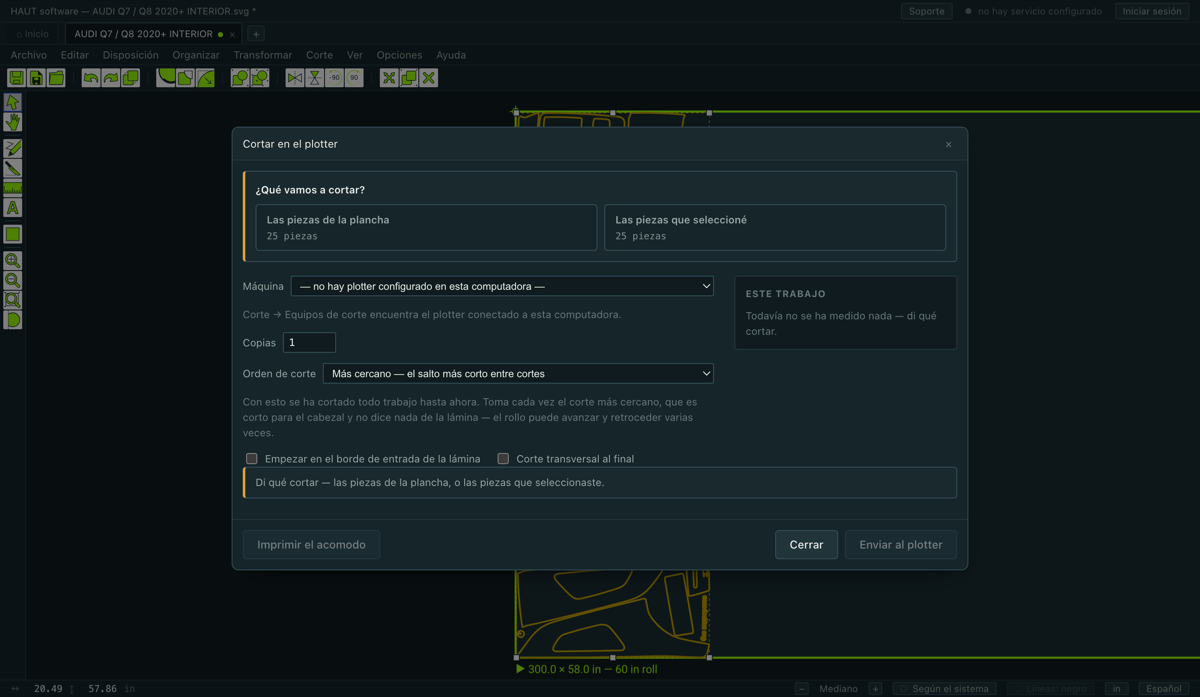
Corte ▸ Cortar en el plotter…. La ventana pregunta una cosa primero, en su propio recuadro arriba: ¿qué estamos cortando? — las piezas de la plancha, o las piezas que usted seleccionó. Nada más está activo hasta que eso se responda.
- Máquina
- Qué plotter. Si dice que no hay plotter configurado, vaya primero a Equipos de corte….
- Copias
- Cuántas veces cortar el mismo trabajo.
- Orden de corte
- El orden que sigue la cuchilla. Más cercano — el salto más corto entre cortes toma cada vez el corte más cercano — corto para el cabezal, y así se ha cortado todo hasta ahora. Serpentina trabaja en bandas a lo largo del rollo, una banda a lo ancho de la lámina y la siguiente de regreso, y devana bastante menos lámina. El más cercano es el predeterminado, y el orden de ningún taller cambia salvo que lo pidan.
- Empezar en el borde de entrada de la lámina
- Corre el trabajo para que el primer corte quede en cero, en vez de que la máquina devane hasta donde las piezas quedaron en el lienzo. Apagado por omisión: una pieza puesta más adelante en el rollo a propósito — para esquivar una falla de la lámina — no debe moverse sin preguntar.
- Corte transversal al final
- Terminar con la lámina presentada bajo la cuchilla de corte transversal.
Los dos números que se leen antes de presionar
- A lo largo del rollo — cuánta lámina lleva el trabajo en sí.
- Hasta el primer corte — cuánto va a devanar la máquina antes de que la cuchilla toque algo. Por encima de un pie el programa avisa: en un retazo eso es lámina que se sale de los rodillos y no se puede recuperar.
El mapa
La ventana dibuja las piezas en el orden en que la cuchilla las tomará, con el recorrido entre cortes punteado y el número de pieza encima, y lo reproduce. Ese orden viene del mismo lugar que el corte, así que la imagen no puede discrepar con la máquina.
Lo que la máquina se queda para sí
Fuerza, velocidad y offset de cuchilla no se envían nunca. Se ponen en el panel del propio plotter, donde el instalador ve la lámina y siente el corte. Al terminar el trabajo el carro vuelve al origen.
8.2Imprimir el acomodo en papel
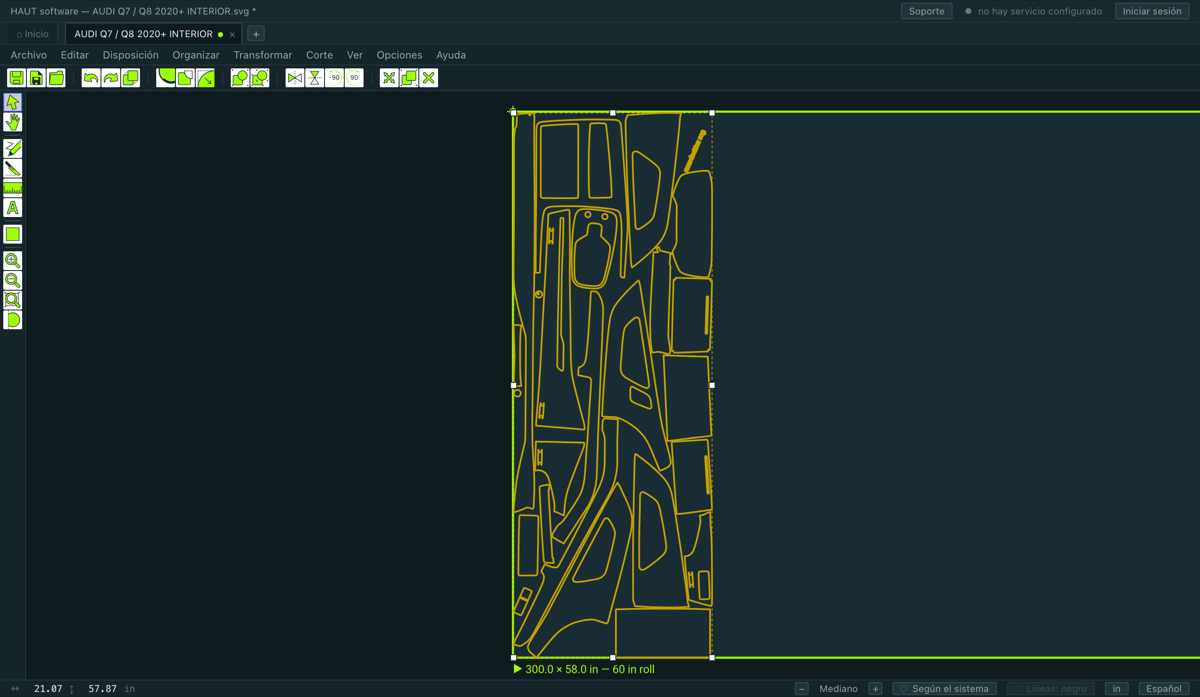
Corte ▸ Imprimir el acomodo…, o Ctrl+P. Imprime un mapa numerado de las piezas sobre la plancha, en A4, para poder distinguir en la mesa una pieza descartada de su vecina.
Esto y la propuesta al cliente desde la cotización son las dos únicas cosas que este programa pone en papel. No hay print-and-cut ni RIP, y no los habrá.
9.1Paquetes — agrupar como usted vende
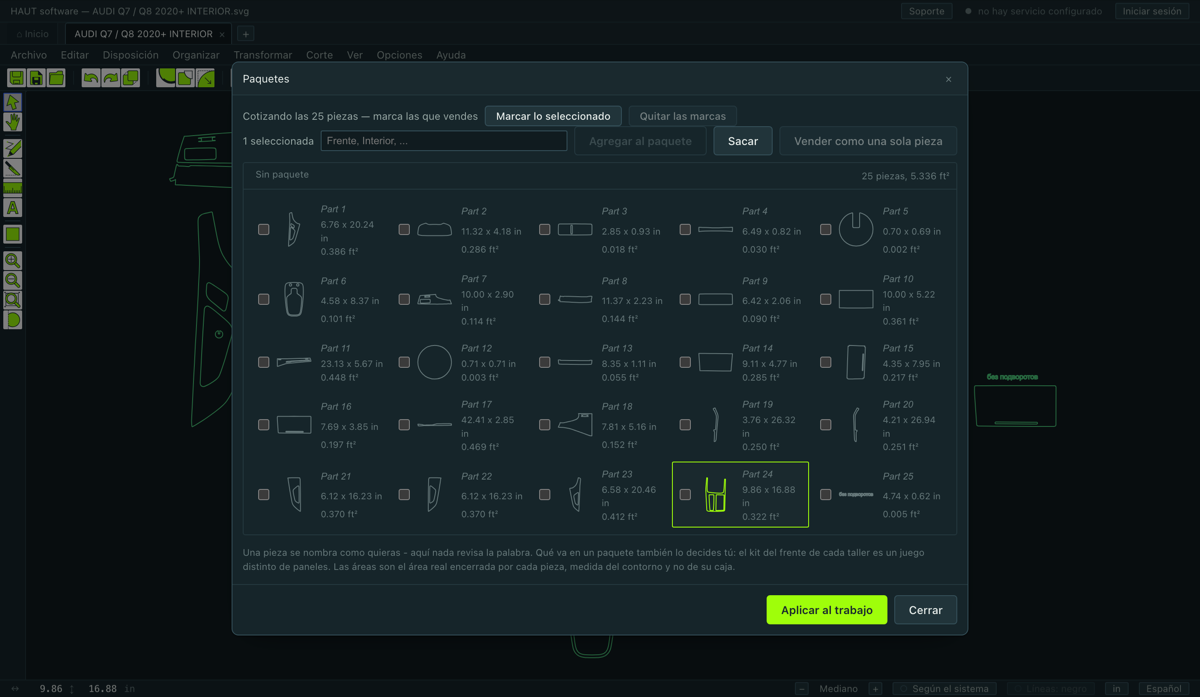
Archivo ▸ Paquetes…. Un cliente no compra veinticinco contornos, compra un frente y un kit de puertas. Un paquete es eso: un grupo con nombre de piezas que la cotización cotiza y la propuesta imprime como una línea.
- Seleccione las piezas, abra la ventana y métalas en un paquete.
- Nombre el paquete como el cliente lo va a leer.
- Una pieza también se puede nombrar por separado — lo que el cliente lee en la propuesta, en vez del nombre del dibujo.
- Todo lo que no está en un paquete se cotiza por su cuenta.
9.2La cotización
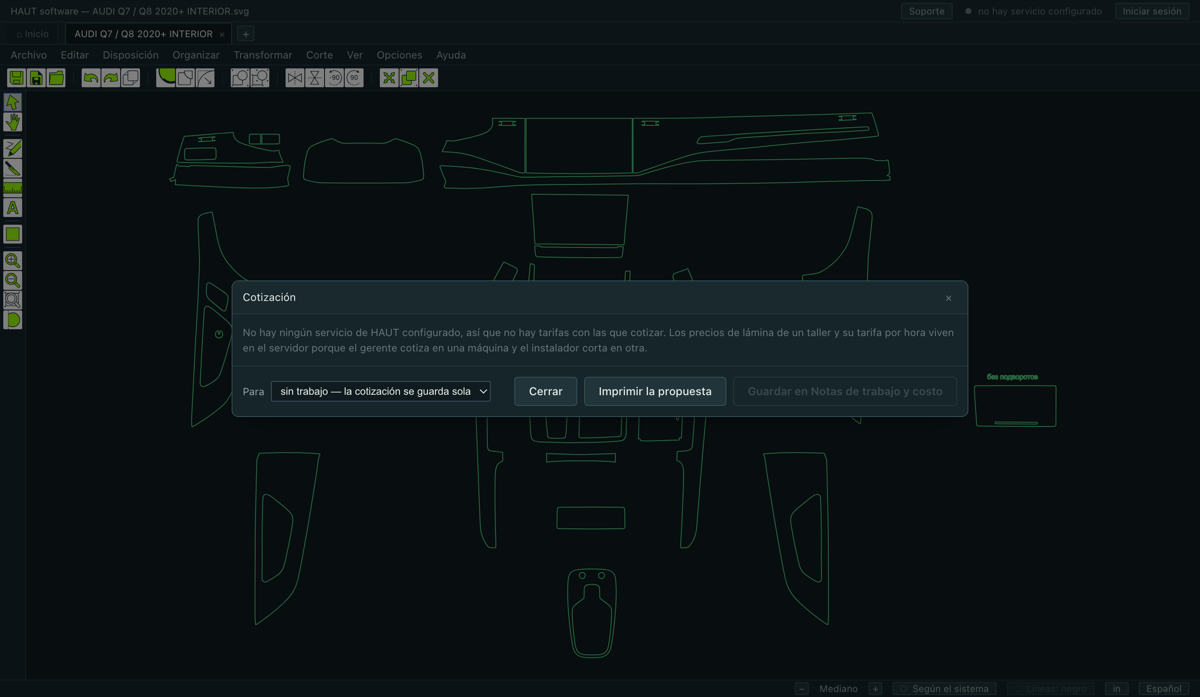
Archivo ▸ Cotización…. Una pantalla: lo que el trabajo le cuesta al taller, y en cuánto se vende.
Dos modos
- Con mano de obra
- Lámina y horas. Éste es un trabajo que usted instala.
- Solo precortados
- Sólo lámina. Las horas quedan en el dibujo y no se cobran — por eso el nivel de dificultad y el instalador se ocultan: sin horas no tienen qué multiplicar ni a quién pagar. Vuelva a cambiar y lo escrito sigue ahí.
Cómo se cuenta la lámina
Sólo lo seleccionado
La cotización es sobre las piezas que usted seleccionó y nada más. Una línea junto a la casilla dice cuántas piezas del dibujo la cotización no cuenta, para que una pieza no se caiga del pedido en silencio. Abra la pantalla sin nada seleccionado y cuenta todo el dibujo.
Descuento, impuesto y tarjeta
El orden es fijo, y no es el común — equivocarse en él no es un error de redondeo:
neto  = suma − descuento
imp.  = neto × tasa
tarj. = (neto + imp.) × tasa
total = neto + imp. + tarj.
- El descuento puede ser porcentaje o suma fija, y se aplica a toda la cotización, antes del impuesto.
- El impuesto no siempre se aplica — a un particular se le factura sin él, y el mismo taller le factura a una empresa con él. Es un hecho de esta cotización, así que se guarda en el dibujo.
- La comisión de tarjeta se toma sobre la suma con el impuesto encima, y se pone a mano — no siempre.
- Una línea que no se pidió está ausente, no en cero. «Descuento 0» en la propuesta de un cliente es una línea por la que alguien pregunta.
Una frase para el cliente
Hay un campo para un comentario sobre toda la cotización. Llega a la propuesta impresa — bajo el total, sobre las condiciones fijas del taller —, a la copia archivada y al archivo con búsqueda.
Archivarla
Guardar en las notas de trabajo congela la cotización: lo que ya se le dijo al cliente queda, hagan lo que hagan las tarifas después. Un taller que reabra el dibujo meses más tarde puede muy bien ver en pantalla una cifra distinta de la del papel, y eso es correcto.
10.1Si algo anda mal
Dice que no hay licencia en esta computadora, pero la licencia está pagada y vigente
El plotter no está en la lista
Presioné cortar y en la máquina no pasó nada
El catálogo está vacío, o mis dibujos guardados no abren
Nada en la cotización tiene precio
La cuchilla cortó más pieza de la que tracé
La cuchilla no hizo nada y dijo que la línea no cruza la pieza
El acomodo automático se niega a correr
Parte de la ventana queda en blanco al maximizarla
Mandé una solicitud y no supe nada
Me sacó la sesión en la otra computadora
Una pieza es más ancha que mi lámina
10.2Cómo pedir ayuda
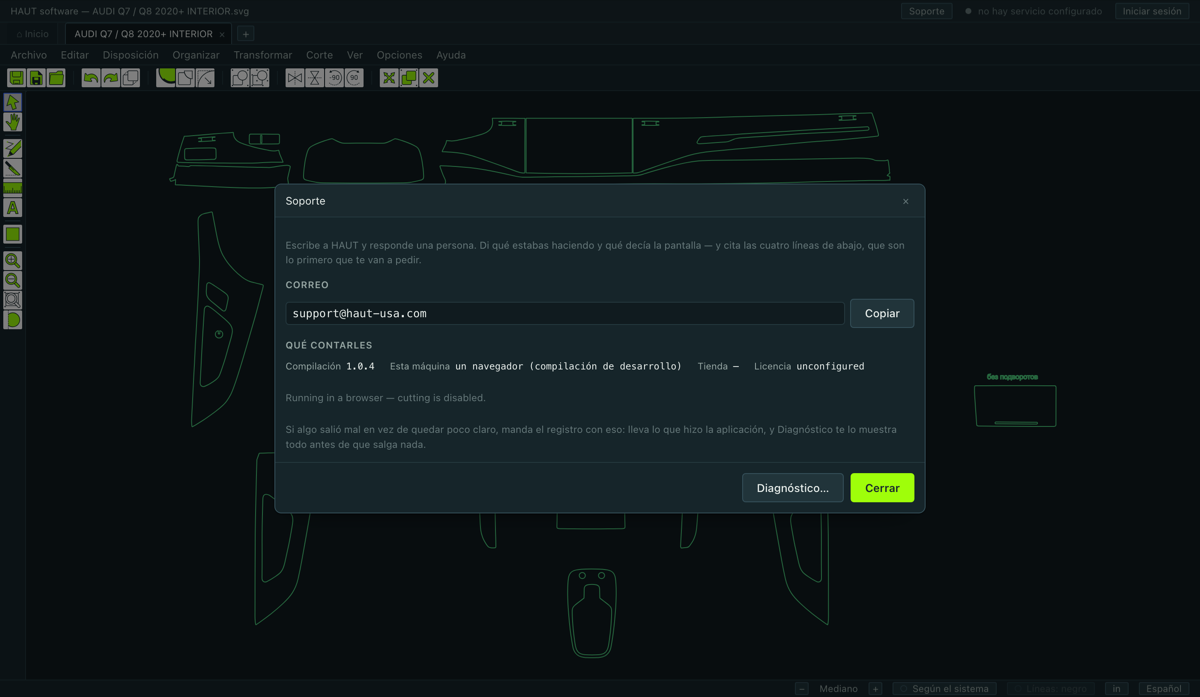
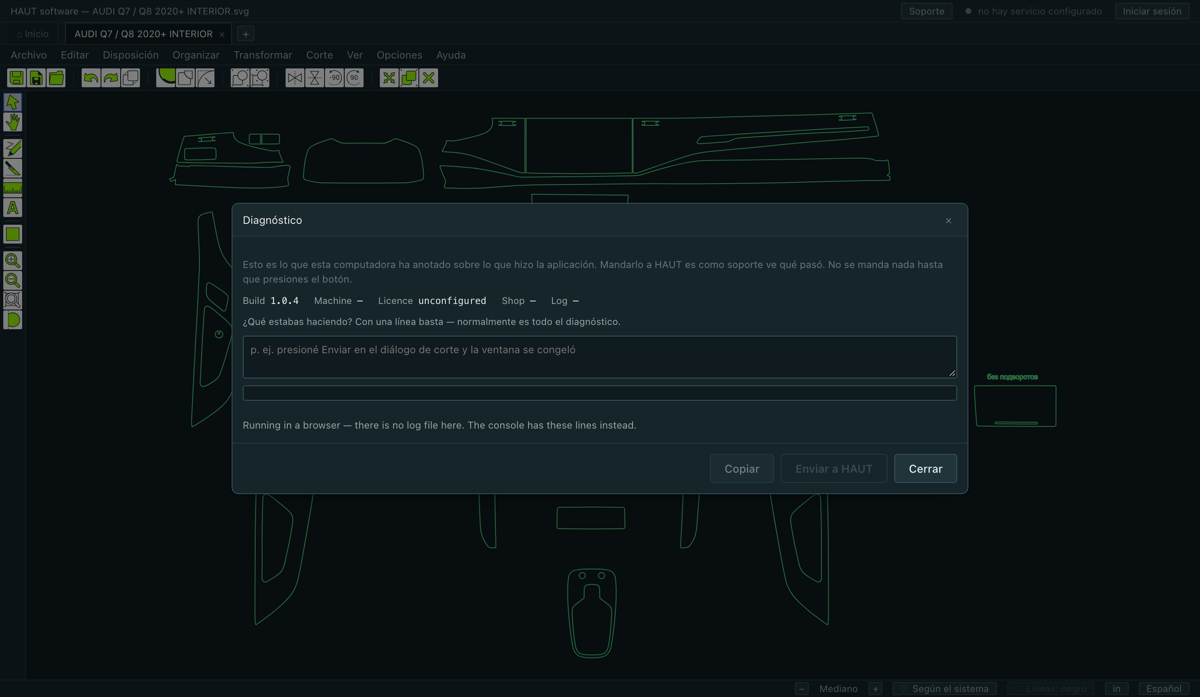
Ayuda ▸ Soporte… tiene un campo para el mensaje. Escriba qué pasó y envíelo — los cuatro datos con que empieza toda llamada a soporte van solos: qué taller, qué cuenta, qué compilación, qué máquina. No hace falta buscarlos.
La dirección está bajo el campo como respaldo, para el caso en que lo que no funciona sea el servicio mismo.
Diagnóstico
Ayuda ▸ Diagnóstico… es el informe que se adjunta cuando algo anda mal y nadie ve por qué. Lleva la compilación, el estado de la licencia, el plotter para el que está configurada la computadora, y el registro de lo que el programa estuvo haciendo. Mándelo con el primer mensaje y no con el tercero — normalmente la respuesta está ahí.
10.4Teclado y mouse
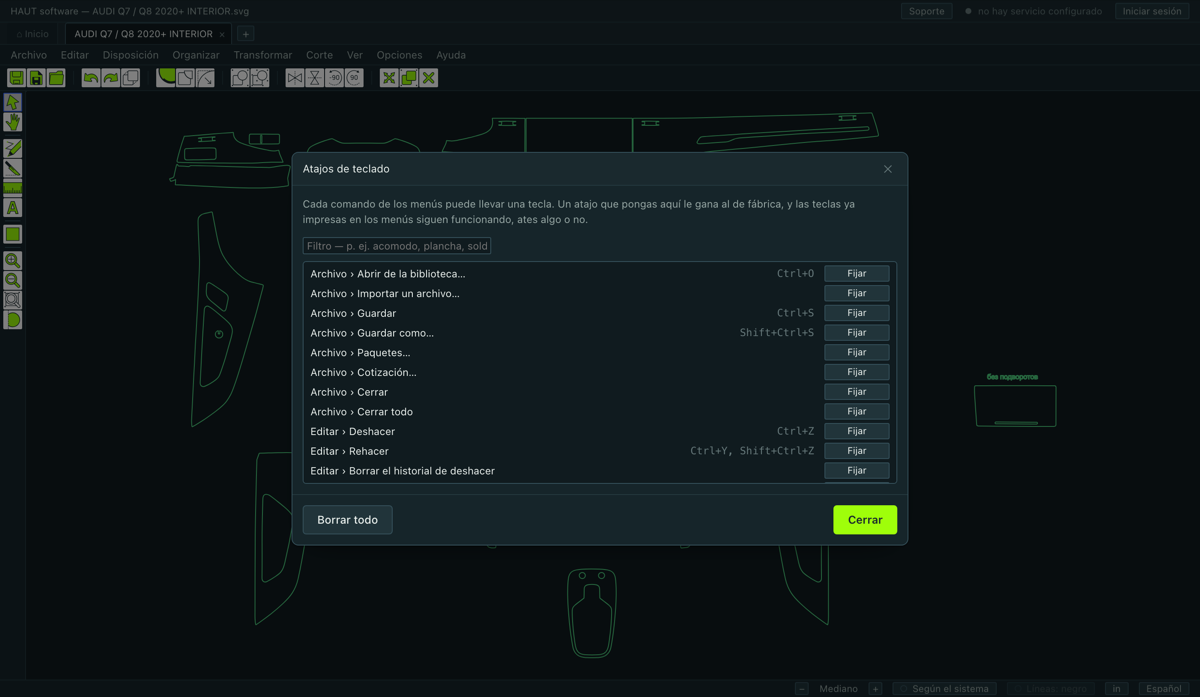
A todo lo que no tiene tecla propia se le puede dar una en Opciones ▸ Atajos de teclado….
Archivos
| Ctrl+O | Abrir de la biblioteca |
|---|---|
| Ctrl+S | Guardar |
| Shift+Ctrl+S | Guardar como |
| Ctrl+P | Imprimir el acomodo |
Edición
| Ctrl+Z | Deshacer |
|---|---|
| Ctrl+Y / Shift+Ctrl+Z | Rehacer |
| Ctrl+X | Cortar (dentro del programa) |
| Ctrl+C | Copiar |
| Ctrl+V | Pegar |
| Ctrl+D | Duplicar |
| Delete / Backspace | Borrar — o sacar de la plancha |
| Ctrl+A | Seleccionar todo |
| Esc | No seleccionar nada |
| Ctrl+G | Agrupar |
| Shift+Ctrl+G | Desagrupar |
| Flechas | Empujar — Shift para un paso mayor |
Vista
| F8 | Ver todo |
|---|---|
| F7 | Ver lo seleccionado |
| F9 | Ver la plancha |
| F6 | Un paso afuera |
| Shift+F6 | Un paso adentro |
| + / − | Acercar / alejar |
| Ctrl+Alt+= / Ctrl+Alt+− | Interfaz más grande / más chica |
Herramientas y guías
| S | Herramienta de selección |
|---|---|
| V | Guía vertical |
| H | Guía horizontal |
Mouse
| Rueda | Zoom centrado en el puntero |
|---|---|
| Espacio + arrastrar | Mover el lienzo |
| Botón central + arrastrar | Mover el lienzo |
| Doble clic en una pieza | Editar nodos |
| Doble clic en una plancha | Hacerla la activa |
| Clic derecho | Qué se puede hacer aquí |
| Alt al arrastrar | Imán apagado |
| Shift al trazar un corte | Fijar el eje |
1.1O que é este programa
O HAUT software encaixa moldes de envelopamento e PPF e os corta no seu plotter. Faz três coisas e não finge fazer mais: abre um molde, encaixa as peças na película que você carregou e manda o corte para a máquina.
- Os moldes vêm do catálogo HAUT. Você escolhe um carro e o kit abre. Também dá para importar um desenho seu.
- O encaixe é automático. O programa arruma as peças na largura de rolo que você informar e diz quantas polegadas de película o trabalho consome.
- O corte vai direto ao plotter, pela fila de impressão que o sistema operacional já cria para ele.
- O orçamento está dentro. Quanto o trabalho custa para a oficina e por quanto é vendido, numa tela só e numa folha só para o cliente.
1.2Baixar e instalar
Existe um endereço só, e ele sempre entrega a compilação mais nova:
- Windows um instalador, cerca de 5 MB
- macOS uma imagem de disco, Intel e Apple silicon no mesmo arquivo
Windows
- Abra o link do Windows. O navegador salva um arquivo cujo nome termina em
-setup.exe. - Execute-o. O Windows pode dizer que o editor é desconhecido — clique em Mais informações e depois em Executar assim mesmo.
- O programa instala e abre. Durante a instalação não há nada a escolher.
macOS
- Abra o link do macOS. O navegador salva um arquivo
.dmg. - Abra-o e arraste o HAUT software para a pasta Aplicativos.
- Abra pelos Aplicativos. A primeira abertura demora alguns segundos a mais enquanto o macOS confere a assinatura.
Atualizações
O programa procura uma compilação mais nova a cada quatro horas e a cada abertura. Quando existe, ele avisa e instala na próxima reinicialização. Nunca é preciso voltar à página de download.
1.3Solicitar uma conta de oficina
A conta é concedida, não tomada. Não há cadastro: você envia uma solicitação, uma pessoa da HAUT a lê, e a oficina com sua licença nascem no momento da aprovação. Para uma solicitação recusada nada é criado — por isso ainda não se escolhe senha.
- Abra o programa. Na tela de entrada clique em Solicitar uma conta de oficina.
- Preencha o formulário. Todos os campos são obrigatórios, menos os que um negócio honesto pode realmente não ter — número de IVA, certificado de revenda, sala no endereço, endereço de entrega separado.
- Dê um link para cada um dos três: seu site, um perfil social e uma ficha em mapas. Se não tiver algum, marque a caixa que diz isso — essa é uma resposta de verdade, não um vazio.
- Responda à declaração sobre trabalhar em empresa que faz software ou catálogos de moldes PPF. Responder sim não recusa a solicitação; abre um campo onde a ligação é nomeada, e uma pessoa decide.
- Envie. A tela dá uma referência. Guarde-a: é assim que se consulta o que aconteceu sem ter conta.
Como consultar
Na tela de entrada, Consultar uma solicitação recebe a referência e diz em que pé está: em análise, aprovada, ou não aprovada com as palavras de quem analisou. Se não foi aprovada, dá para corrigir e solicitar de novo quando o motivo estiver resolvido.
1.4O código de convite e o primeiro acesso
Quando a solicitação é aprovada, a HAUT envia um código de convite para o e-mail que consta nela. É nesse momento que se escolhe a senha.
- Na tela de entrada clique em Eu tenho um código de convite.
- Digite o código, o e-mail para onde o convite foi enviado e uma senha de pelo menos oito caracteres.
- Leia os Termos de Serviço e a Política de Privacidade e marque a caixa.
- Clique em Entrar na oficina. Você entrou, a licença ocupa um lugar neste computador e o catálogo abre.
Lugares
Uma licença tem dois lugares — dois computadores. Quem os ocupa são as duas primeiras máquinas em que você entrar. Uma terceira é recusada pelo nome, em vez de expulsar alguém: a máquina que seria expulsa pode estar cortando. Para mover um lugar, saia na máquina que não precisa mais dele, ou escreva para a HAUT.
Se esquecer a senha
Na tela de entrada, Esqueceu a sua senha? envia um link para o e-mail em que a licença foi emitida. Abra o link, escolha uma senha nova e entre aqui com ela.
1.5Conectar o plotter
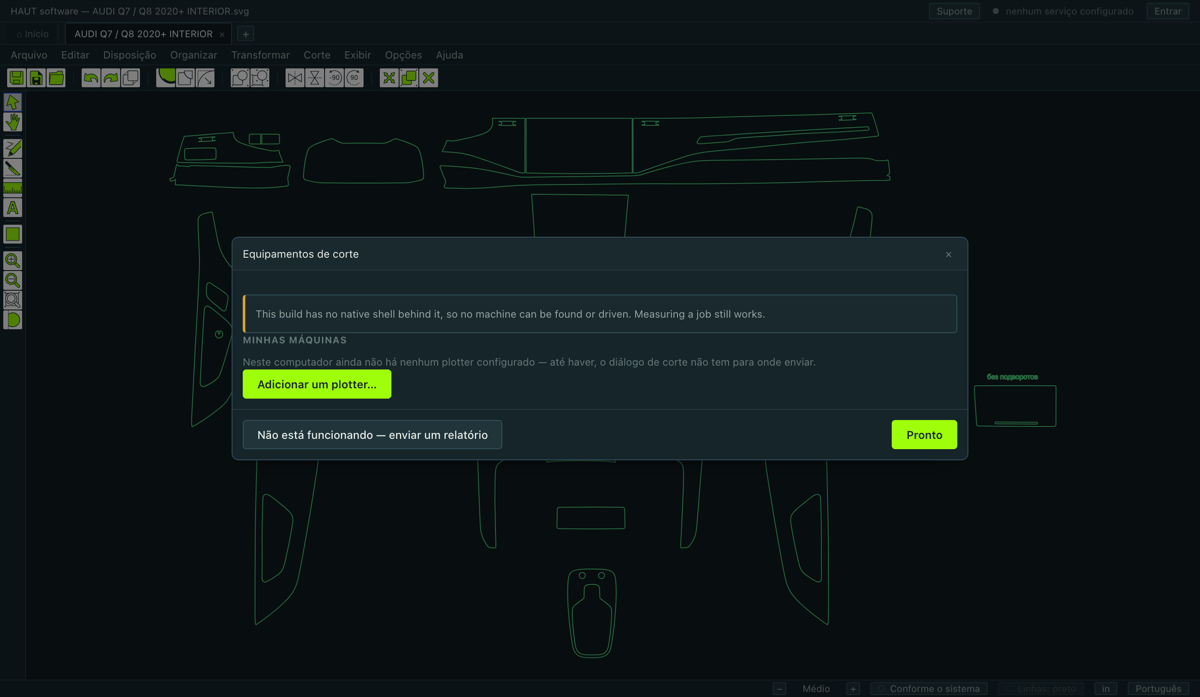
Faça isto agora, antes de abrir o seu primeiro molde. Configura-se uma vez e nunca mais, e é o passo que mais custa tempo quando é deixado para quando a película já está carregada.
O programa conversa com o plotter pela fila de impressão que o sistema operacional cria para ele, então a máquina precisa existir lá antes de poder aparecer aqui.
Windows
- Ligue o plotter com o cabo USB e ligue-o.
- Abra Configurações → Bluetooth e dispositivos → Impressoras e scanners (ou o antigo Painel de Controle → Dispositivos e Impressoras).
- Se o plotter já estiver lá, abra-o, vá em Propriedades da impressora → Portas e anote a porta — USB001, USB002 ou parecida. Depois pule para o passo do nome.
- Se não estiver, clique em Adicionar dispositivo e depois em A impressora que desejo não está listada.
- Escolha Adicionar impressora local ou de rede com configurações manuais.
- Como porta escolha a USB00… em que o plotter está. Se a máquina estiver em rede, escolha Porta TCP/IP padrão, digite o endereço dela e deixe o tipo em RAW na porta 9100.
- Como driver escolha o fabricante Generic e a impressora Generic / Text Only. É de propósito: este programa manda o arquivo de corte à máquina sem tocar nele, e um driver de impressora de verdade o reescreveria em algo que um plotter não consegue ler.
- Nomeie HAUT, depois a sua marca e modelo. Não compartilhe. Conclua.
macOS
- Ligue o plotter com o cabo USB e ligue-o.
- Abra Ajustes do Sistema → Impressoras e Scanners. Um plotter USB normalmente aparece sozinho — se já estiver na lista, pronto.
- Se não estiver, clique em Adicionar Impressora, Scanner ou Fax… e espere alguns segundos na aba Padrão até a máquina aparecer.
- Se o plotter estiver em rede em vez de cabo, use a aba IP: digite o endereço, escolha o protocolo HP Jetdirect – Socket e deixe a porta em 9100.
- O que ele oferecer em «Usar:» serve — este programa manda o arquivo de corte sem tocar nele e o driver nunca o vê. Se não oferecer nada, escolha «Selecionar Software…» e pegue Generic PostScript Printer.
- Dê o nome HAUT … e clique em Adicionar.
Por que o nome importa
O programa lê o nome da fila de volta. Uma fila chamada HAUT … é tomada como o plotter e oferecida sozinha, porque esse nome foi digitado por alguém que via o cabo — e isso vence qualquer palpite que o programa pudesse dar por marca ou porta. Uma fila com outro nome funciona igual; só fica na lista longa atrás do botão que mostra todas as portas.
1.6O quadrado de teste — o que prova que corta
Corte ▸ Equipamentos de corte… lista as máquinas para as quais este computador está configurado. Escolhida uma, clique em Cortar um quadrado de teste.
A máquina corta um quadradinho. Depois o programa faz uma única pergunta: a lâmina se moveu?
- Sim — a máquina fica marcada como comprovada, com a data. É isso que «conectada» significa aqui.
- Nada se moveu — a resposta nomeia as três coisas a conferir, na ordem: o painel não está em HP-GL, é a fila errada, ou a lâmina não está abaixada.
Qual driver é usado
Uma fila cujo nome o programa reconhece vai para o driver da própria máquina, se esse driver for um dos que está comprovado que cortam. Caso contrário, vai para o driver HP-GL padrão, que corta — e a linha sob a máquina diz isso, e diz que o limite de largura da própria máquina não é usado e que a chapa é o que limita o trabalho.
2.1A aba Início
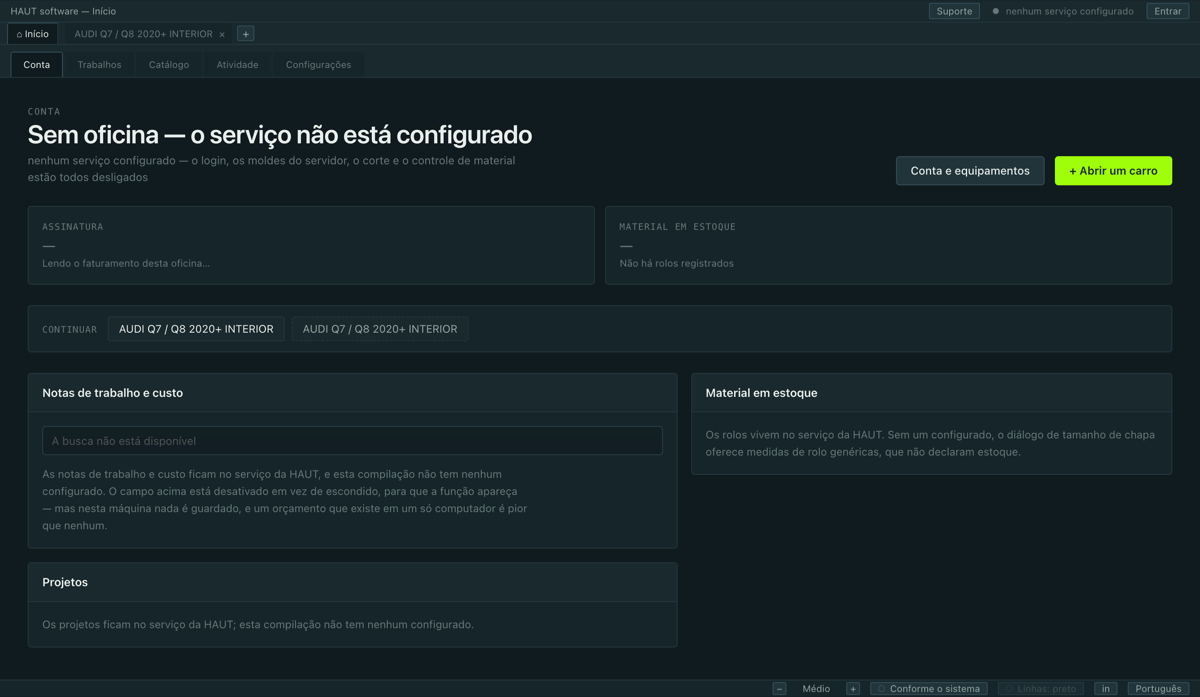
Início é a aba mais à esquerda e está sempre lá. Tudo o que é da oficina e não de um desenho mora nela, em faces entre as quais se alterna:
- Catálogo
- Os moldes que a sua licença deixa ver. É aqui que um trabalho começa — veja o próximo capítulo.
- Trabalhos
- Os orçamentos que esta oficina arquivou, com busca. Um orçamento salvo aqui fica congelado: o que foi dito ao cliente permanece.
- Ajustes
- Os números da própria oficina — valor da hora, preços de película, a margem sobre material, instaladores, níveis de dificuldade, imposto, e o nome do negócio que vai numa proposta impressa.
- Cobrança
- A assinatura, e a compra de película e ferramentas da HAUT onde isso se aplicar à sua oficina.
2.2Os números da oficina, digitados uma vez
Início ▸ Ajustes guarda o que um orçamento lê ao vivo: mude uma tarifa ali e todo orçamento posterior a usa, enquanto um já arquivado mantém os números com que foi custeado.
- Quanto vale uma hora
- Dois números: o que você cobra por uma hora e o que uma hora lhe custa. A diferença é a margem da mão de obra.
- Margem sobre material
- Um multiplicador sobre o que a película lhe custou. ×2,5 vende a película por duas vezes e meia o que você pagou. Nada num orçamento tem preço até isto ser definido: é o único número sem o qual a tela não calcula, e digita-se uma vez.
- Película em estoque
- Cada película com que você trabalha, e o que você paga por ela — não por quanto vende. A margem acima faz a venda.
- Níveis de dificuldade
- Um nome e um multiplicador. O nível multiplica o trabalho, não o total: a película custa o mesmo, seja o que for que se cole nela.
- Instaladores
- Quem faz o trabalho e quanto vale a hora dele, se for diferente da da oficina. Um instalador pode ser pago por hora ou por porcentagem do trabalho — há oficinas com os dois.
- Imposto
- Como a linha de imposto se chama nas suas propostas, e a alíquota. Deixe o nome vazio e usa-se a palavra do próprio mercado.
- Taxa do cartão
- O que o cartão lhe custa. Cobrada sobre a soma com o imposto, e desligada a menos que um orçamento a peça.
- Timbre
- O nome do negócio que vai numa proposta impressa. Sem ele, uma proposta não levaria nome nenhum.
2.3Licença, lugares e equipamentos
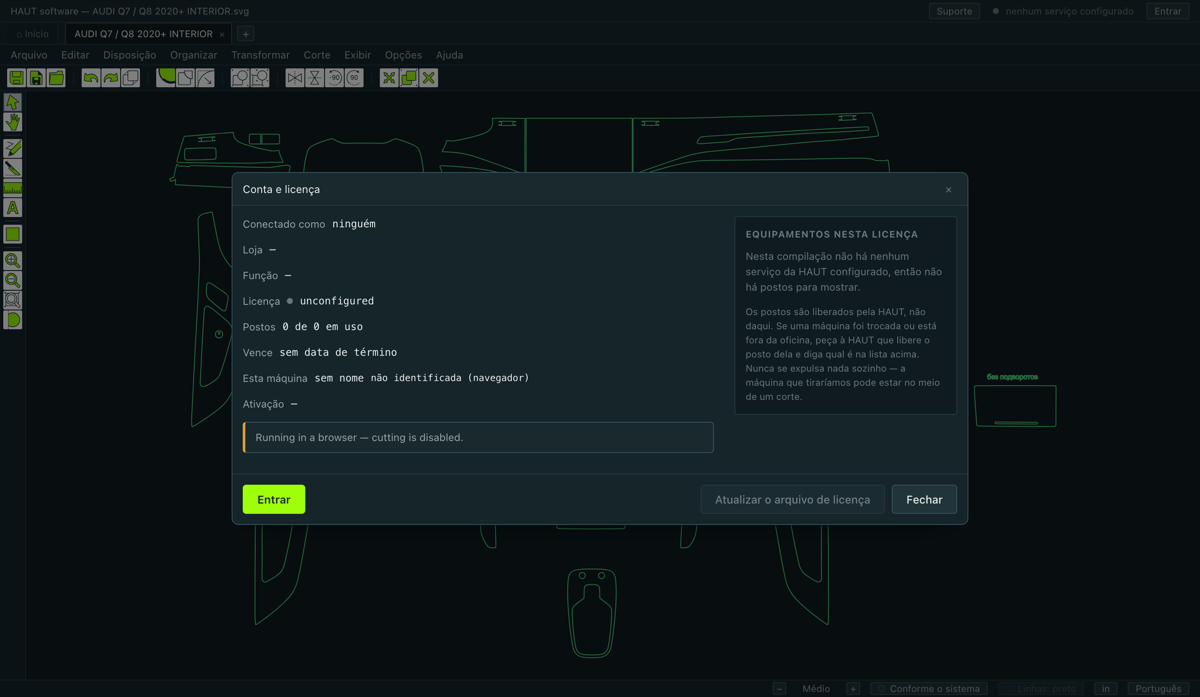
Ajuda ▸ Conta, licença e equipamentos… mostra a que este computador tem direito: a oficina, o plano, até quando vale, quais máquinas ocupam os dois lugares e qual delas é a que corta.
Como a licença é verificada
- A cada abertura, a cada entrada e uma vez por hora enquanto o programa estiver aberto. Também pergunta quando você volta à janela depois de sair.
- Uma licença que termina no almoço fecha no almoço, não na manhã seguinte. Não é preciso reiniciar nada.
- Offline, a última resposta vale sete dias. Uma máquina numa oficina sem rede continua cortando; uma que está offline há mais tempo precisa ver o serviço de novo.
Quando o corte para
Se a licença venceu ou foi suspensa, o catálogo fecha e os desenhos salvos da própria oficina fecham junto — não só a lista, as linhas. O editor e a biblioteca embutida continuam funcionando. É a licença fazendo o trabalho dela, e se resolve com um pagamento ou uma conversa com a HAUT, não com um ajuste.
3.1Abrir um molde do catálogo
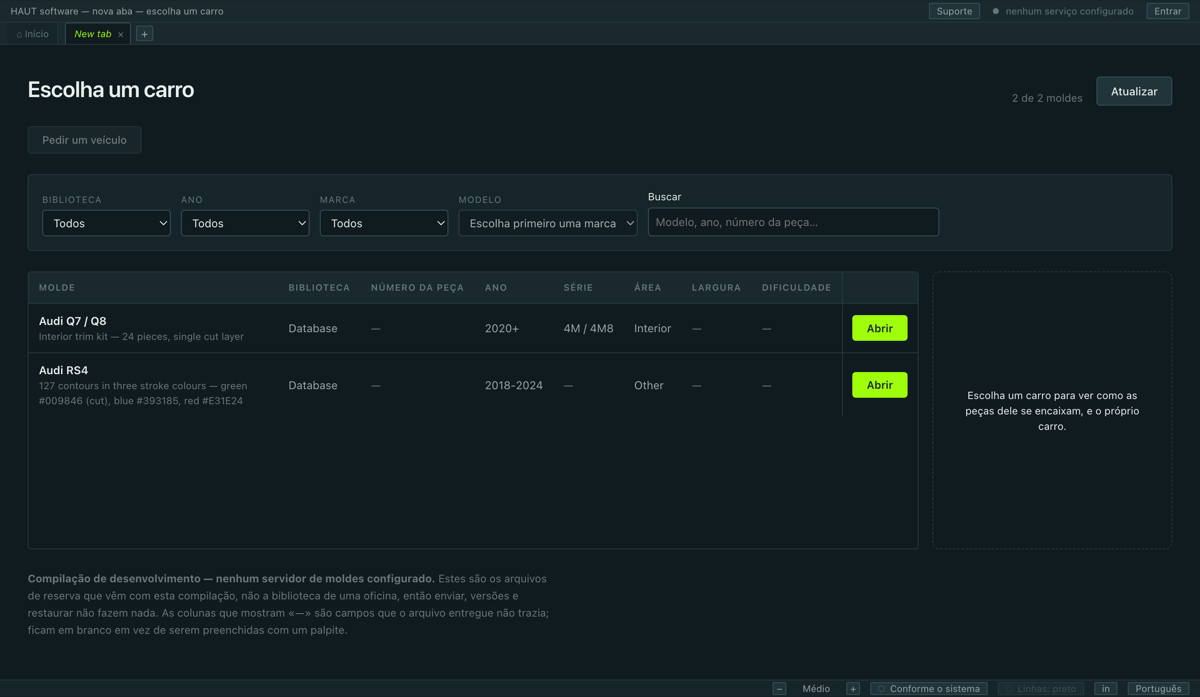
Arquivo ▸ Abrir da biblioteca…, ou Ctrl+O, ou o + na barra de abas.
- Reduza com os filtros de cima: biblioteca, ano, marca, modelo.
- Ou digite na busca — o nome de um modelo, parte dele, um número de peça.
- Clique em Abrir na linha que quiser. O kit chega numa aba nova.
O que as colunas significam
- Biblioteca
- A qual catálogo o molde pertence. Quais bibliotecas você enxerga faz parte da licença.
- Número da peça
- O número próprio da HAUT para aquele kit.
- Largura
- O mais largo que o kit precisa na largura do rolo. Um kit mais largo que a sua película não é cortado numa peça só.
- Dificuldade
- Quão difícil é a aplicação. É a nota do projetista, não um preço.
3.2Quando o molde não existe
Se o carro não está no catálogo, peça. O pedido vai para a própria prancheta da HAUT e volta como molde na biblioteca: você não precisa desenhar nem procurar em outro lugar.
O formulário fica na tela do catálogo. Nomeie o carro com a maior precisão possível: marca, modelo, os anos, a carroceria e a versão onde ela muda os painéis. Um pedido que diz «BMW» recebe de volta a pergunta de qual; um que diz «BMW M3 CS 2024, cupê» recebe um molde.
4.1Do que a janela é feita
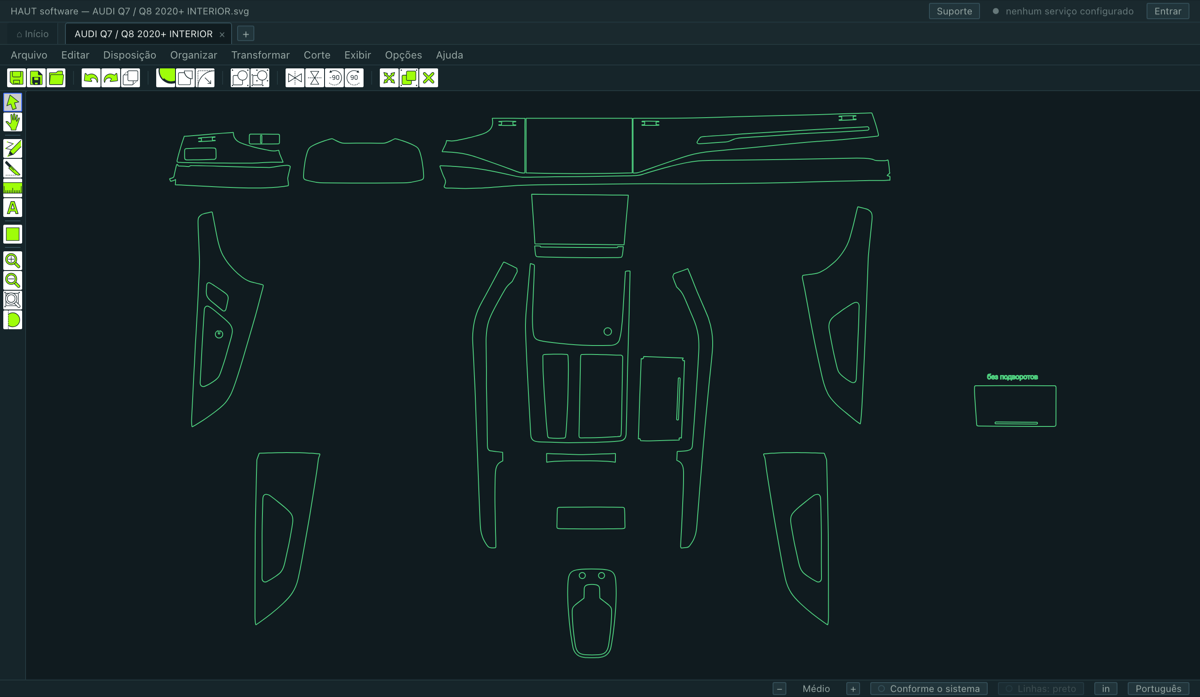
De cima para baixo:
- Barra de título
- O arquivo aberto. Quando uma ferramenta modal está rodando, o nome dela aparece aqui também —
HAUT software -[Sobreposição] — …, e assim dá para ver de relance que a ferramenta ainda está armada. - Abas
- Uma por arquivo aberto, mais Início à esquerda e + à direita. Vários moldes podem ficar abertos ao mesmo tempo.
- Barra de menus
- Oito menus, na ordem em que o trabalho acontece: pegar o arquivo, mudá-lo, colocar sobre o material, arrumar, trabalhar a geometria, enviar — depois a vista e os ajustes.
- Barra de ferramentas
- Botões do que mais se usa. Totalmente reorganizável — veja Personalizar a barra e a paleta….
- Paleta de ferramentas
- Na borda esquerda: as ferramentas modais. A que está armada tem um anel azul.
- Tela de desenho
- O desenho. A chapa de material, quando existe, é desenhada por baixo, com a medida numa etiqueta.
- Linha de estado
- Embaixo: o tamanho do que está selecionado, o tamanho da interface, o tema, a cor das linhas, as unidades e o idioma.
4.2Como se mover pelo desenho
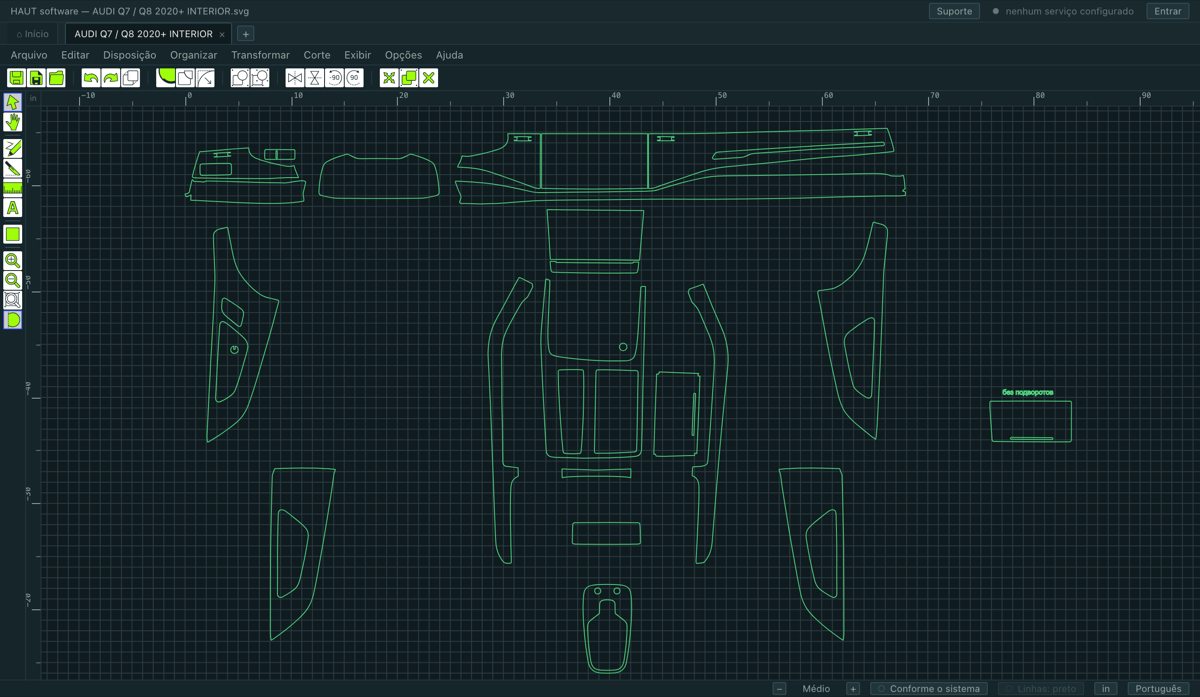
| Roda do mouse | Zoom, centrado no ponteiro. Nada mais está ligado à roda. |
|---|---|
| Espaço + arrastar | Mover a tela. |
| Botão do meio + arrastar | Mover a tela. |
| F8 | Ver tudo |
| F7 | Ver o selecionado |
| F9 | Ver a chapa |
| F6 / Shift+F6 | Um passo para fora / um passo para dentro |
| + / − | Um passo para dentro / um passo para fora |
Grade, réguas e guias
- Mostrar a grade no menu Exibir desenha a grade, e Tamanho da grade ao lado define o passo — 0.25, 0.5, 1, 2 ou 5 in.
- Mostrar as réguas coloca uma régua em cima e à esquerda.
- Uma guia é uma linha que você coloca: V solta uma vertical, H uma horizontal, as duas no ponteiro. As peças grudam nelas.
- Para tirar uma guia, clique com o botão direito nela e use Delete Guide. Limpar as guias tira todas.
4.3Tema, tamanho, unidades e idioma
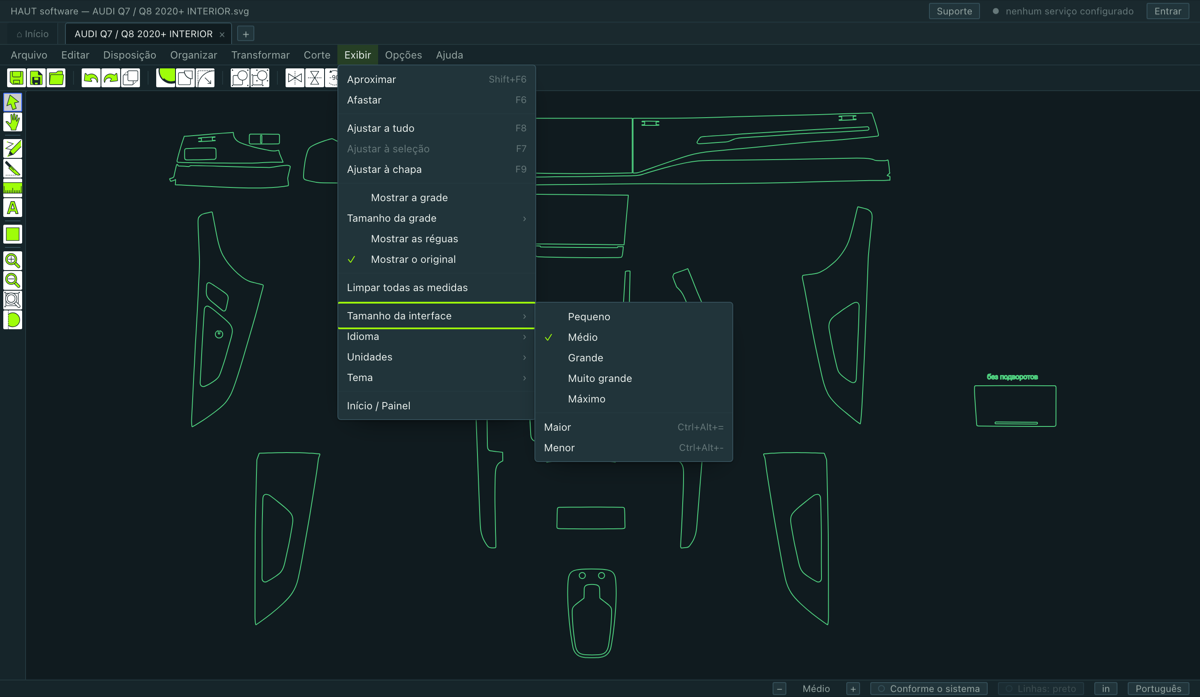
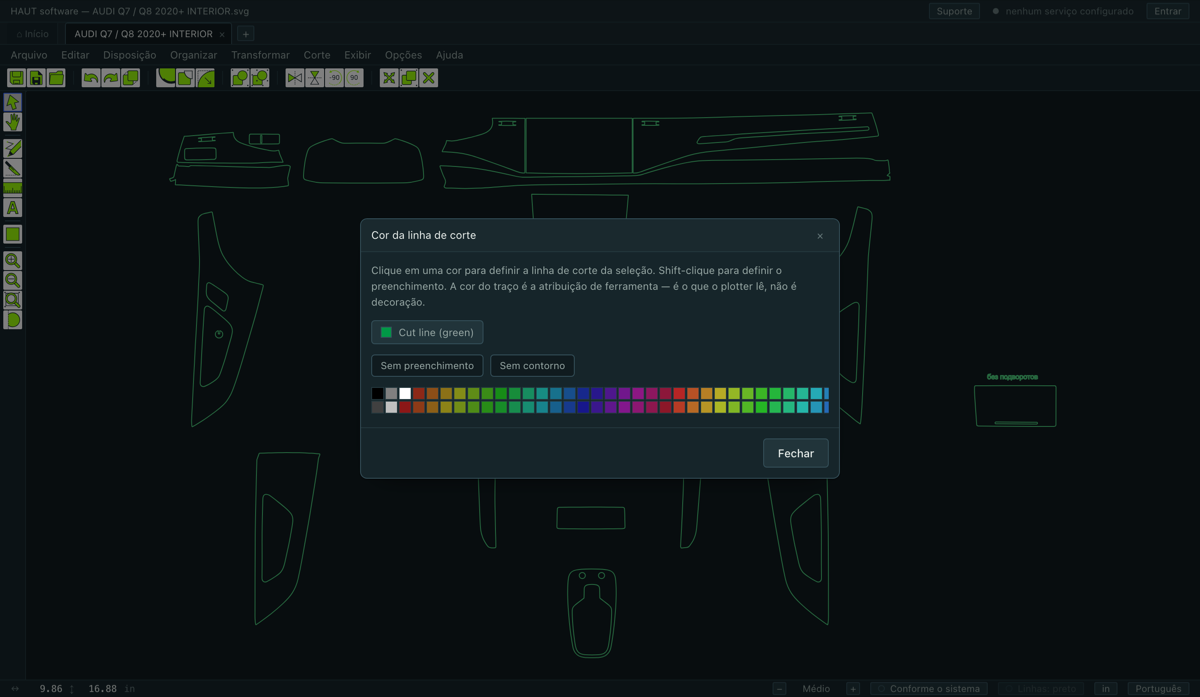
Os quatro estão no menu Exibir, e os quatro também estão na linha de estado no pé da janela, a um clique.
- Tamanho da interface
- Cinco passos, de Pequeno a Máximo. Tudo escala junto — menus, botões, caixas de diálogo e os campos dentro delas. Ctrl+Alt+= e Ctrl+Alt+− sobem e descem um passo.
- Idioma
- English, Русский, Español, Português. Muda na hora e fica guardado.
- Unidades
- Polegadas ou milímetros. Muda todo campo e toda leitura do programa, inclusive os das barras de ferramentas.
- Tema
- Escuro, Claro ou Conforme o sistema — que segue o ajuste do próprio computador e muda junto com ele ao anoitecer. Uma instalação nova fica em Conforme o sistema.
A cor das linhas
A linha de estado tem um interruptor Linhas: preto. Ligado, todo contorno é desenhado em preto, seja qual for a cor com que chegou. Isso importa porque as cores no arquivo do molde não significam nada — são do designer, e o programa nunca corta por cor.
4.4Reorganizar a barra e a paleta
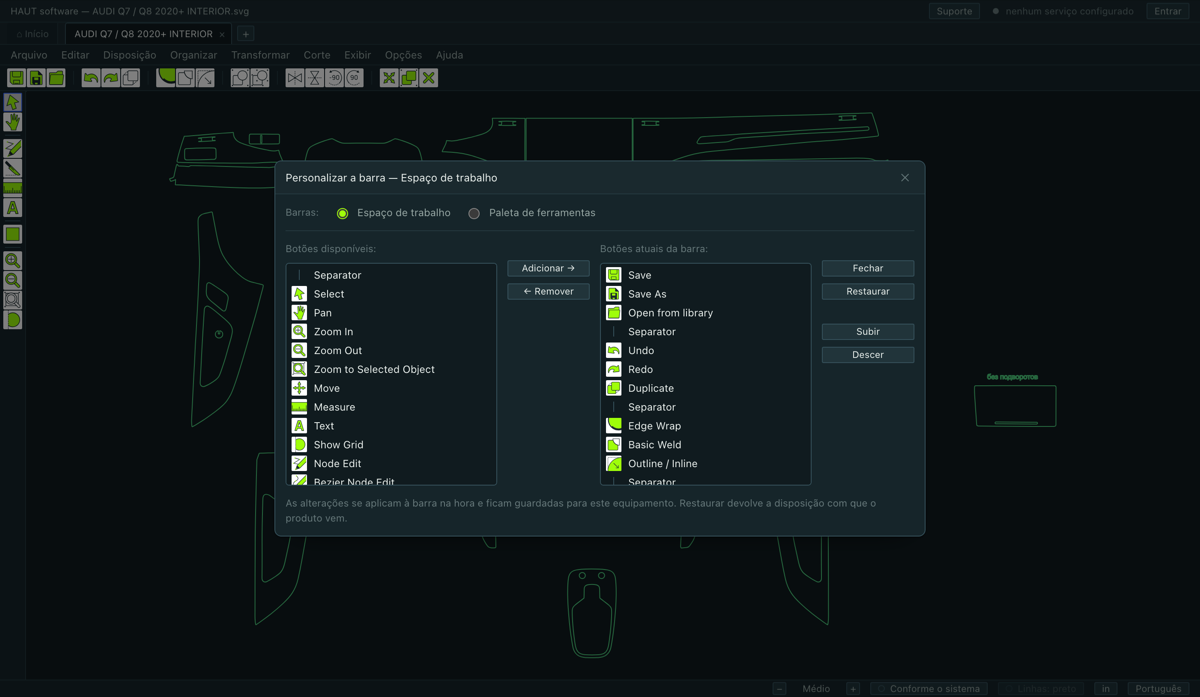
Opções ▸ Personalizar a barra e a paleta… traz duas listas: tudo o que o programa pode colocar numa barra, e o que está nela agora. Adicionar, remover, subir, descer, e um separador para agrupar.
O que você montar fica guardado neste computador. Uma oficina que nunca usa a ferramenta de texto pode tirá-la; uma que espelha todo trabalho pode pôr o par de espelhos na ponta esquerda.
Atalhos de teclado
Opções ▸ Atalhos de teclado… lista todo comando que pode receber uma tecla e deixa você definir as suas. As teclas de fábrica dos próximos capítulos não podem ser tiradas, mas tudo que não tem uma pode ganhar.
4.5Importar, salvar, e o que sai do programa
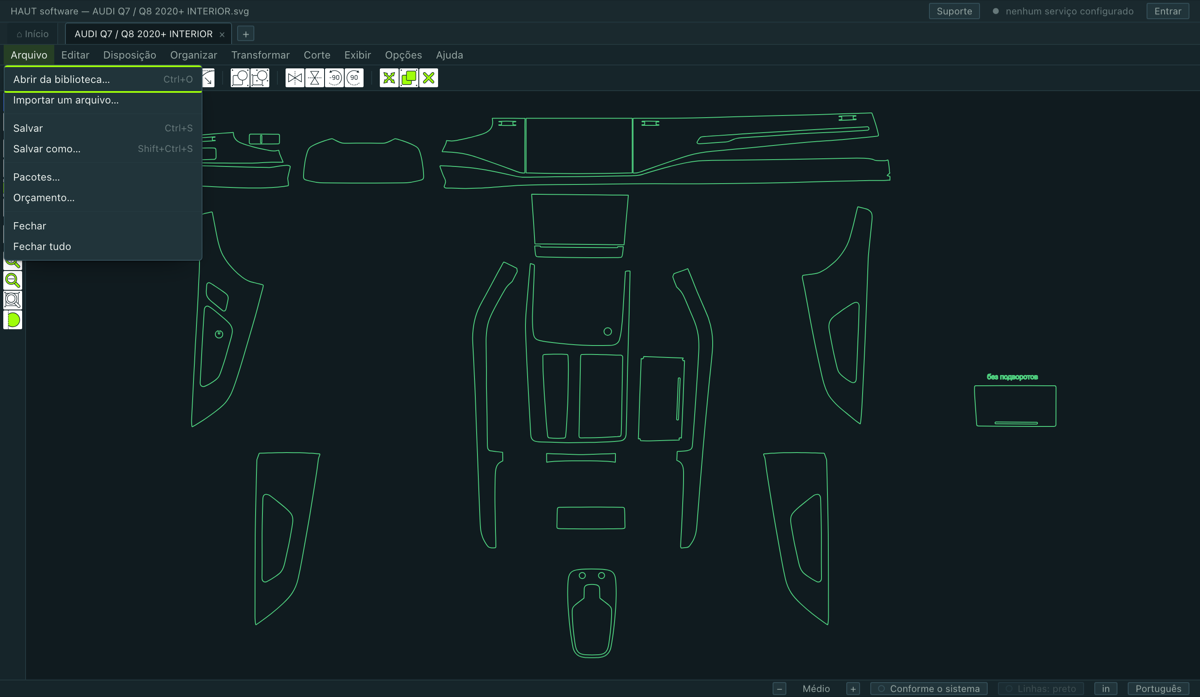
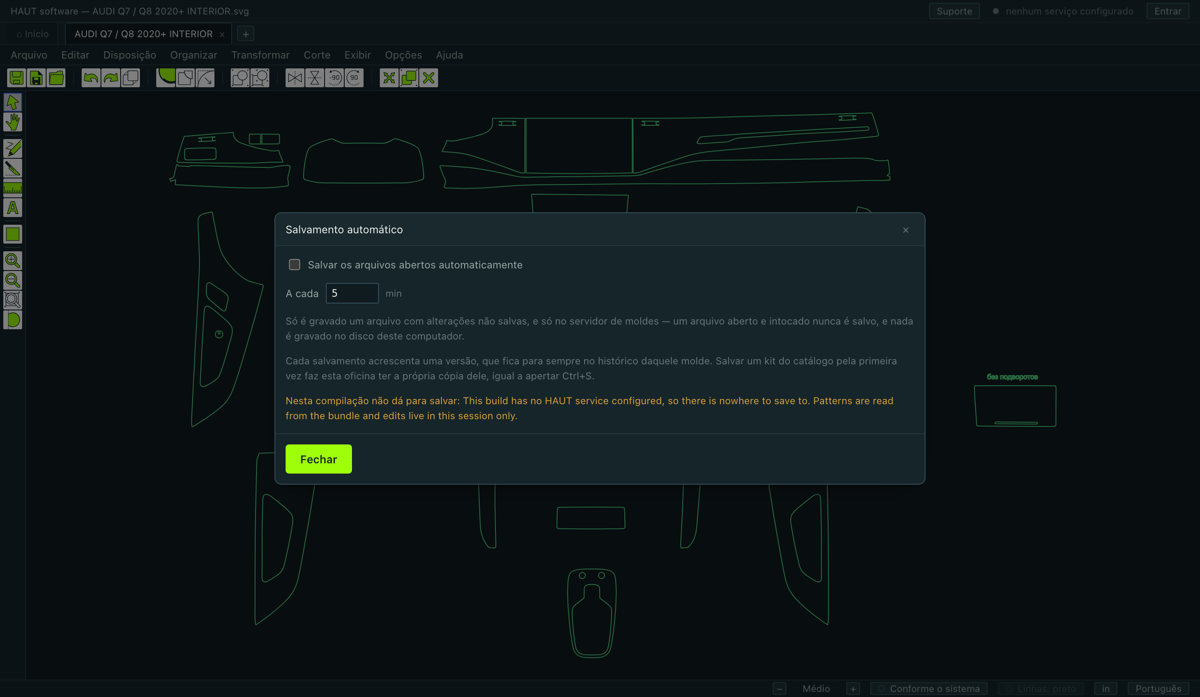
Importar
Arquivo ▸ Importar um arquivo… lê um desenho seu: SVG, EPS, AI e PLT. Ele chega numa aba nova e se comporta como qualquer outro molde.
Salvar
- Ctrl+S — Salvar, por cima do arquivo aberto.
- Shift+Ctrl+S — Salvar como…, com outro nome. Um molde que veio do catálogo ou de uma importação precisa ser salvo num lugar próprio da primeira vez, então esse é o salvamento de que se precisa mais vezes que o simples.
- Uma aba com trabalho não salvo tem um ponto ao lado do nome, e ao fechar ela pergunta.
Salvamento automático
Opções ▸ Salvamento automático… salva a cada poucos minutos todos os arquivos abertos com alterações não salvas. Fica desligado até você ligar.
O que não pode sair
Não há exportação — nem arquivo vetorial, nem imagem, nem PDF — e os dados vetoriais não são copiados para a área de transferência do sistema. Ctrl+C e Ctrl+V movem peças dentro deste programa e não deixam nada onde outro programa possa ler.
O que sai é papel: Corte ▸ Imprimir o encaixe… imprime um mapa numerado das peças na chapa, e o orçamento imprime uma proposta para o cliente.
4.6Selecionar e mover peças
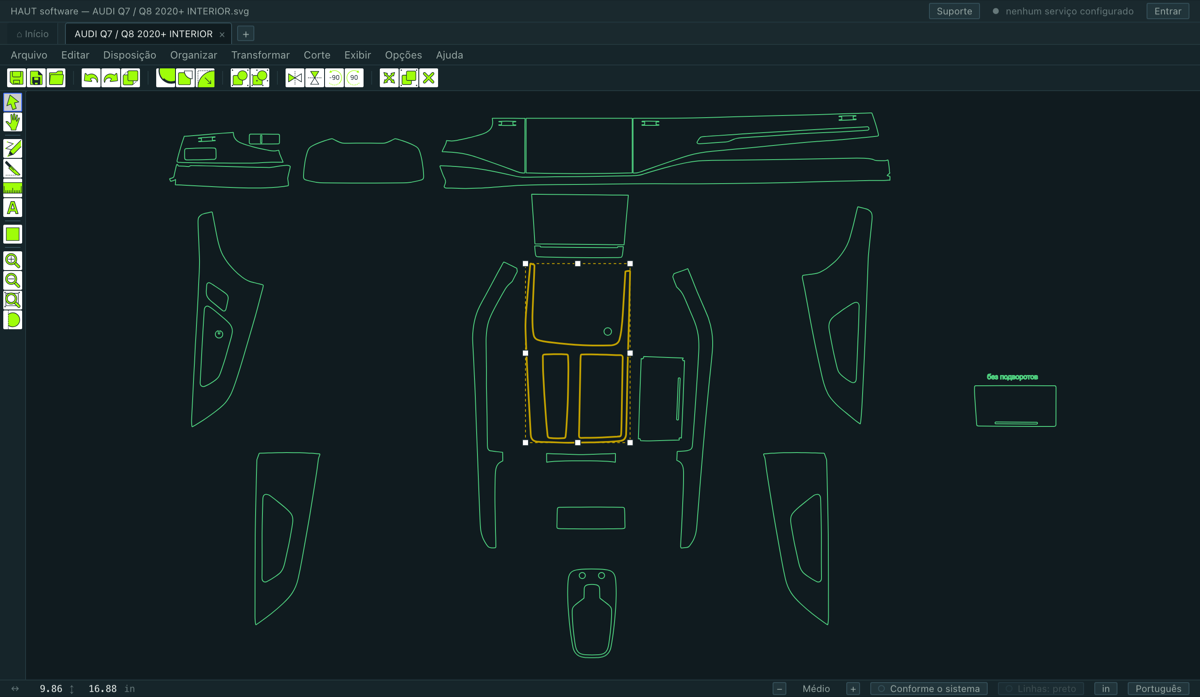
| Clique | Selecionar uma peça. Ela é contornada com linha mais grossa para se ver qual é. |
|---|---|
| Shift + clique | Somar uma peça à seleção, ou tirá-la. |
| Arrastar sobre película vazia | Um laço retangular — seleciona tudo o que encostar. |
| Ctrl+A | Selecionar tudo |
| Esc | Não selecionar nada |
| Arrastar uma peça selecionada | Mover. Tudo o que está selecionado vai junto. |
| Setas | Empurrar um passo. Shift aumenta o passo. |
| Ctrl+D | Duplicar |
| Delete | Excluir — mas veja a observação abaixo |
Ímã
Enquanto você arrasta, a peça gruda nas guias, nas bordas da chapa, na grade, e nas bordas e centros das outras peças. A linha em que ela se prendeu é desenhada tracejada enquanto durar o arrasto.
- Segure Alt para desligar o ímã naquele arrasto.
- Guias e grade só prendem enquanto estão visíveis.
Delete sobre peças encaixadas
O tamanho de uma peça não pode ser mudado
5.1Dizer ao programa que película está carregada
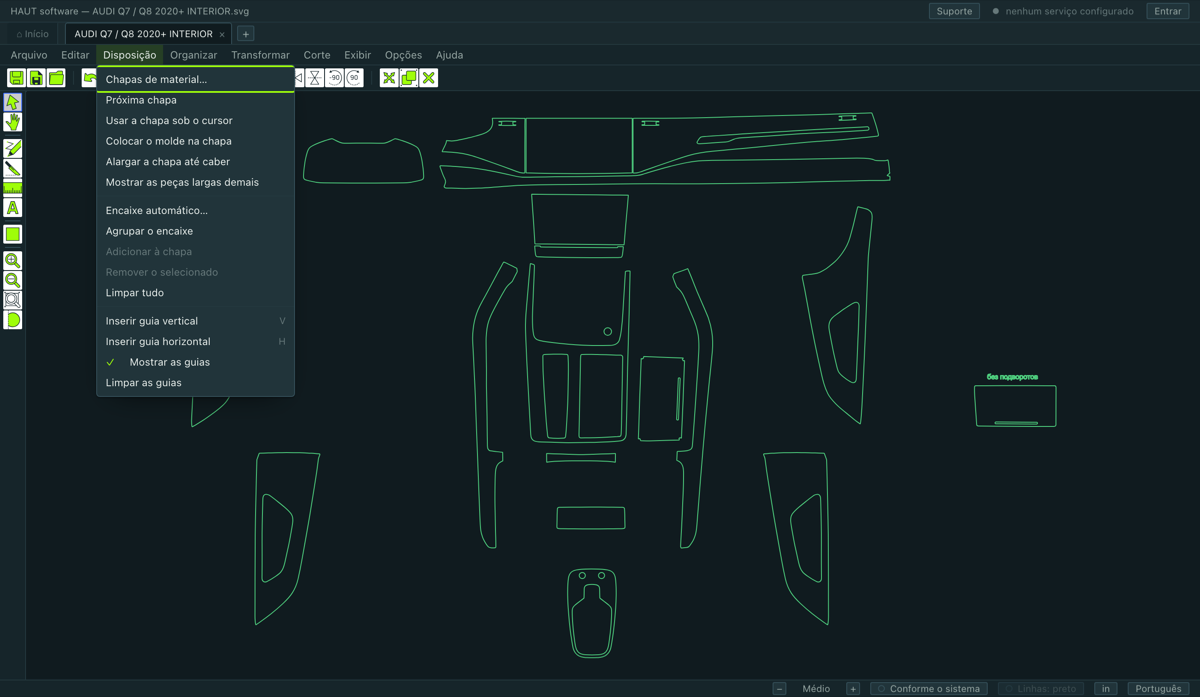
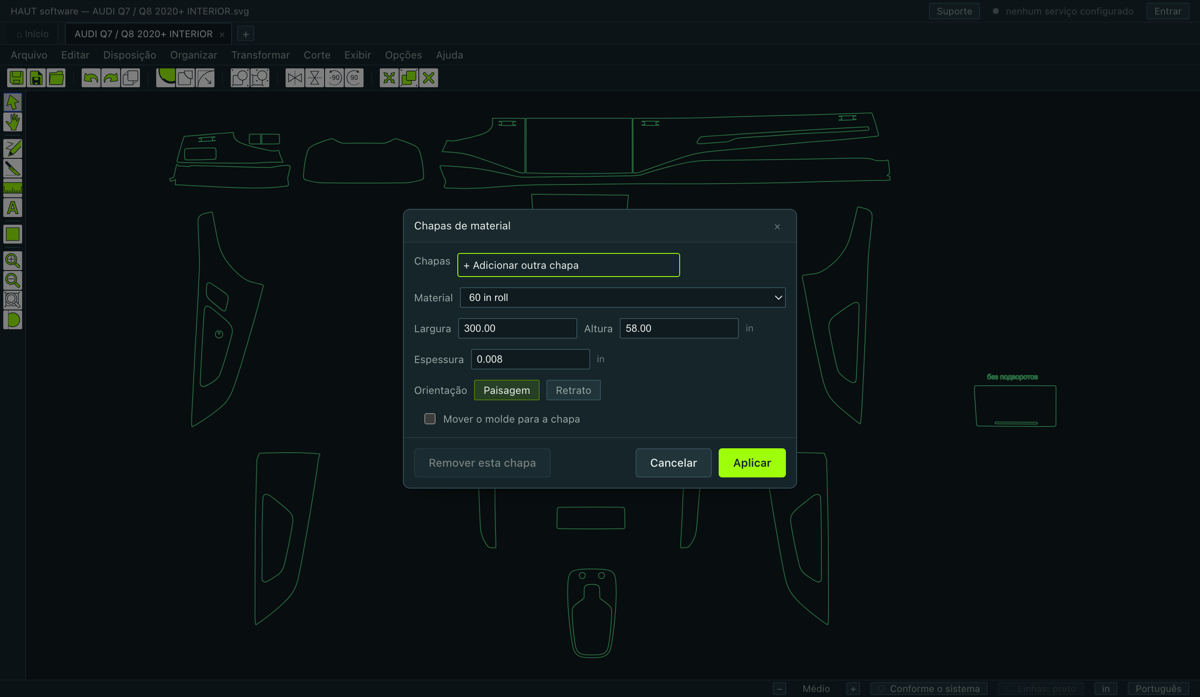
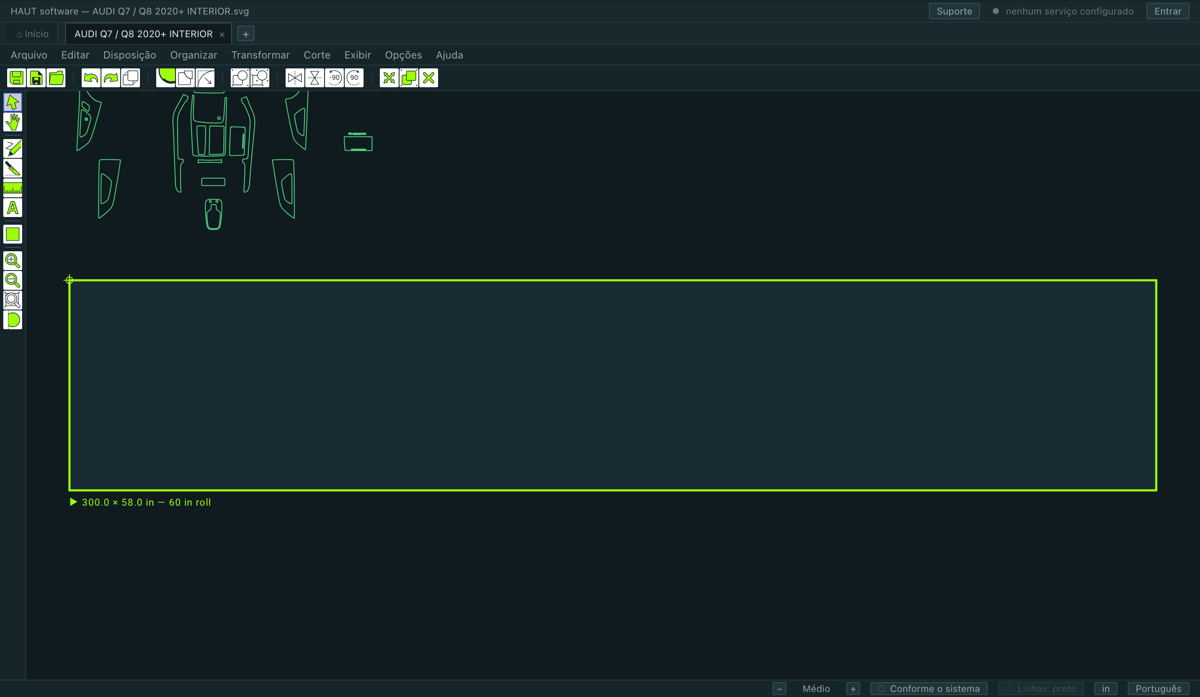
Uma chapa é a película que você tem na máquina, desenhada na tela como um retângulo sob as peças. Tudo sobre o encaixe e sobre o que vai ser cortado é decidido em relação a ela, então é a primeira coisa a definir assim que um molde está aberto.
Disposição ▸ Chapas de material….
- Escolha o rolo em Material — 60, 48, 36, 30, 24 ou 12 in. A largura do rolo se preenche sozinha.
- Defina o comprimento se quiser diferente do padrão.
- Clique em Aplicar. A folha aparece sob o desenho, com a medida numa etiqueta.
5.2Várias folhas, e dois comandos que vale conhecer
Dá para ter mais de uma chapa na tela — um rolo de 60 in e um de 30 in, por exemplo. Uma delas é a ativa, e todo comando age sobre ela. Para trocar:
- clique duplo na folha, ou
- clique com o botão direito e Use This Blank, ou
- Disposição ▸ Próxima chapa.
- Alargar a chapa até caber
- Deixa a chapa tão larga quanto a peça mais larga precisa — até meia polegada da borda do rolo. Um rolo de 60 in de fato pode ser cortado a 59.5 com pulso firme, e essa é a edição feita de onde o problema aparece.
- Mostrar as peças largas demais
- Seleciona e enquadra as peças que não vão caber na largura da chapa ativa, para ver quais são antes de descobrir na máquina.
6.1A paleta de ferramentas
Pela borda esquerda, de cima para baixo. Só uma fica armada por vez, e a armada tem um anel azul.
- Selecionar
- Escolher, mover e agrupar peças. S arma de qualquer lugar. É onde se começa e para onde se volta.
- Deslocar
- Arrastar a tela. Quase não é preciso — o espaço e o botão do meio fazem o mesmo sem sair da ferramenta atual.
- Editar nós
- Trabalhar os nós de uma peça. Clique duplo numa peça também arma.
- Faca
- Cortar uma peça em duas por uma linha que você traça.
- Medir
- Traçar uma cota entre dois pontos. Fica no desenho até você tirar.
- Texto
- Colocar uma palavra no desenho — uma etiqueta numa peça, um recado para o instalador.
- Forma
- Quadrado, círculo, triângulo, estrela, polígono. O botão abre para o lado com as cinco.
- Aproximar / Afastar / Ajustar ao objeto selecionado
- A vista. A roda faz as duas primeiras mais rápido.
- Mostrar a grade
- A grade, ligada ou desligada.
6.2Sobreposição — a margem de PPF
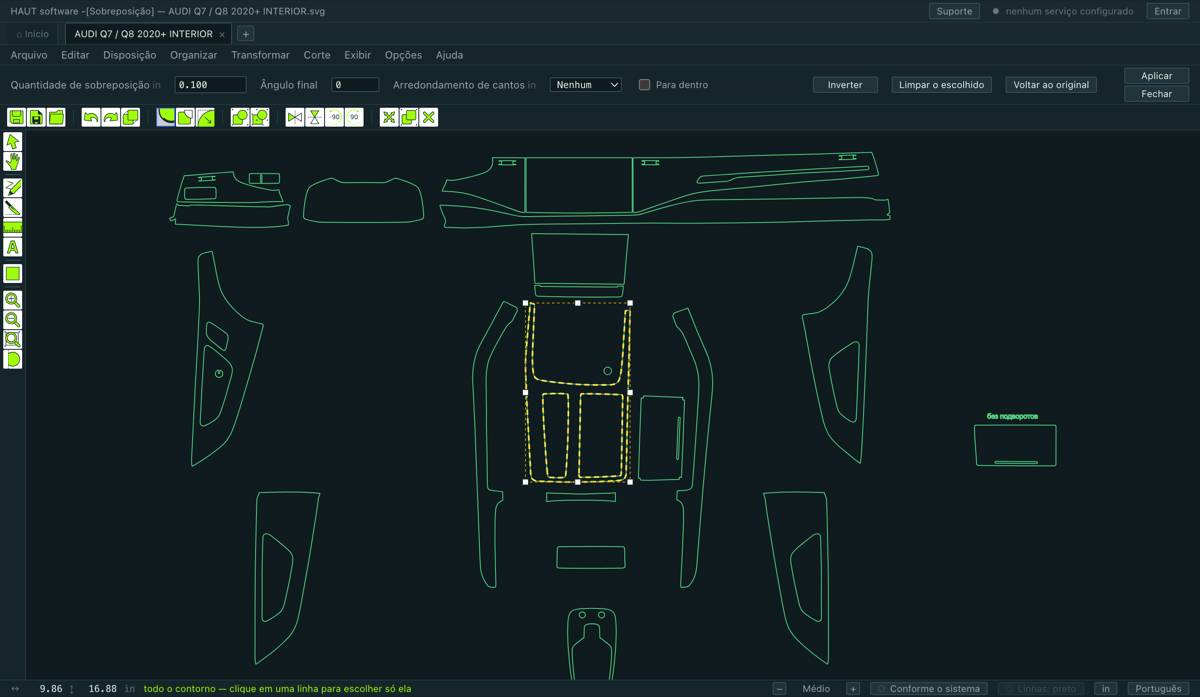
Esta é a ferramenta pela qual o ramo compra este programa. Ela estende a película para além da borda do painel para poder dobrar por trás — e faz isso nos trechos que você escolhe, não na peça inteira, porque um capô é sobreposto na borda de ataque e cortado rente nas frestas.
Transformar ▸ Sobreposição…, ou o botão da barra.
- Selecione a peça.
- Clique numa linha dela para escolher aquele trecho. Shift-clique acrescenta outro, ou tira. A leitura na linha de estado diz quanto já foi escolhido; sem nada escolhido, a margem cobre todos os contornos da peça.
- Digite a Quantidade de sobreposição — o quanto a película passa da borda.
- Clique em Aplicar.
Os campos
- Quantidade de sobreposição
- O quanto a película passa da borda. É o número que o costume do próprio instalador decide.
- Ângulo final
- Graus. 0 corta a margem em esquadro na borda. Um ângulo positivo a reduz a nada no último trecho, para não deixar degrau onde termina.
- Arredondamento de cantos
- Arredonda os cantos que a margem faz — onde ela começa e termina no contorno, e os cantos do degrau que ela levanta. Nenhum deixa em ponta, que é como a ferramenta sempre trabalhou. As opções são 0.05, 0.1, 0.2 e 0.3 in.
- Para dentro
- Leva a margem para dentro da peça em vez de para fora. Num furo, para dentro abre o furo.
Os três botões
- Inverter
- Escolher neste contorno tudo menos o que você escolheu — e o caminho longo entre dois pontos.
- Limpar o escolhido
- Largar todos os trechos escolhidos. O Apply volta então a cobrir todos os contornos da peça. Essa é a saída quando você escolheu um trecho a mais.
- Voltar ao original
- Tirar todas as margens e devolver os contornos ao jeito em que a peça foi desenhada.
6.3Contorno / interno — crescer e encolher
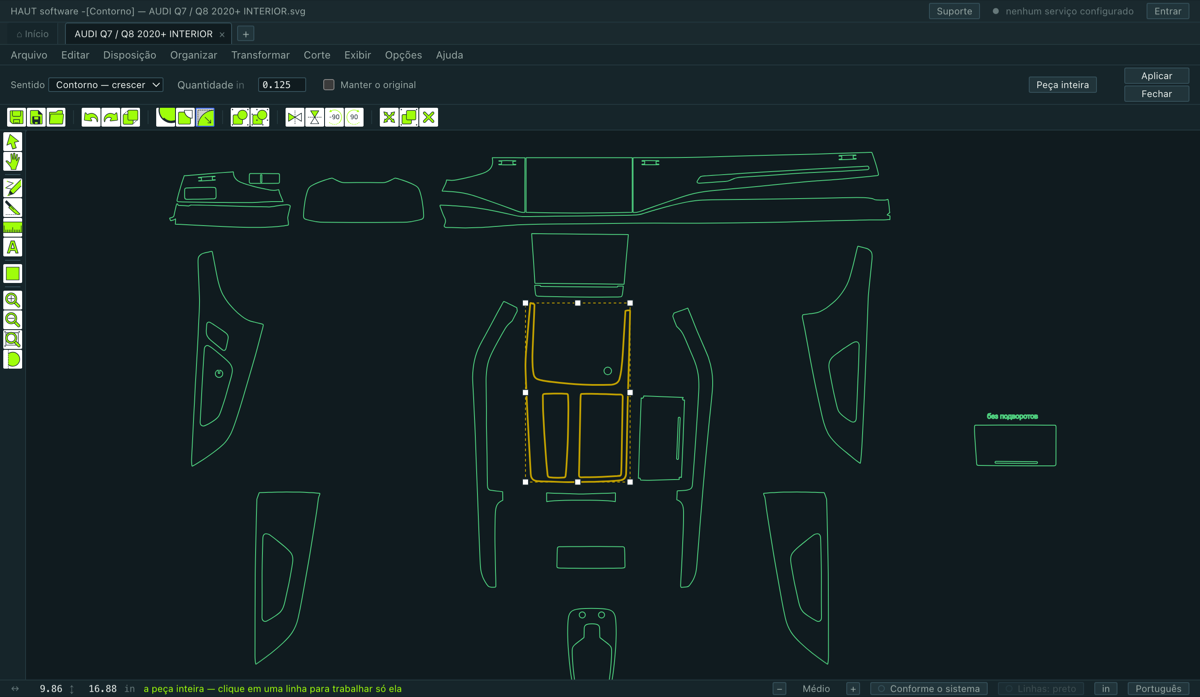
Transformar ▸ Contorno / interno…. Move um contorno para fora ou para dentro numa medida exata, mantendo a forma: cantos continuam cantos, não são arredondados.
- Sentido
- Contorno — crescer acrescenta a medida em toda a volta; Interno — encolher tira essa mesma medida.
- Quantidade
- Quanto. O padrão é 0.125 in.
- Manter o original
- Deixar o contorno que estava ao lado do novo. Desligado por padrão, e é de propósito — os dois seriam cortados.
- Peça inteira
- Largar as linhas escolhidas, para o Apply voltar a cobrir todos os contornos da peça.
Como a Sobreposição, ela trabalha em linhas escolhidas: clique numa linha para escolher, Shift-clique para somar ou tirar. Um furo de sensor escolhido e crescido abre, enquanto o resto do painel fica como foi desenhado.
6.4A faca — cortar uma peça em duas
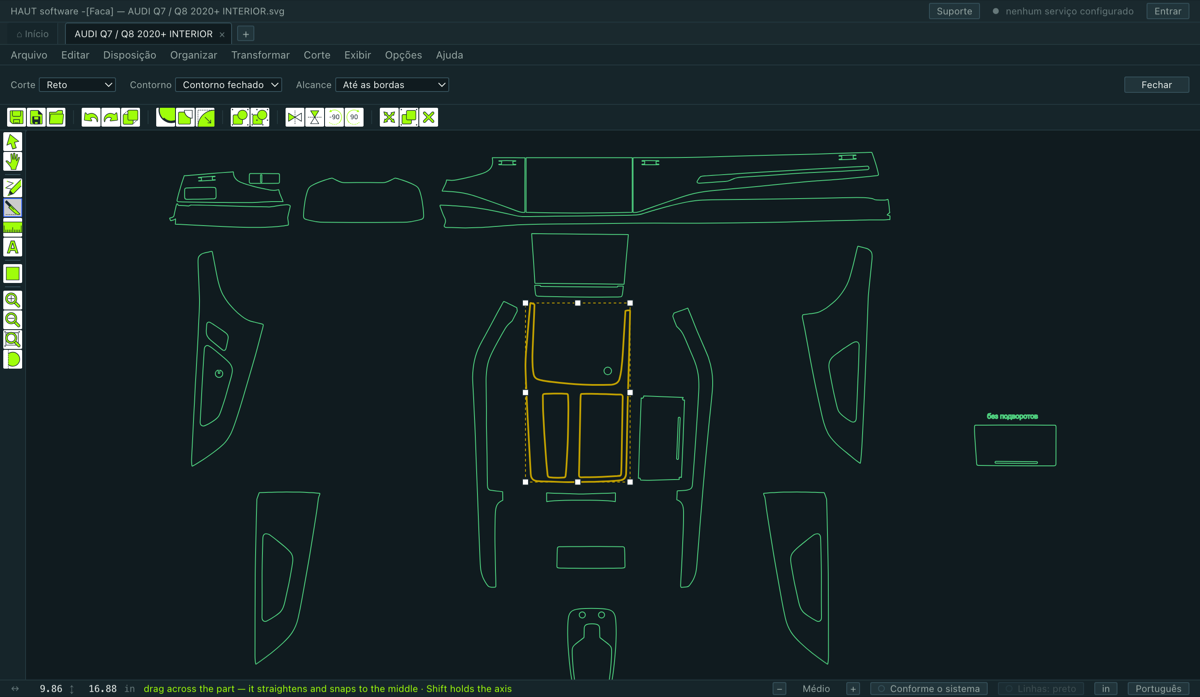
Arme a Faca na paleta, selecione as peças a cortar e arraste uma linha atravessando. A barra dela tem três campos, e eles são independentes entre si.
- Corte — Reto ou Arco
- A forma do corte. Reto: arraste atravessando as peças. Arco: arraste a corda, depois mova para curvar o corte e clique. Os dois se endireitam na horizontal ou vertical perto desses ângulos; Shift trava o eixo em qualquer ângulo.
- Contorno — Contorno fechado ou Contorno aberto
- O que o corte deixa. Contorno fechado parte a peça em pedaços fechados inteiros que dá para afastar — é o corte comum. Contorno aberto faz a mesma divisão no mesmo lugar, mas deixa os contornos abertos ao longo dela.
- Alcance — Até as bordas ou Só onde foi traçado
- Até onde o corte vai. Até as bordas: um traço curto divide a peça inteira naquele ponto. Só onde foi traçado: o corte é exatamente a linha que você fez e para onde a sua mão parou.
Quando a faca recusa, e por quê
- Um traço que não cruza a peça é recusado pelo nome. Uma linha dentro do vão de uma janela não encosta em película, então não há o que cortar.
- O corte é o traço e mais nada. Ele nunca aparece onde você não traçou. Um traço sobre uma ilha da peça deixa as outras ilhas inteiras, com furos e tudo.
- «Só onde foi traçado» pode deixar uma peça só, e isso é um resultado, não uma recusa. Um talho atravessando uma ponte estreita deixa a peça inteira e o corte fica no desenho mesmo assim: sob a lâmina a película se separa por ali.
6.5Editar nós — trabalhar a própria linha
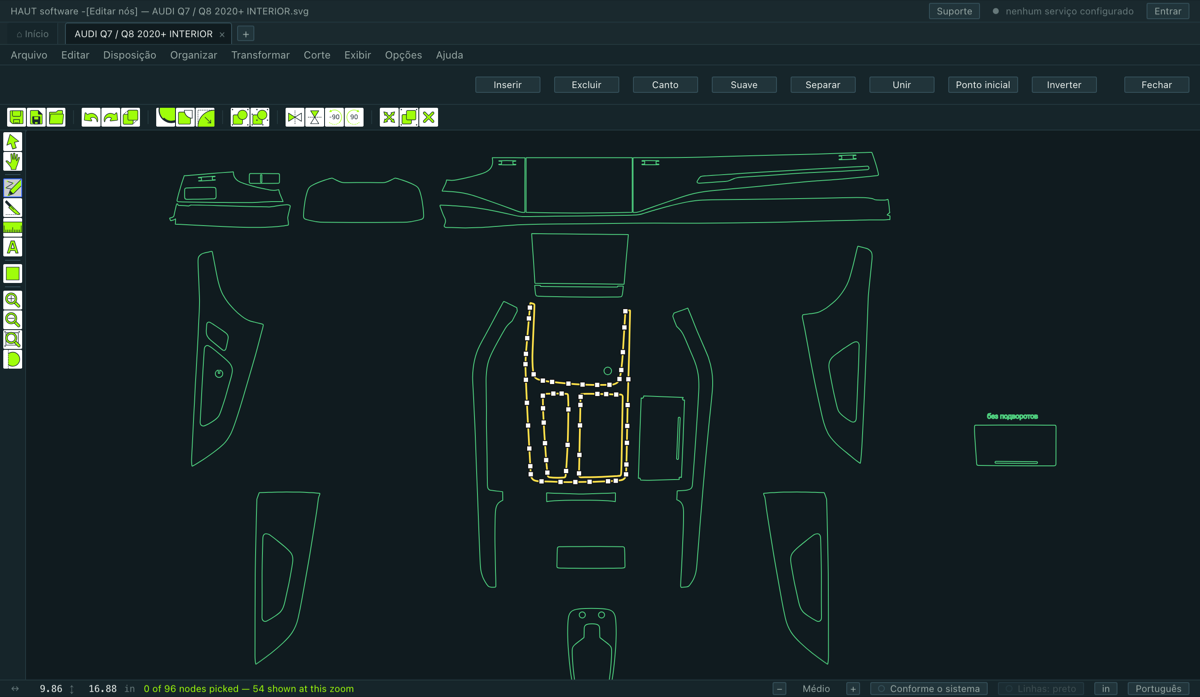
Clique duplo numa peça, ou arme o Editar nós na paleta. Os nós da peça aparecem como quadradinhos: o escolhido é preenchido, o não escolhido é um anel. Arraste um nó para movê-lo; arraste as alças dele para curvar a linha.
Na barra e no clique direito
- Inserir
- Acrescentar um nó — ou clique duplo na linha onde você o quer.
- Excluir
- Tirar os nós escolhidos. Delete faz o mesmo.
- Canto
- Tornar os nós escolhidos cantos duros.
- Suave
- Deitar as alças dos nós escolhidos sobre a curva, para a linha passar suave.
- Separar
- Abrir o contorno no nó escolhido.
- Unir
- Juntar as duas pontas soltas escolhidas — ou fechar o contorno, se forem as duas pontas dele.
- Ponto inicial
- Começar o corte deste contorno no nó escolhido.
- Inverter
- Cortar este contorno ao contrário. Muda como a película solta, por isso está aqui e não arquivado como enfeite.
Numa peça densa nem todos os nós são desenhados
Um painel entregue pode ter quatrocentos nós, e no zoom em que se vê a peça inteira os quadradinhos se encostariam e virariam uma faixa sólida. Então o programa desenha só os que cabem, e a linha de estado diz quantos do total estão à mostra. Nada fica escondido do ponteiro: um nó não desenhado continua sendo escolhido com um clique no lugar dele, e aparece na hora.
6.6Reduzir nós
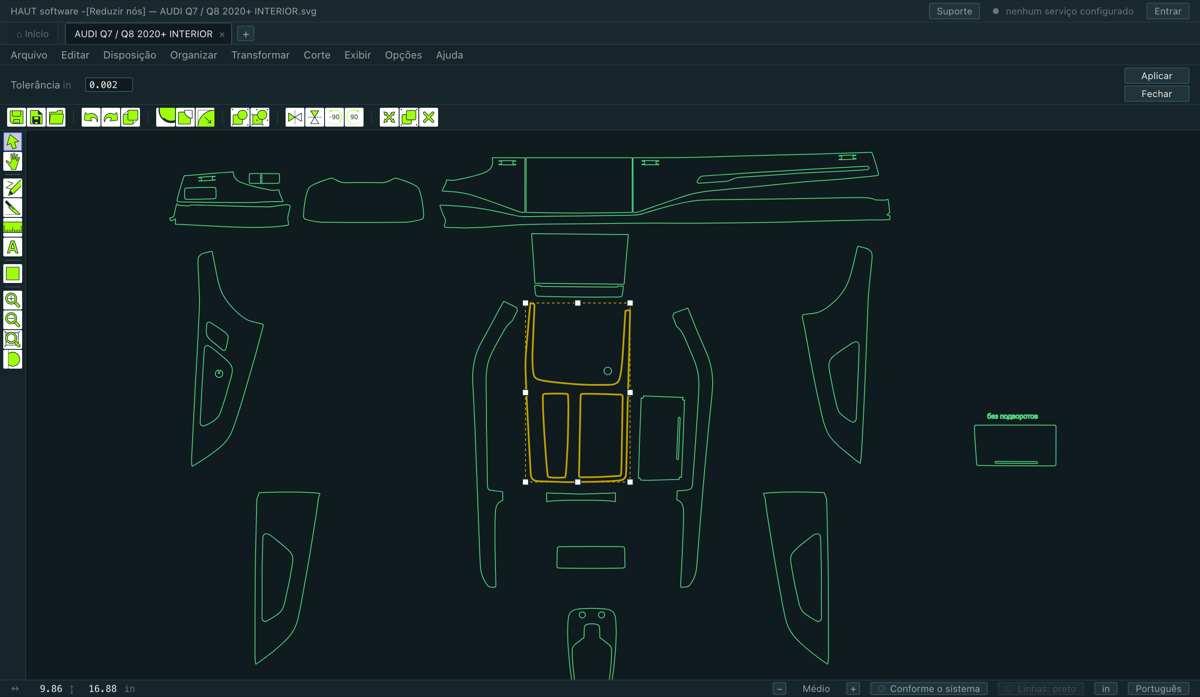
Organizar ▸ Reduzir nós… tira os nós que podem sair sem mover a linha de corte além da tolerância que você definir. Os nós que carregam forma de verdade ficam.
- Tolerância
- O quanto a linha de corte pode se mover. Um passo de plotter é 0.001 in (0.025 mm), então tudo nisso ou abaixo é invisível para a máquina. O padrão é 0.002 in.
Vale rodar depois de um deslocamento ou de uma booleana: as duas devolvem linhas de segmentos com mais pontos do que a forma precisa.
6.7Refugo — a borda por onde o excesso sai
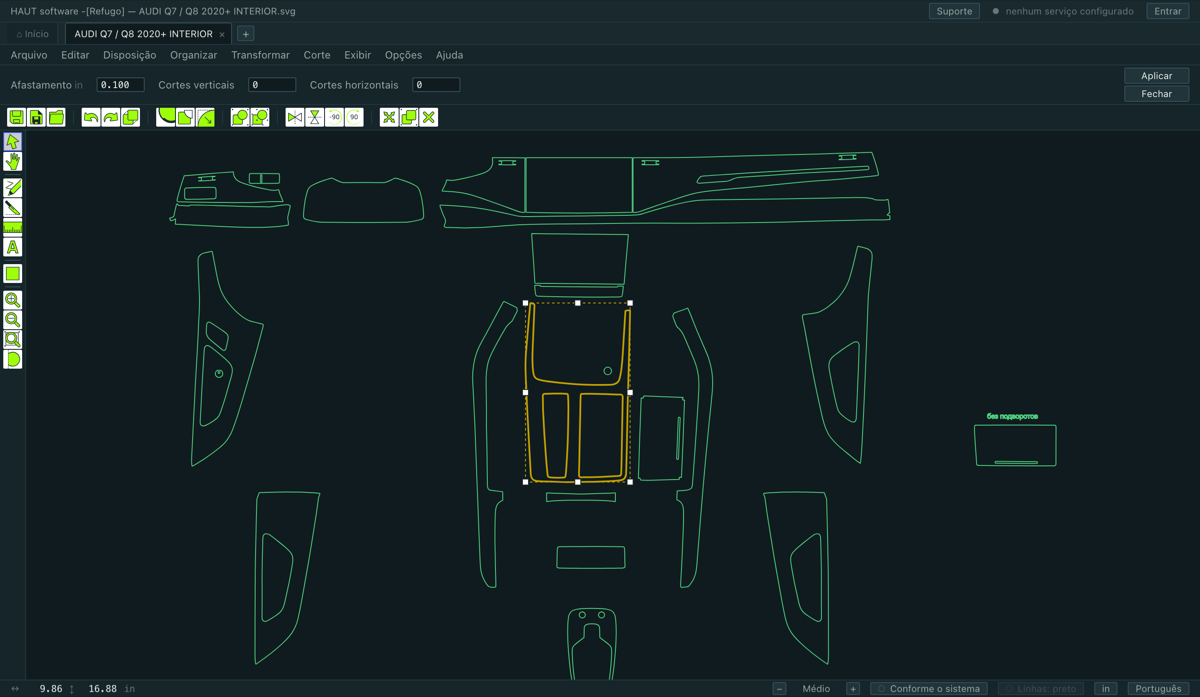
Transformar ▸ Refugo… traça uma linha de corte em volta das peças selecionadas para a película excedente sair inteira em vez de ser catada aos pedaços.
- Afastamento
- O quanto a borda corre para fora da peça. 0.10 in é o usual no ramo.
- Cortes verticais / Cortes horizontais
- Cortes extras que dividem o refugo em tiras, para um trabalho comprido sair em pedaços manejáveis em vez de uma folha só.
6.8Texto, figuras e medidas
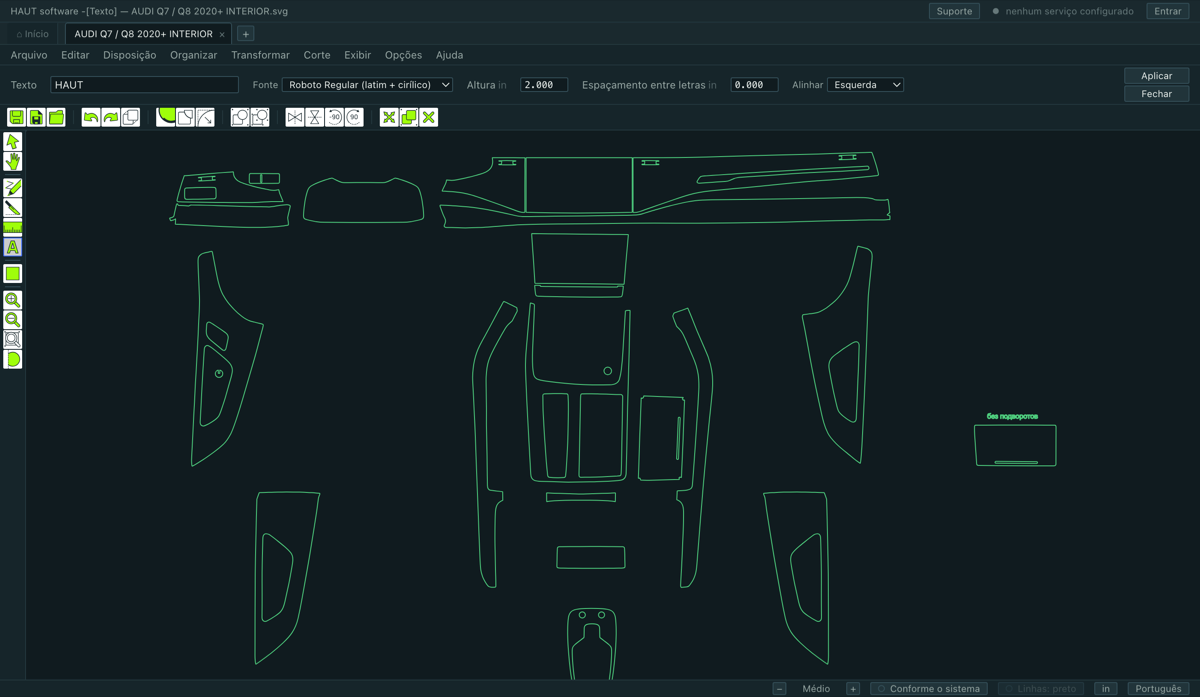
Texto
Transformar ▸ Texto… ou o botão A da paleta. Digite as palavras, escolha uma fonte, defina a Altura (é a altura de maiúscula) e posicione. Espaçamento entre letras afasta as letras; um valor negativo aproxima.
Transformar ▸ Texto em gráfico transforma o texto em contornos comuns. Faça isso quando quiser editar as letras por nós, ou antes de entregar o desenho a alguém cujo computador pode não ter a fonte.
Figuras
O botão de figuras da paleta abre para o lado com cinco: quadrado, círculo, triângulo, estrela e polígono. Arraste na tela para desenhar uma. Uma figura que você desenhou é a única coisa neste programa cujo tamanho dá para definir à mão: tudo que veio de um molde é protegido.
Medidas
Arme o Medir e arraste entre dois pontos. A cota fica no desenho; não é cortada e não faz parte da geometria. Para tirar uma, clique com o botão direito na peça em que foi medida e use Delete Measurement; Exibir ▸ Limpar todas as medidas tira todas.
6.9Contornos: combinar, separar, fechar, curvas
- Combinar traçados
- Faz de vários contornos uma peça com furos. É assim que se monta um painel com recorte de sensor: o anel interno vira furo, não uma segunda peça.
- Separar
- O contrário — cada contorno vira uma peça própria. Serve quando um furo precisa ser movido ou excluído sozinho.
- Fechar os contornos abertos
- Um contorno aberto é um corte que não volta ao início. Isto os fecha.
- Converter em curvas
- Converte linhas de segmentos de volta em curvas. Reduz muito a quantidade de nós, mas pode mover a linha mais do que um deslocamento — até um sexto de polegada num contorno que veio de um deslocamento. Olhe o resultado antes de cortar.
- Agrupar / Desagrupar
- Ctrl+G e Shift+Ctrl+G. Um grupo se move, gira e corta como um só.
- Bloquear o objeto / Desbloquear o objeto
- Uma peça travada não pode ser pega nem movida sem querer.
6.10Espelho, rotação e alinhamento
Tudo está em Transformar e Organizar, e os quatro mais usados estão na barra.
- Espelho horizontal / Espelho vertical
- Espelha a seleção. Um painel esquerdo vira o direito.
- Girar 90° / Girar −90°
- Um quarto de volta. Para qualquer outro ângulo, arraste a alça de rotação no canto da seleção.
- Alinhar
- Esquerda, centro, direita, topo, meio, base — e espaçamento igual, na horizontal ou na vertical.
- Cortar ao meio na horizontal / Cortar ao meio na vertical
- Divide a seleção por uma linha que passa pelo meio dela. Uma peça comprida que não cabe na largura do seu rolo se parte em dois cliques, sem traçar linha.
7.1Encaixe automático
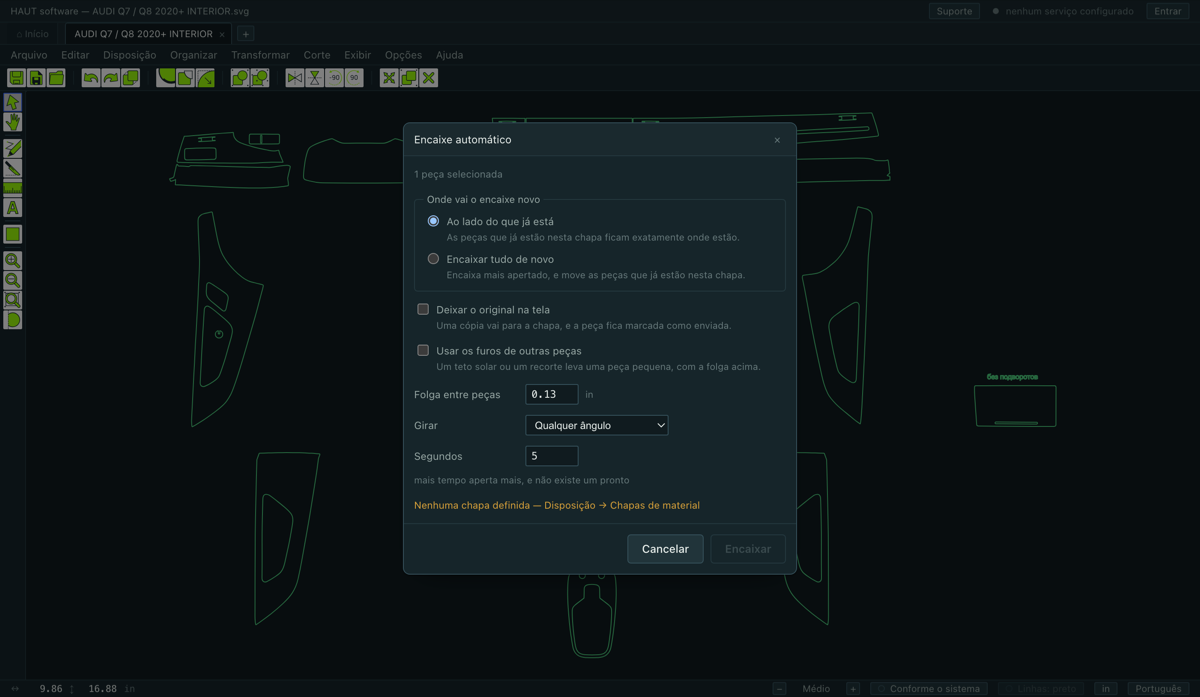
É isto que economiza película. Selecione as peças, abra Disposição ▸ Encaixe automático… e o programa as arruma na chapa ativa o mais apertado que conseguir nos segundos que você der.
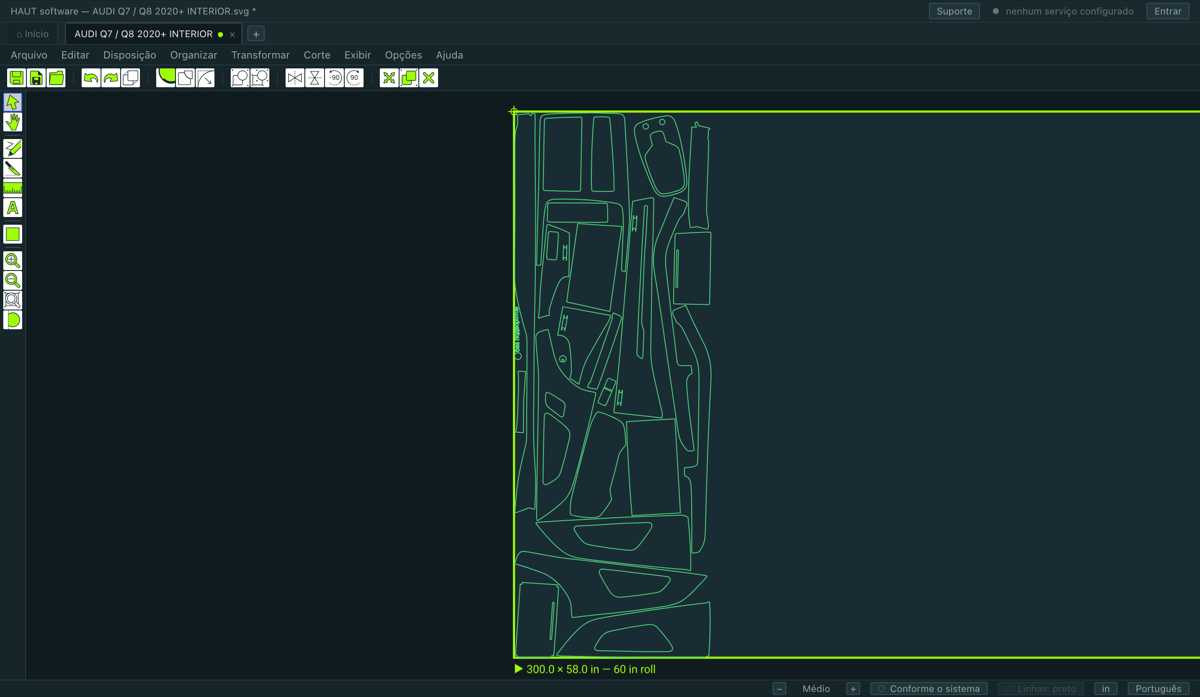
A janela
- Folga
- O espaço deixado entre as peças. Digitado uma vez e lembrado — cada oficina encaixa com a sua própria folga.
- Segundos
- Quanto tempo o solucionador pode pensar. Mais tempo é mais apertado, com retorno decrescente.
- Onde colocar
- Ao lado do que já está deixa o que está na folha exatamente onde está e põe o encaixe novo depois. Reorganizar pega o que está ali junto com o que você escolheu e encaixa tudo de novo. «Ao lado» é o padrão porque é o único dos dois que não pode estragar um trabalho arrumado à mão.
- Deixar o original na tela
- Para a chapa vai uma cópia e o original fica onde estava, marcado com uma cor — para o instalador ver o que já entrou na chapa e o que não.
- Usar os furos de outras peças
- Coloca peças pequenas dentro dos vazios de peças maiores — um teto com teto solar, uma porta com janela. Desligado por padrão, porque uma folha em que uma peça fica dentro de outra se lê como sobreposição para quem não pediu. Custa cerca do dobro de espera, porque a folha é resolvida duas vezes.
O que ele diz depois
A nota informa as polegadas de rolo usadas e a densidade e — quando houve peças que entraram em furos — quantas foram. Um encaixe que de repente saiu um terço mais curto com uma peça aparentemente sumida é trabalho que alguém iria conferir à mão.
As duas formas de pôr uma peça
- Adicionar à chapa
- Acha lugar para as peças selecionadas sem mover o que já está lá. Esta é a metade de uma por vez: o instalador mudou de ideia e falta entrar mais um pedaço.
- Agrupar o encaixe
- Faz de tudo o que está na chapa ativa um objeto só, para o encaixe arrastar, girar e cortar como um.
Tirar peças de volta
- Remover o selecionado
- Tira da película as peças selecionadas e devolve de onde vieram. Uma cópia é removida e a marca sai do original; uma peça que viajou é girada de volta e assentada no centro anterior. Delete sobre peças encaixadas faz o mesmo e reorganiza o que sobrou.
- Limpar tudo
- Tira tudo o que está na chapa ativa.
7.2Conferir o encaixe antes de cortar
- Corte ▸ Verificar sobreposições
- Alguma peça ficou em cima de outra? Duas peças dividindo película são duas peças perdidas, e essa é a pergunta que se faz antes de a lâmina se mover.
- Corte ▸ Área total do objeto
- A área fechada real da seleção, ou do desenho todo se nada estiver selecionado.
- Disposição ▸ Mostrar as peças largas demais
- Quais peças não vão caber na largura da chapa ativa.
8.1Enviar o trabalho
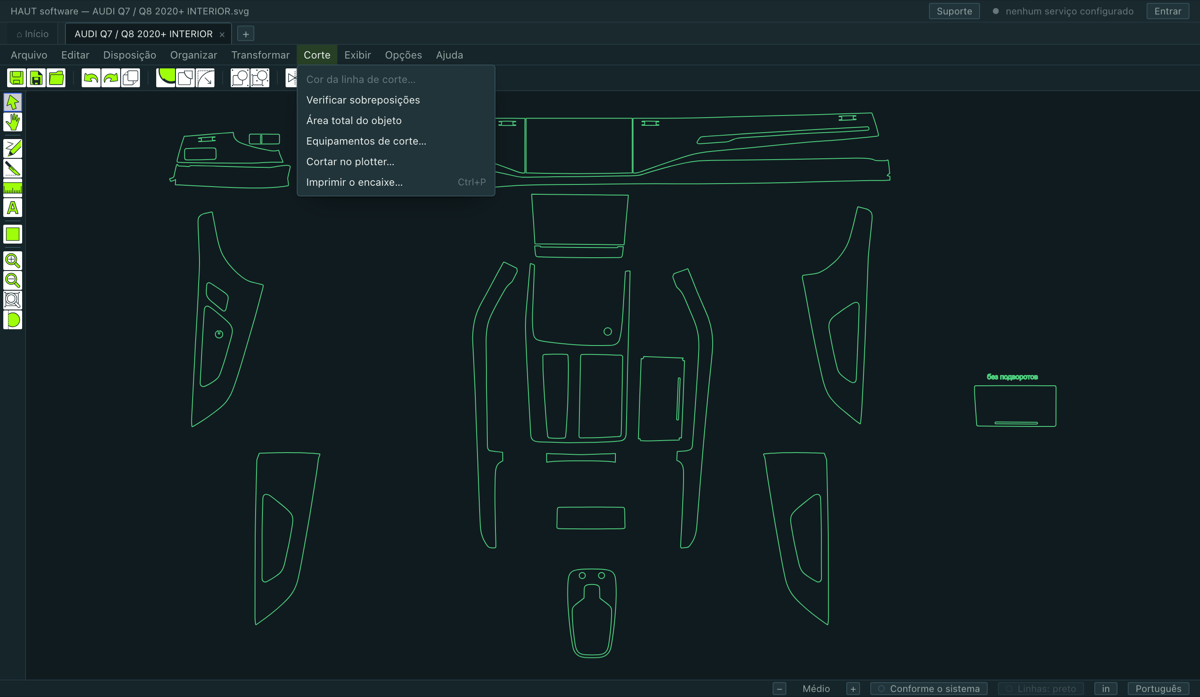
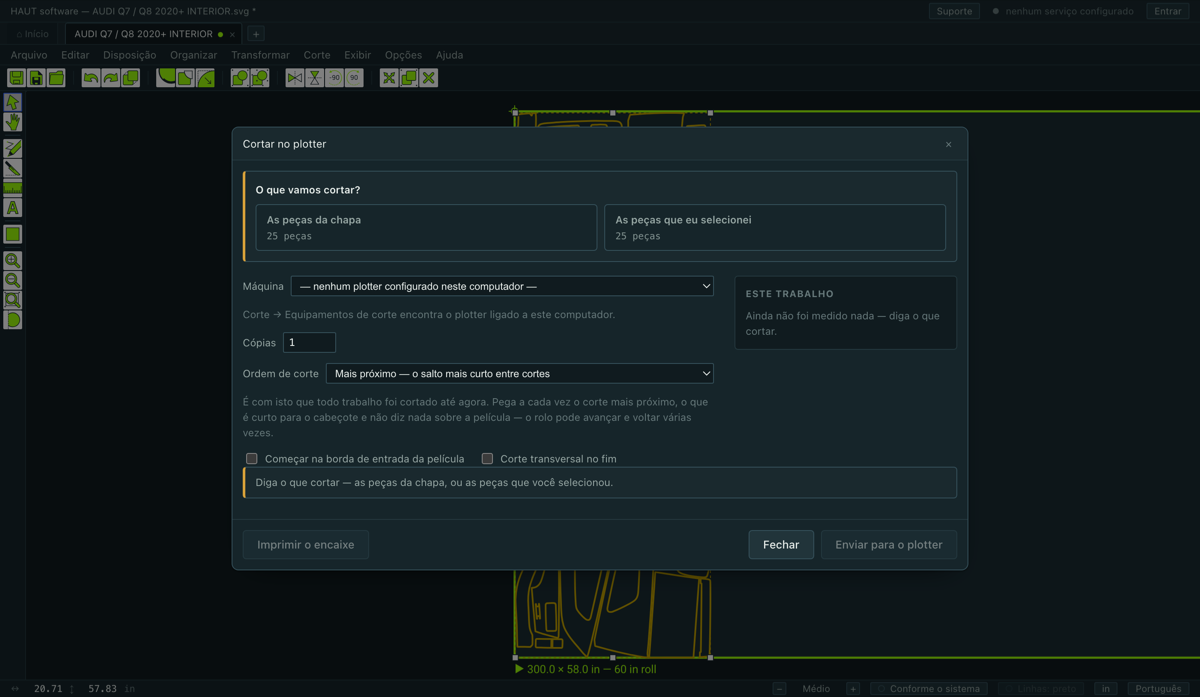
Corte ▸ Cortar no plotter…. A janela pergunta uma coisa primeiro, na caixa dela no topo: o que estamos cortando? — as peças da chapa, ou as peças que você selecionou. Nada mais fica ativo até isso ser respondido.
- Máquina
- Qual plotter. Se disser que não há plotter configurado, vá primeiro em Equipamentos de corte….
- Cópias
- Quantas vezes cortar o mesmo trabalho.
- Ordem de corte
- A ordem que a lâmina segue. Mais próximo — o salto mais curto entre cortes pega a cada vez o corte mais próximo — curto para o cabeçote, e é assim que tudo foi cortado até agora. Serpentina trabalha em faixas ao longo do rolo, uma faixa na largura da película e a seguinte de volta, e desenrola bem menos película. O mais próximo é o padrão, e a ordem de nenhuma oficina muda sem que peçam.
- Começar na borda de entrada da película
- Desloca o trabalho para o primeiro corte ficar no zero, em vez de a máquina desenrolar até onde as peças calharam de ficar na tela. Desligado por padrão: uma peça posta mais adiante no rolo de propósito — para desviar de um defeito da película — não deve ser movida sem perguntar.
- Corte transversal no fim
- Terminar com a película apresentada sob a lâmina de corte transversal.
Os dois números que se leem antes de apertar
- Ao longo do rolo — quanta película o trabalho em si consome.
- Até o primeiro corte — quanto a máquina vai desenrolar antes de a lâmina encostar em algo. Acima de um pé o programa avisa: num retalho isso é película que sai dos rolos de pressão e não tem como voltar.
O mapa
A janela desenha as peças na ordem em que a lâmina vai pegá-las, com o percurso entre cortes tracejado e o número da peça em cima, e reproduz isso. Essa ordem vem do mesmo lugar que o corte, então a imagem não pode discordar da máquina.
O que a máquina guarda para si
Força, velocidade e offset da lâmina nunca são enviados. São ajustados no painel do próprio plotter, onde o instalador vê a película e sente o corte. No fim do trabalho o carro volta à origem.
8.2Imprimir o encaixe em papel
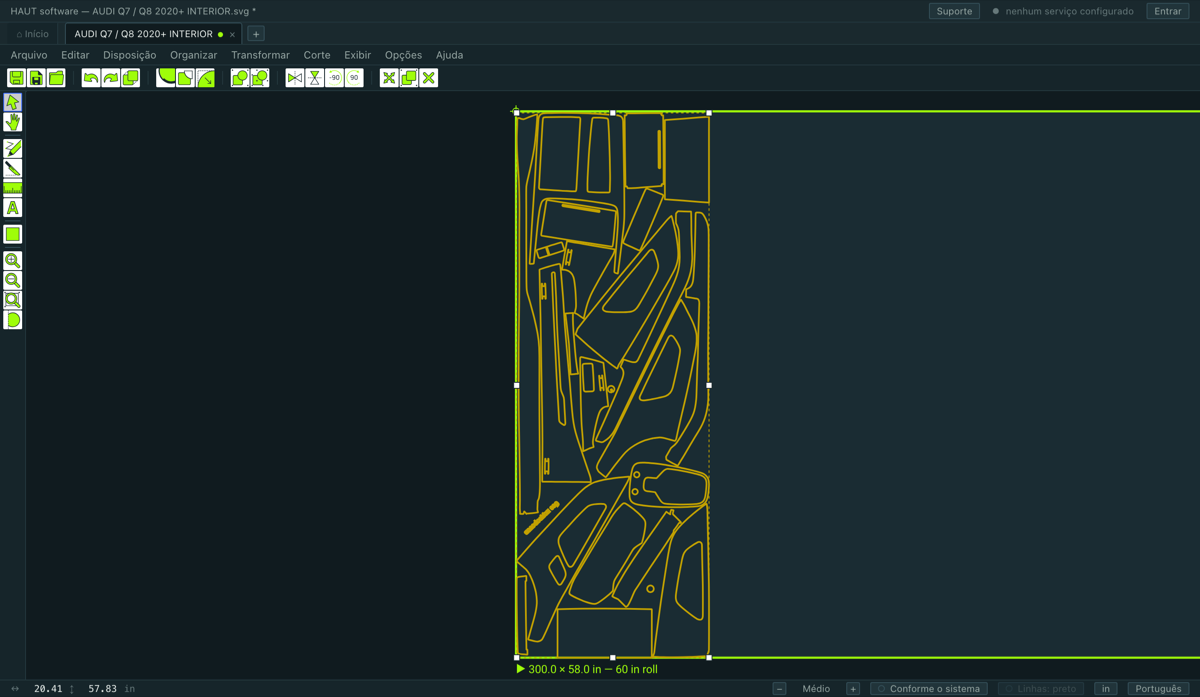
Corte ▸ Imprimir o encaixe…, ou Ctrl+P. Imprime um mapa numerado das peças na chapa, em A4, para dar para distinguir na bancada uma peça já removida da vizinha.
Isto e a proposta ao cliente vinda do orçamento são as duas únicas coisas que este programa põe no papel. Não há print-and-cut nem RIP, e não haverá.
9.1Pacotes — agrupar como você vende
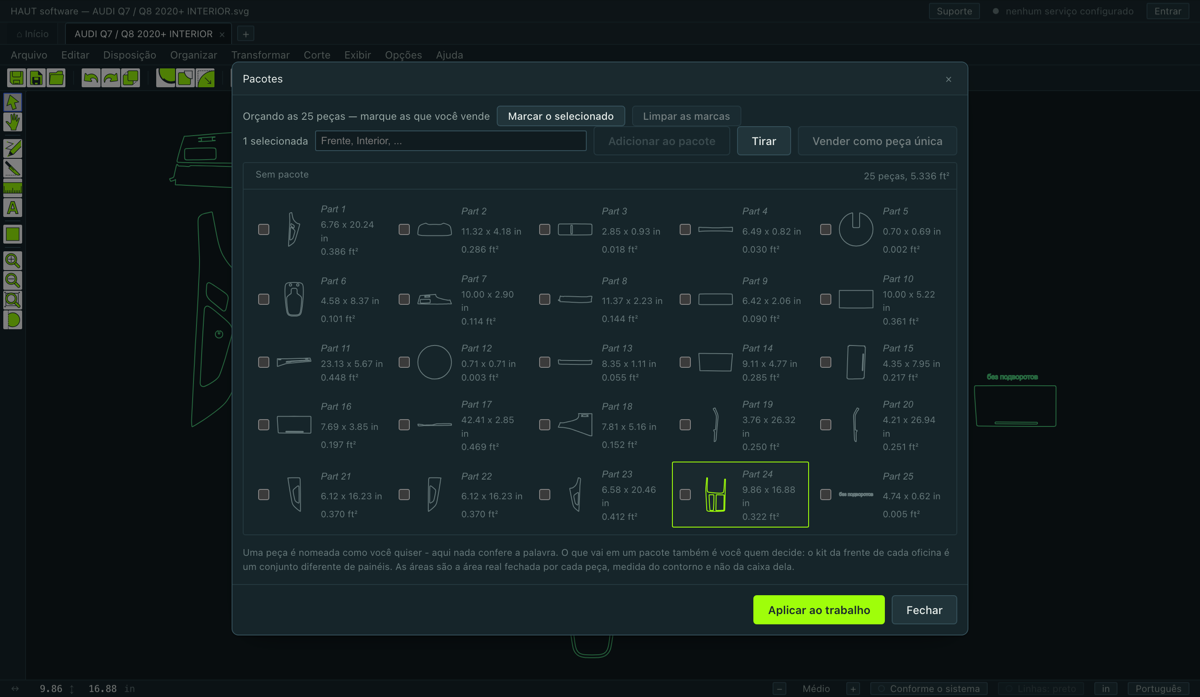
Arquivo ▸ Pacotes…. Um cliente não compra vinte e cinco contornos, compra um dianteiro e um kit de portas. Um pacote é isso: um grupo nomeado de peças que o orçamento precifica e a proposta imprime como uma linha.
- Selecione as peças, abra a janela e coloque-as num pacote.
- Dê ao pacote o nome que o cliente vai ler.
- Uma peça também pode ser nomeada sozinha — o que o cliente lê na proposta, em vez do nome do desenho.
- Tudo o que não está num pacote é precificado por conta própria.
9.2O orçamento
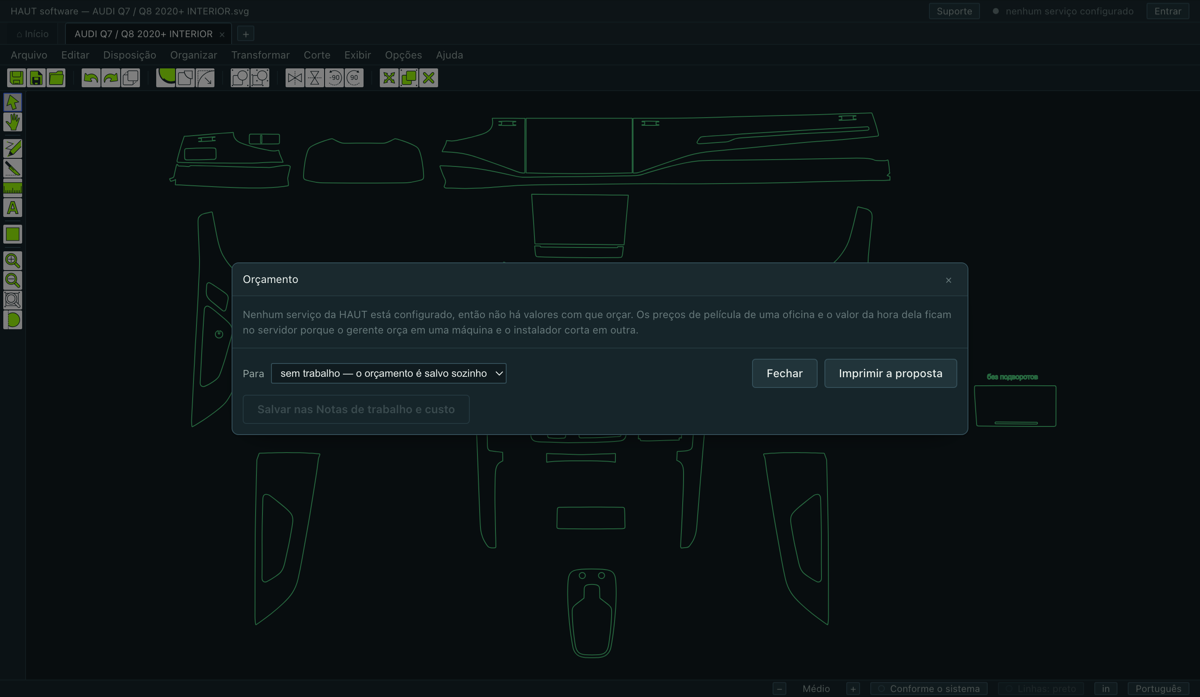
Arquivo ▸ Orçamento…. Uma tela: quanto o trabalho custa para a oficina, e por quanto é vendido.
Dois modos
- Com mão de obra
- Película e horas. Este é um trabalho que você instala.
- Só pré-cortados
- Só película. As horas ficam no desenho e não são cobradas — por isso o nível de dificuldade e o instalador ficam escondidos: sem horas, não têm o que multiplicar nem a quem pagar. Volte a trocar e o que foi digitado continua lá.
Como a película é contada
Só o que está selecionado
O orçamento é sobre as peças que você selecionou e mais nada. Uma linha ao lado da caixa diz quantas peças do desenho o orçamento não conta, para que uma peça não caia do pedido em silêncio. Abra a tela sem nada selecionado e ele conta o desenho inteiro.
Desconto, imposto e cartão
A ordem é fixa, e não é a comum — errar nela não é diferença de arredondamento:
líquido = soma − desconto
imposto = líquido × alíquota
cartão  = (líquido + imposto) × taxa
total   = líquido + imposto + cartão
- O desconto pode ser percentual ou valor fixo, e se aplica ao orçamento inteiro, antes do imposto.
- O imposto nem sempre se aplica — um cliente pessoa física é faturado sem ele, e a mesma oficina fatura uma empresa com ele. É um fato deste orçamento, então fica guardado no desenho.
- A taxa do cartão é tirada sobre a soma com o imposto, e é colocada à mão — nem sempre.
- Uma linha que não foi pedida fica ausente, não zerada. «Desconto 0» na proposta de um cliente é uma linha sobre a qual alguém pergunta.
Uma frase para o cliente
Há um campo para um comentário sobre o orçamento inteiro. Ele chega à proposta impressa — sob o total, acima das condições fixas da oficina —, à cópia arquivada e ao arquivo com busca.
Arquivar
Salvar nas notas de trabalho congela o orçamento: o que já foi dito ao cliente permanece, façam o que fizerem as tarifas depois. Uma oficina que reabrir o desenho meses depois pode muito bem ver na tela um número diferente do que está no papel, e isso está certo.
10.1Se algo está errado
Diz que não há licença neste computador, mas a licença está paga e válida
O plotter não está na lista
Cliquei em cortar e na máquina não aconteceu nada
O catálogo está vazio, ou meus desenhos salvos não abrem
Nada no orçamento tem preço
A faca cortou mais da peça do que eu tracei
A faca não fez nada e disse que a linha não cruza a peça
O encaixe automático se recusa a rodar
Parte da janela fica em branco quando eu maximizo
Mandei uma solicitação e não soube de nada
Fui desconectado no outro computador
Uma peça é mais larga que a minha película
10.2Como pedir ajuda
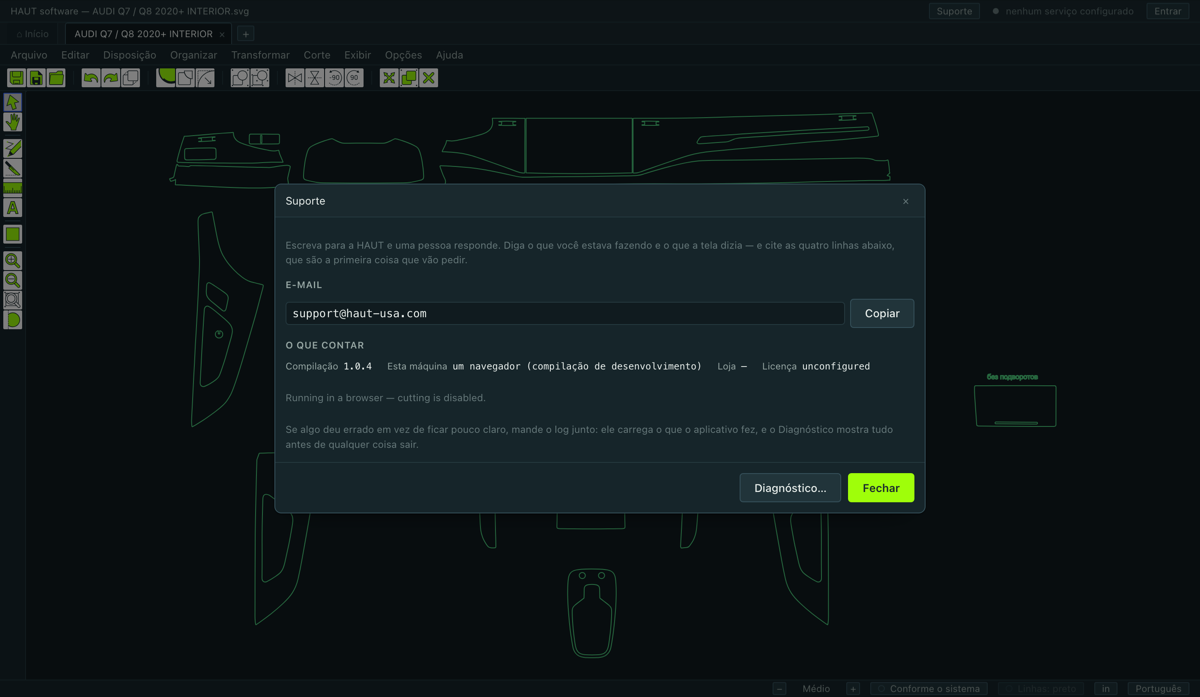
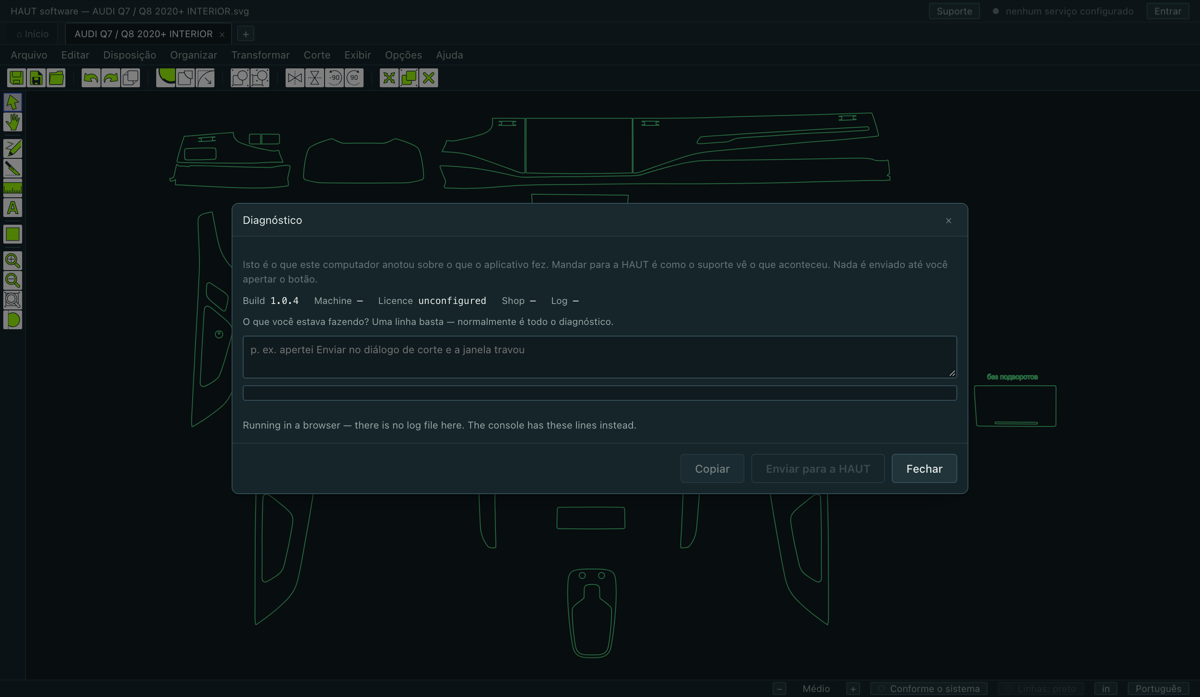
Ajuda ▸ Suporte… tem um campo para a mensagem. Escreva o que aconteceu e envie — os quatro dados com que começa toda conversa com o suporte vão junto sozinhos: qual oficina, qual conta, qual compilação, qual máquina. Não é preciso procurá-los.
O endereço fica embaixo do campo como alternativa, para o caso em que o que não funciona seja o próprio serviço.
Diagnóstico
Ajuda ▸ Diagnóstico… é o relatório que se anexa quando algo está errado e ninguém vê por quê. Ele leva a compilação, o estado da licença, o plotter para o qual o computador está configurado, e o registro do que o programa andou fazendo. Mande com a primeira mensagem, não com a terceira — normalmente a resposta está nele.
10.4Teclado e mouse
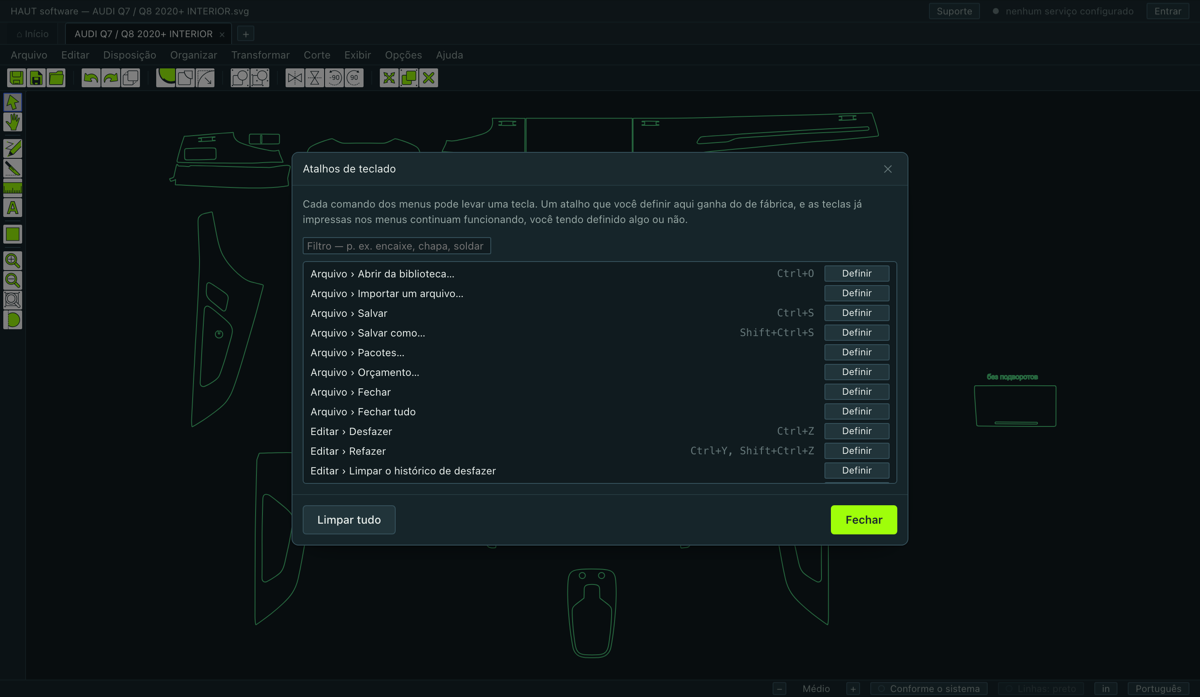
A tudo que não tem tecla própria dá para atribuir uma em Opções ▸ Atalhos de teclado….
Arquivos
| Ctrl+O | Abrir da biblioteca |
|---|---|
| Ctrl+S | Salvar |
| Shift+Ctrl+S | Salvar como |
| Ctrl+P | Imprimir o encaixe |
Edição
| Ctrl+Z | Desfazer |
|---|---|
| Ctrl+Y / Shift+Ctrl+Z | Refazer |
| Ctrl+X | Recortar (dentro do programa) |
| Ctrl+C | Copiar |
| Ctrl+V | Colar |
| Ctrl+D | Duplicar |
| Delete / Backspace | Excluir — ou tirar da chapa |
| Ctrl+A | Selecionar tudo |
| Esc | Não selecionar nada |
| Ctrl+G | Agrupar |
| Shift+Ctrl+G | Desagrupar |
| Setas | Empurrar — Shift para um passo maior |
Vista
| F8 | Ver tudo |
|---|---|
| F7 | Ver o selecionado |
| F9 | Ver a chapa |
| F6 | Um passo para fora |
| Shift+F6 | Um passo para dentro |
| + / − | Aproximar / afastar |
| Ctrl+Alt+= / Ctrl+Alt+− | Interface maior / menor |
Ferramentas e guias
| S | Ferramenta de seleção |
|---|---|
| V | Guia vertical |
| H | Guia horizontal |
Mouse
| Roda | Zoom centrado no ponteiro |
|---|---|
| Espaço + arrastar | Mover a tela |
| Botão do meio + arrastar | Mover a tela |
| Clique duplo numa peça | Editar nós |
| Clique duplo numa chapa | Torná-la a ativa |
| Clique direito | O que dá para fazer aqui |
| Alt ao arrastar | Ímã desligado |
| Shift ao traçar um corte | Travar o eixo |
The green in this manual is #009846 — the colour every HAUT pattern's cut line arrives in.
Screenshots are taken from the running program in the language you are reading.